
App interface
The Desktop app is broken into two primary sections
- The Home page - The main landing page of the app. This is where you can navigate from one workspace to the next, setup your dashboard and more.
- The Workspace - This is your workspace, this is the section when you enter a workspace and move within it.
The below sections cover the key sections of the interface.
Home page
The home page is the main landing page when on the app. You can configure it to land either on the dashboard or workspaces view in settings.
The Home page has options in the top right to toggle between all of the available views.
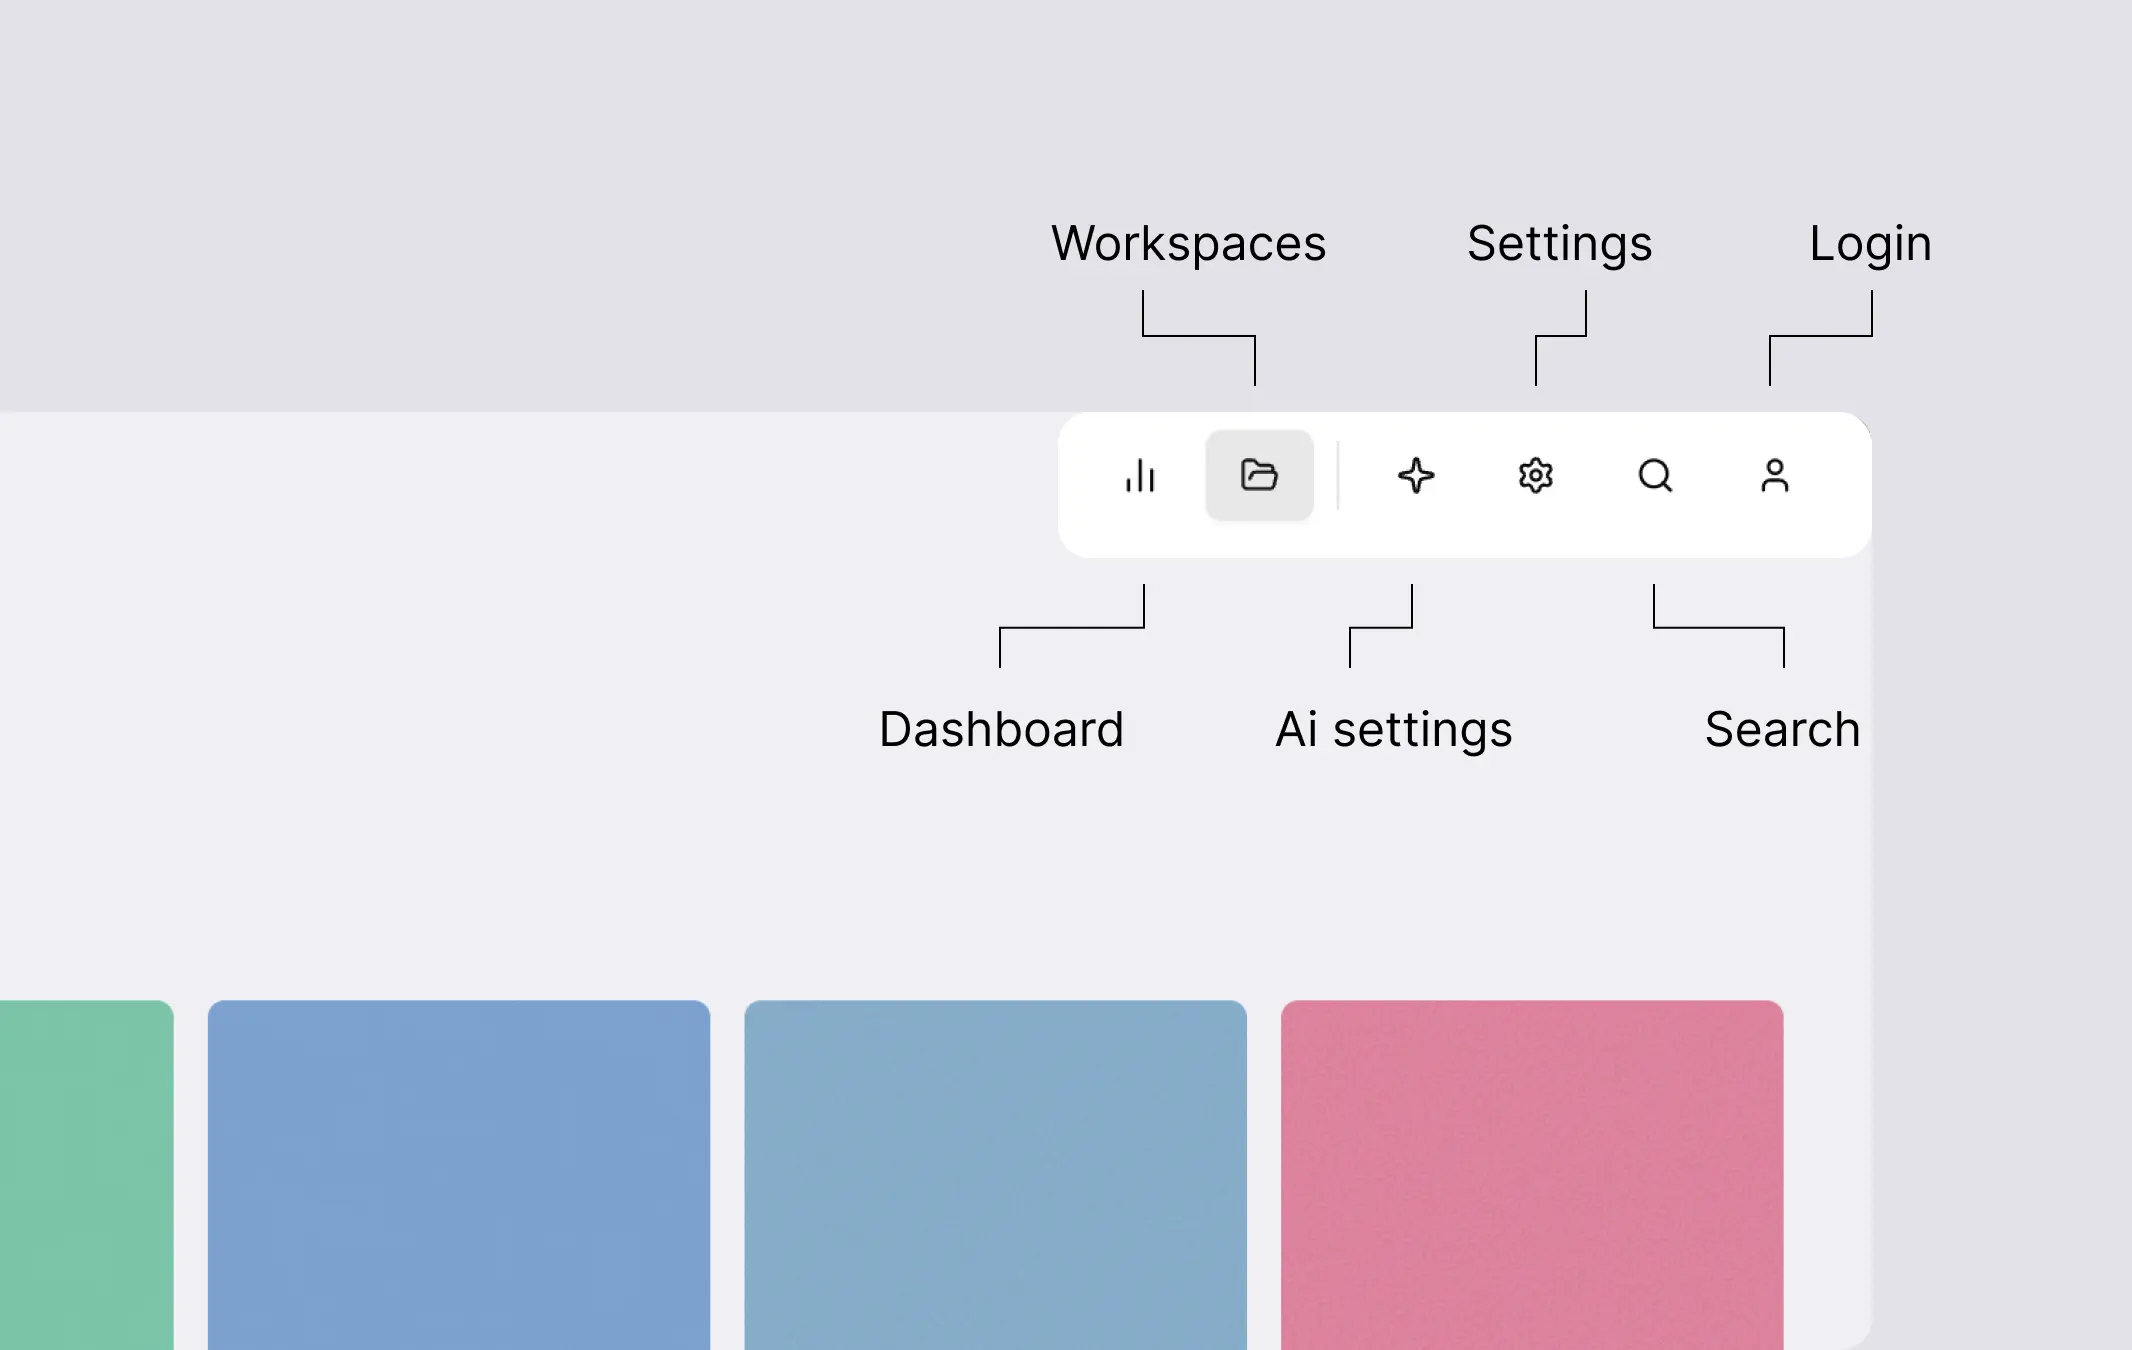
Workspaces
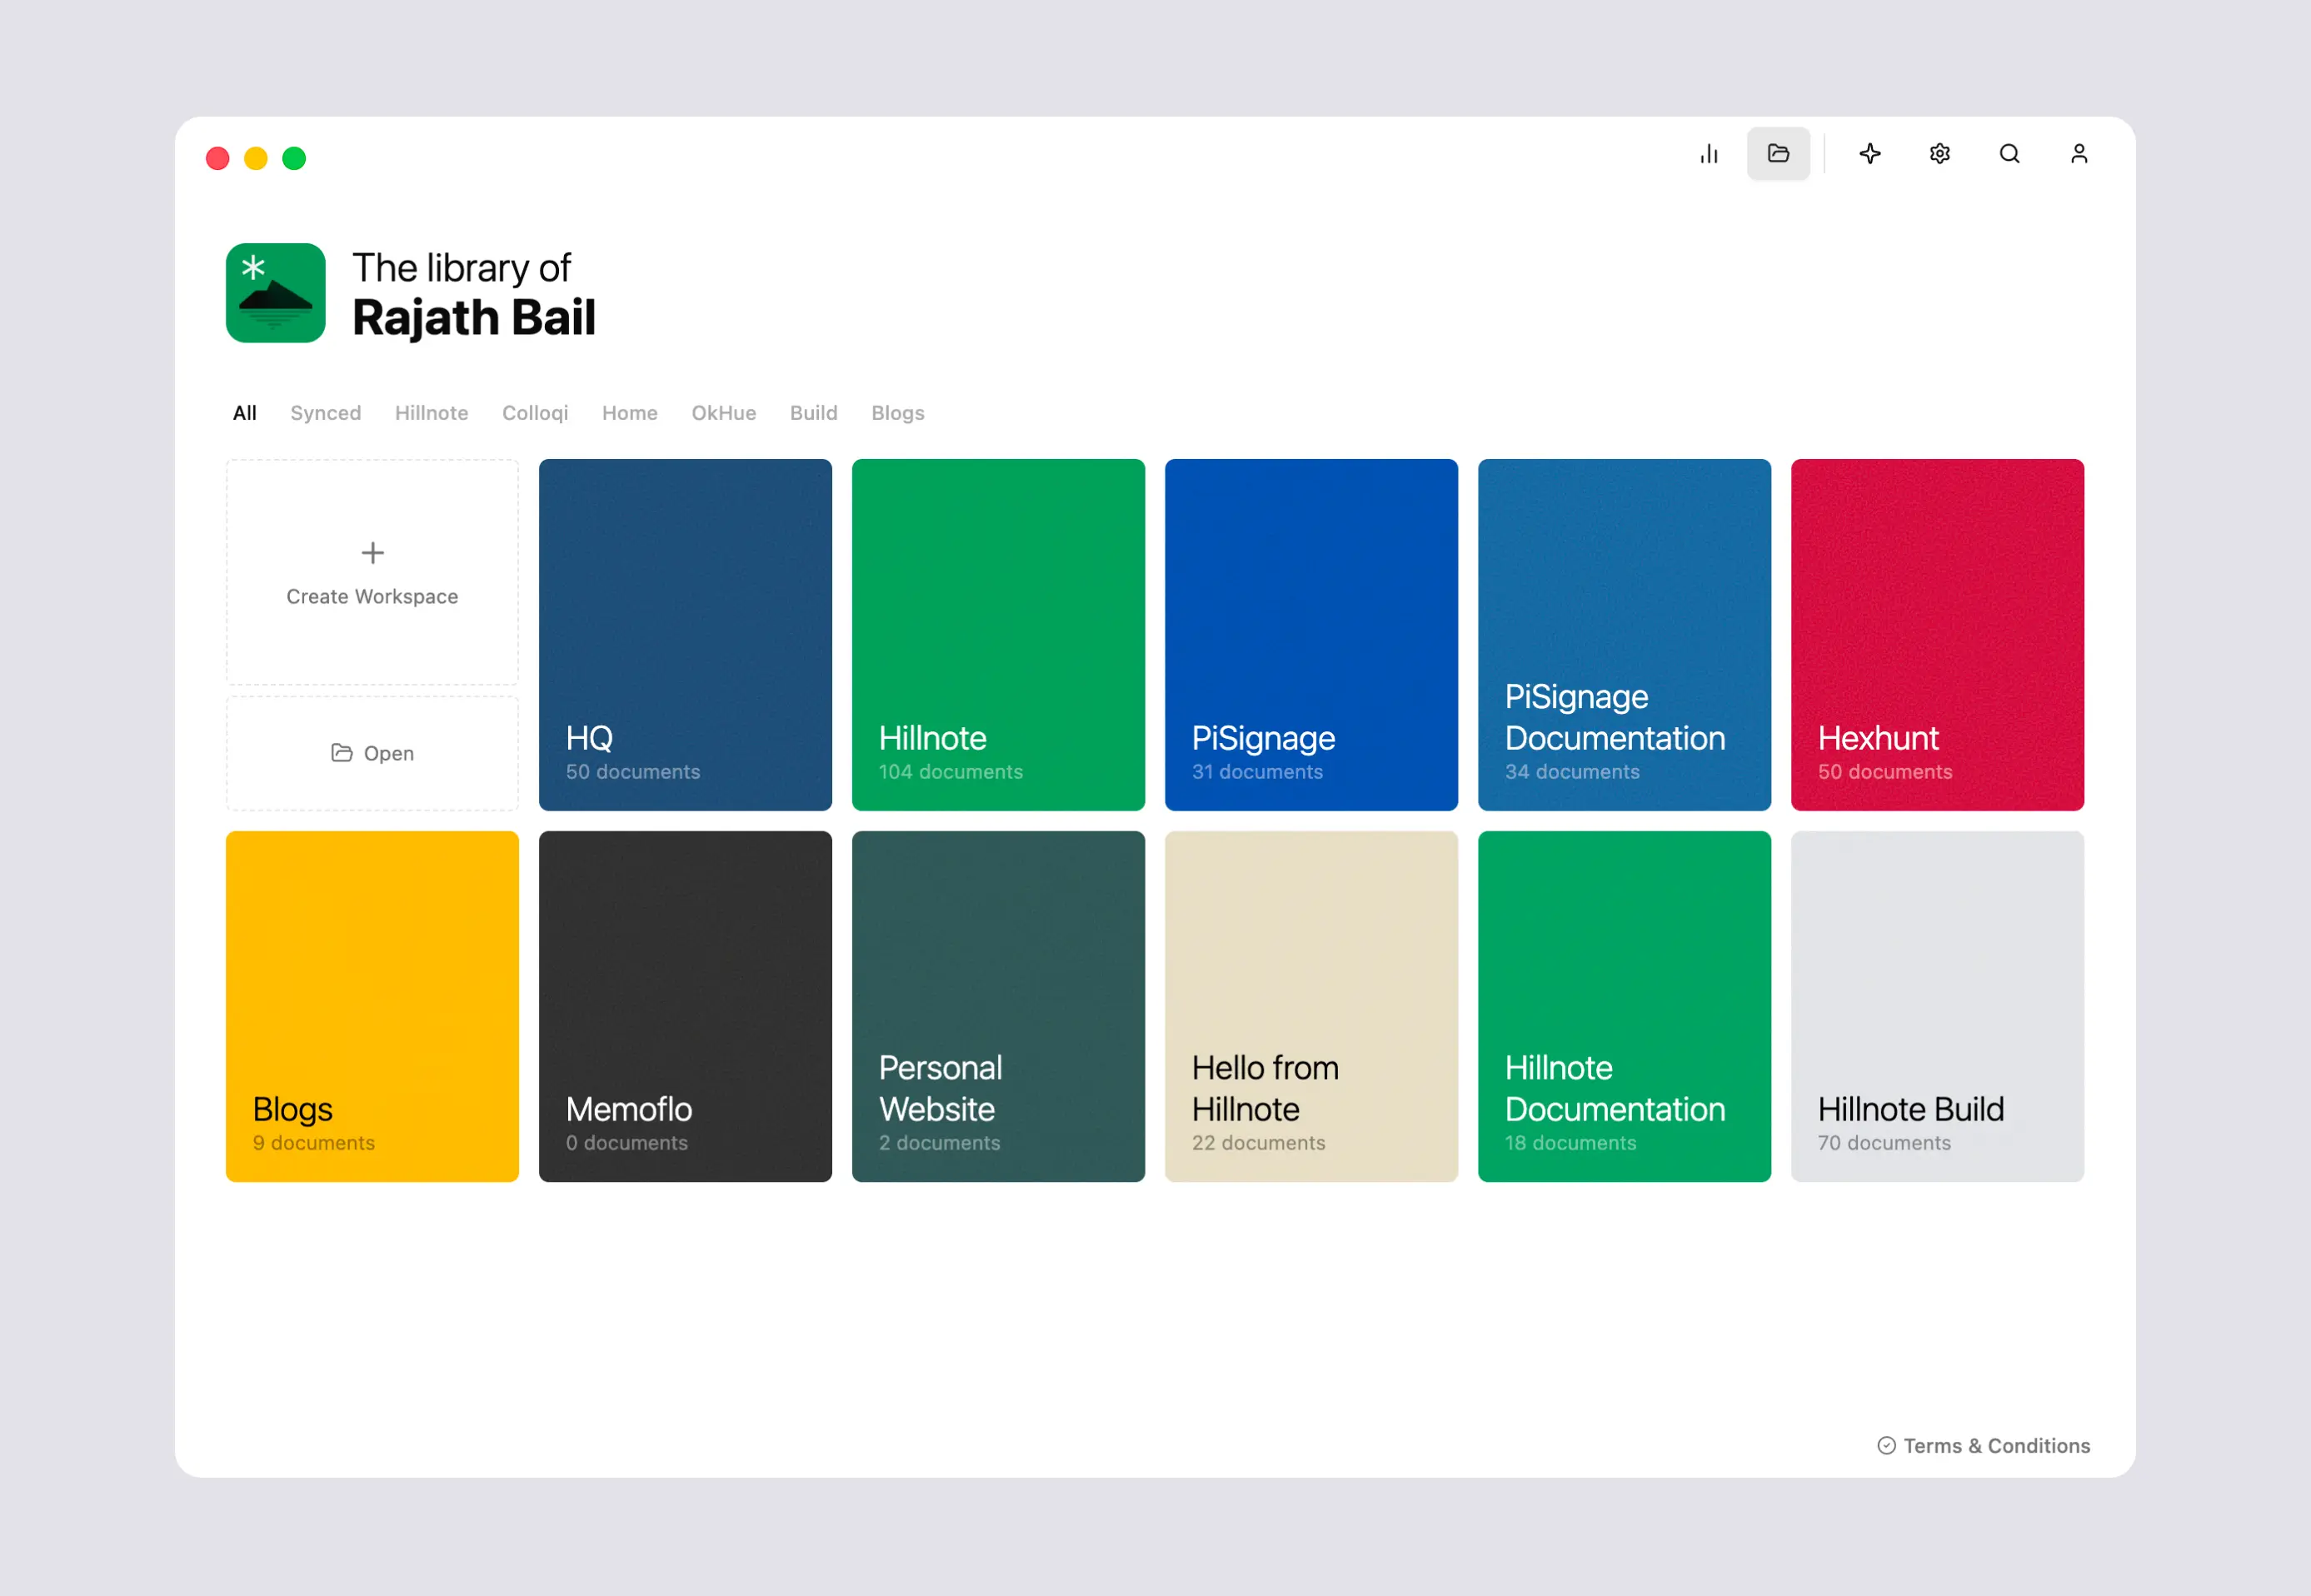 The workspaces view is the default view when opening the app for the first time. Below is a breakdown of all of the sections available.
Tags
Tags are easy ways to categorise your workspaces within tabs on the main page. These tags can help organise and make your workspaces easy to navigate.
Adding a tag
Tagging a workspace is as simple as clicking the library icon at the top of a workspace while hovering on the same. This then opens the tag dialog, select your tags or add new tags by using the input box within the dialog.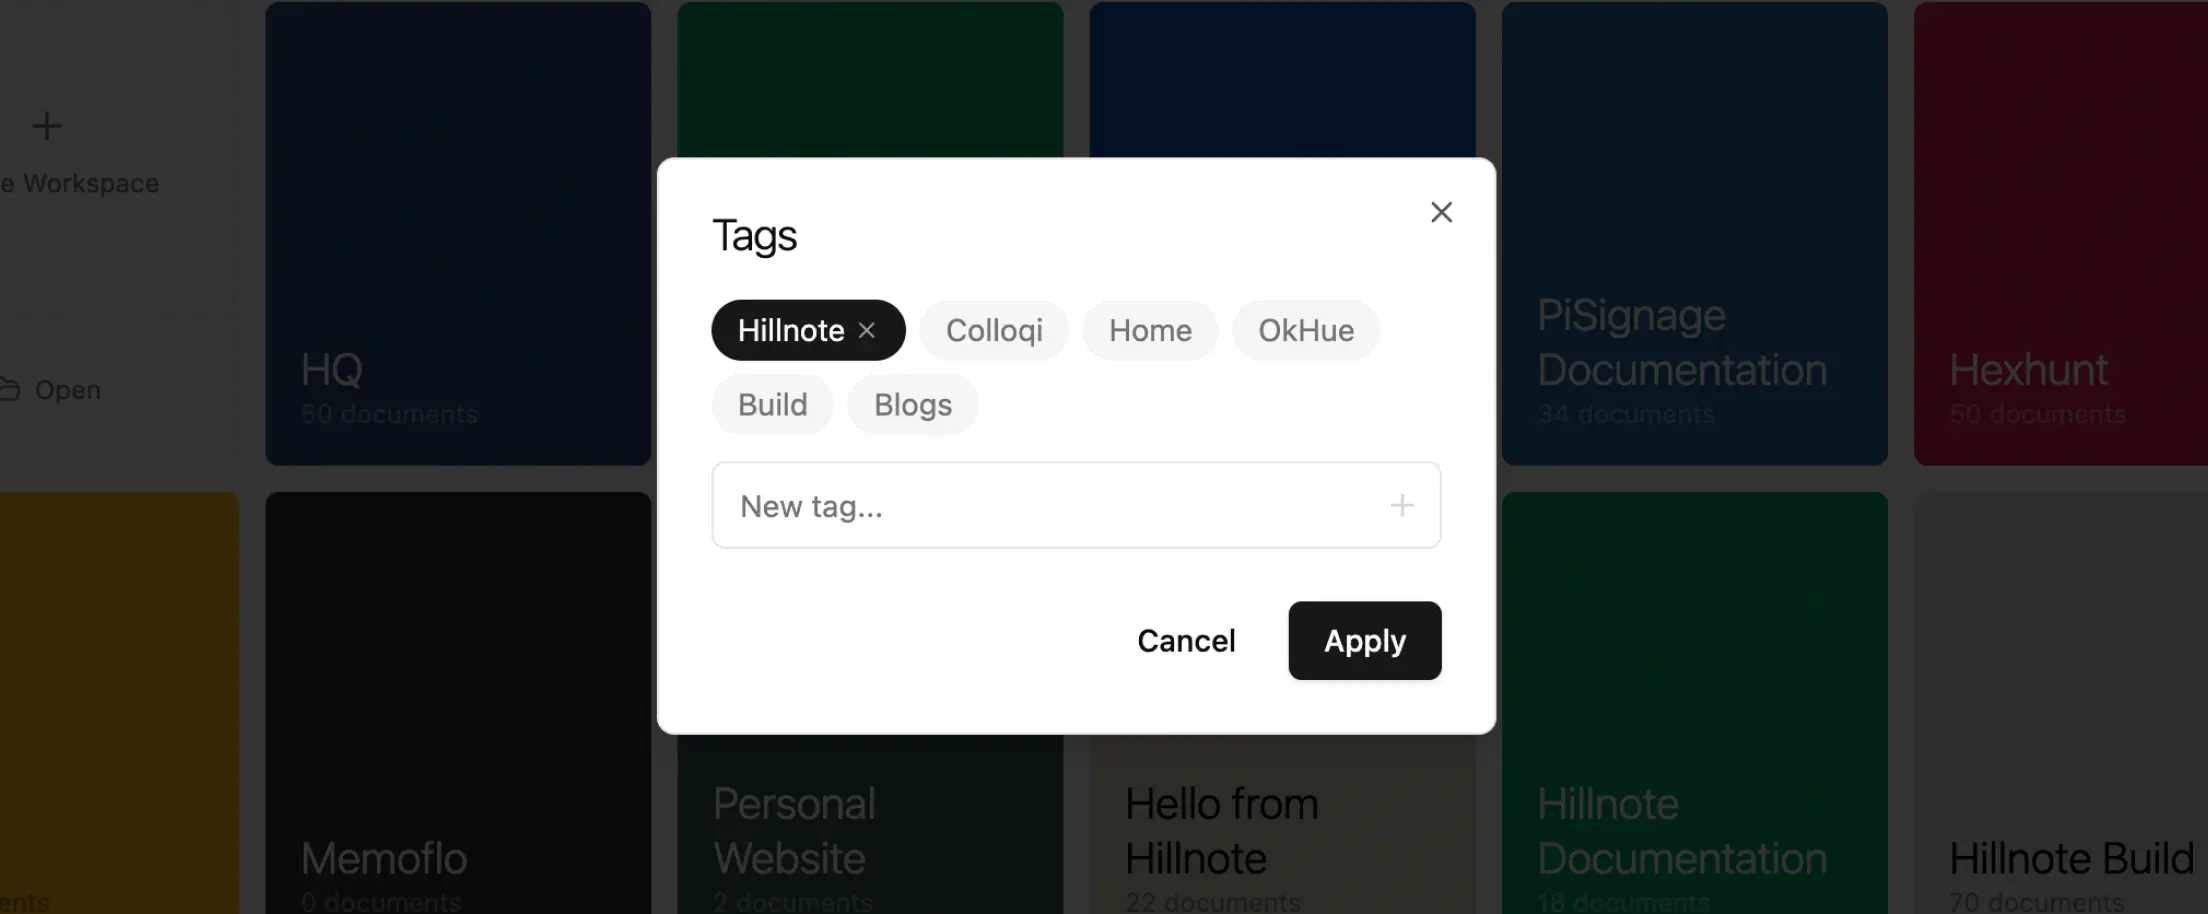
Synced Workspaces
One of the tabs available is “Synced”. This is where all synced workspaces appear including workspaces that you have been invited to collaborate on. Downloading a workspace from here makes it available in the main page and across your files.
Create workspace
To create a workspace - click on the “create workspace tile”.
- You will be prompted to choose a location for it. You can save workspaces across your machine.
- Choose a name
- Add description to be used as the overarching context of why the workspace exists.
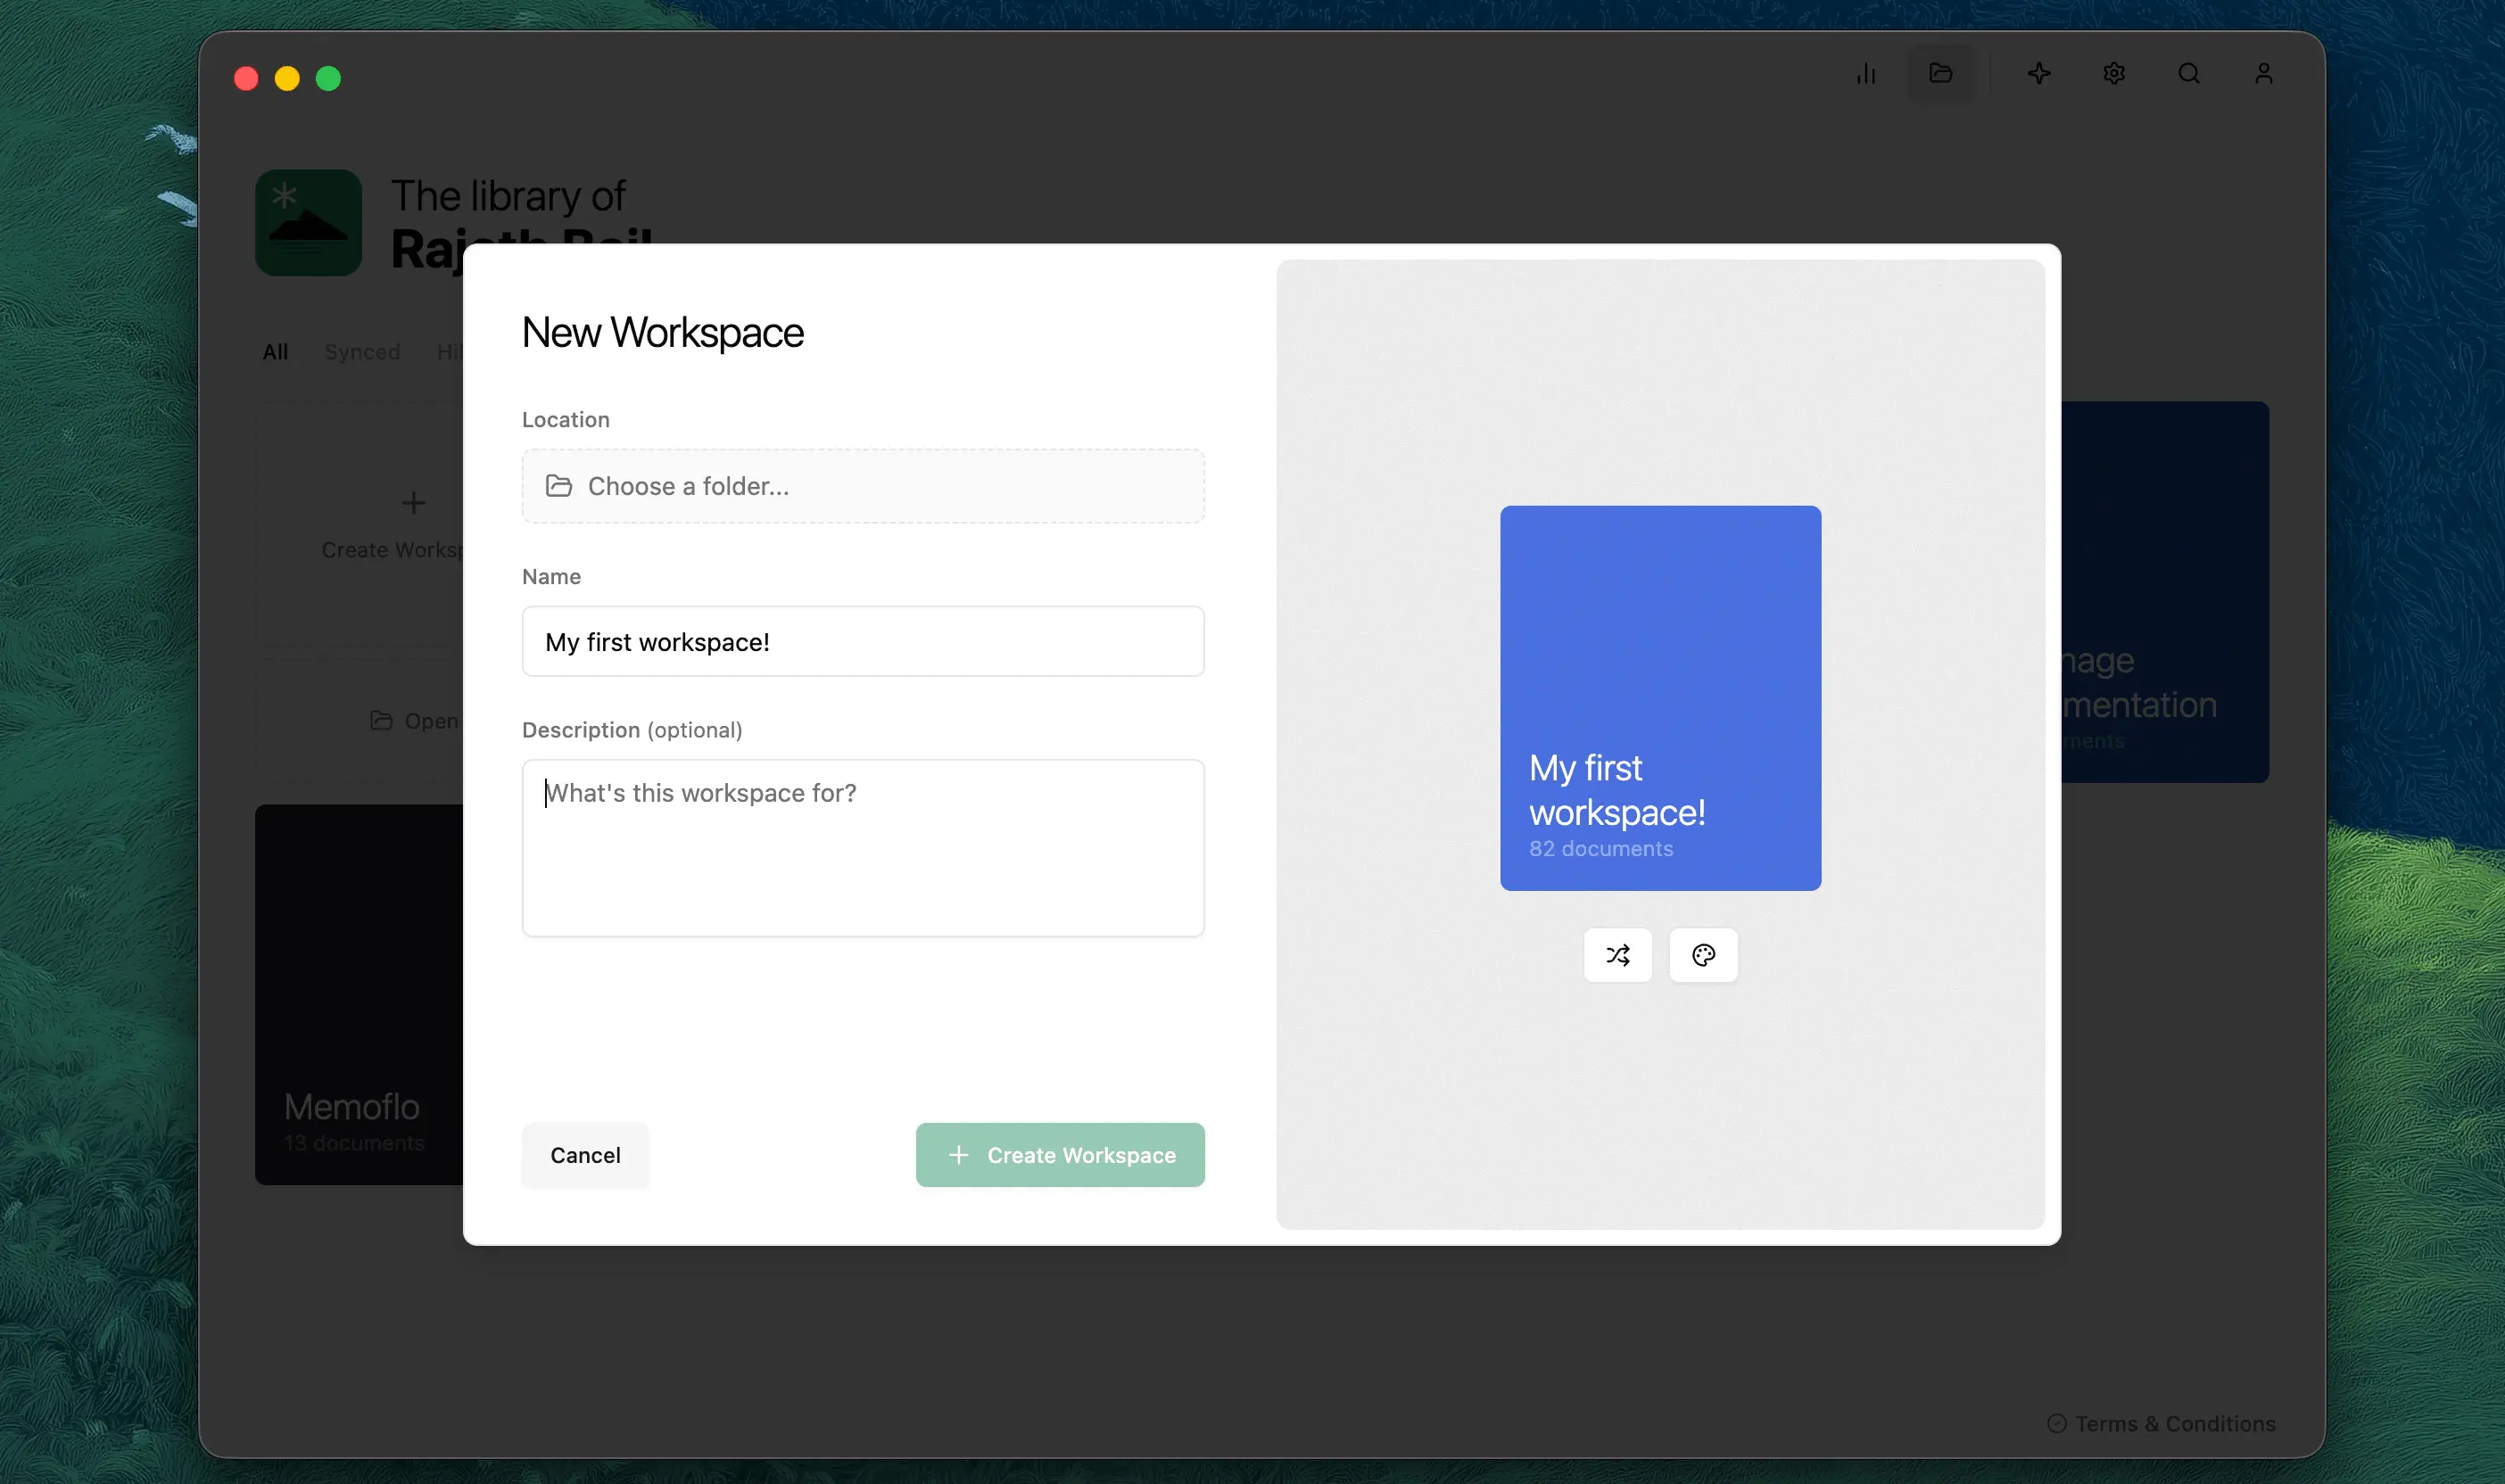
Open workspace
To open a workspace click on “Open workspace” and locate your workspace folder. The name and description should auto populate within the dialog.
Customising a workspace tile
To customise a workspace click the swatch icon. This then opens the swatch dialog for you to choose a colour or pattern to use as the background for the tile. You can choose between a colour, image or pre-set texture.
Removing a workspace
Deleting a workspace removes it from hillnote but leaves the local file as-is. This is to ensure deletion does not disrupt any other operations you have setup on the file. To completely remove a workspace delete it on Hillnote and then move the file to trash.
Dashboard
The dashboard is a configurable hub for you to store all of the information across workspaces with options to setup widgets with just the right information designed and set by you.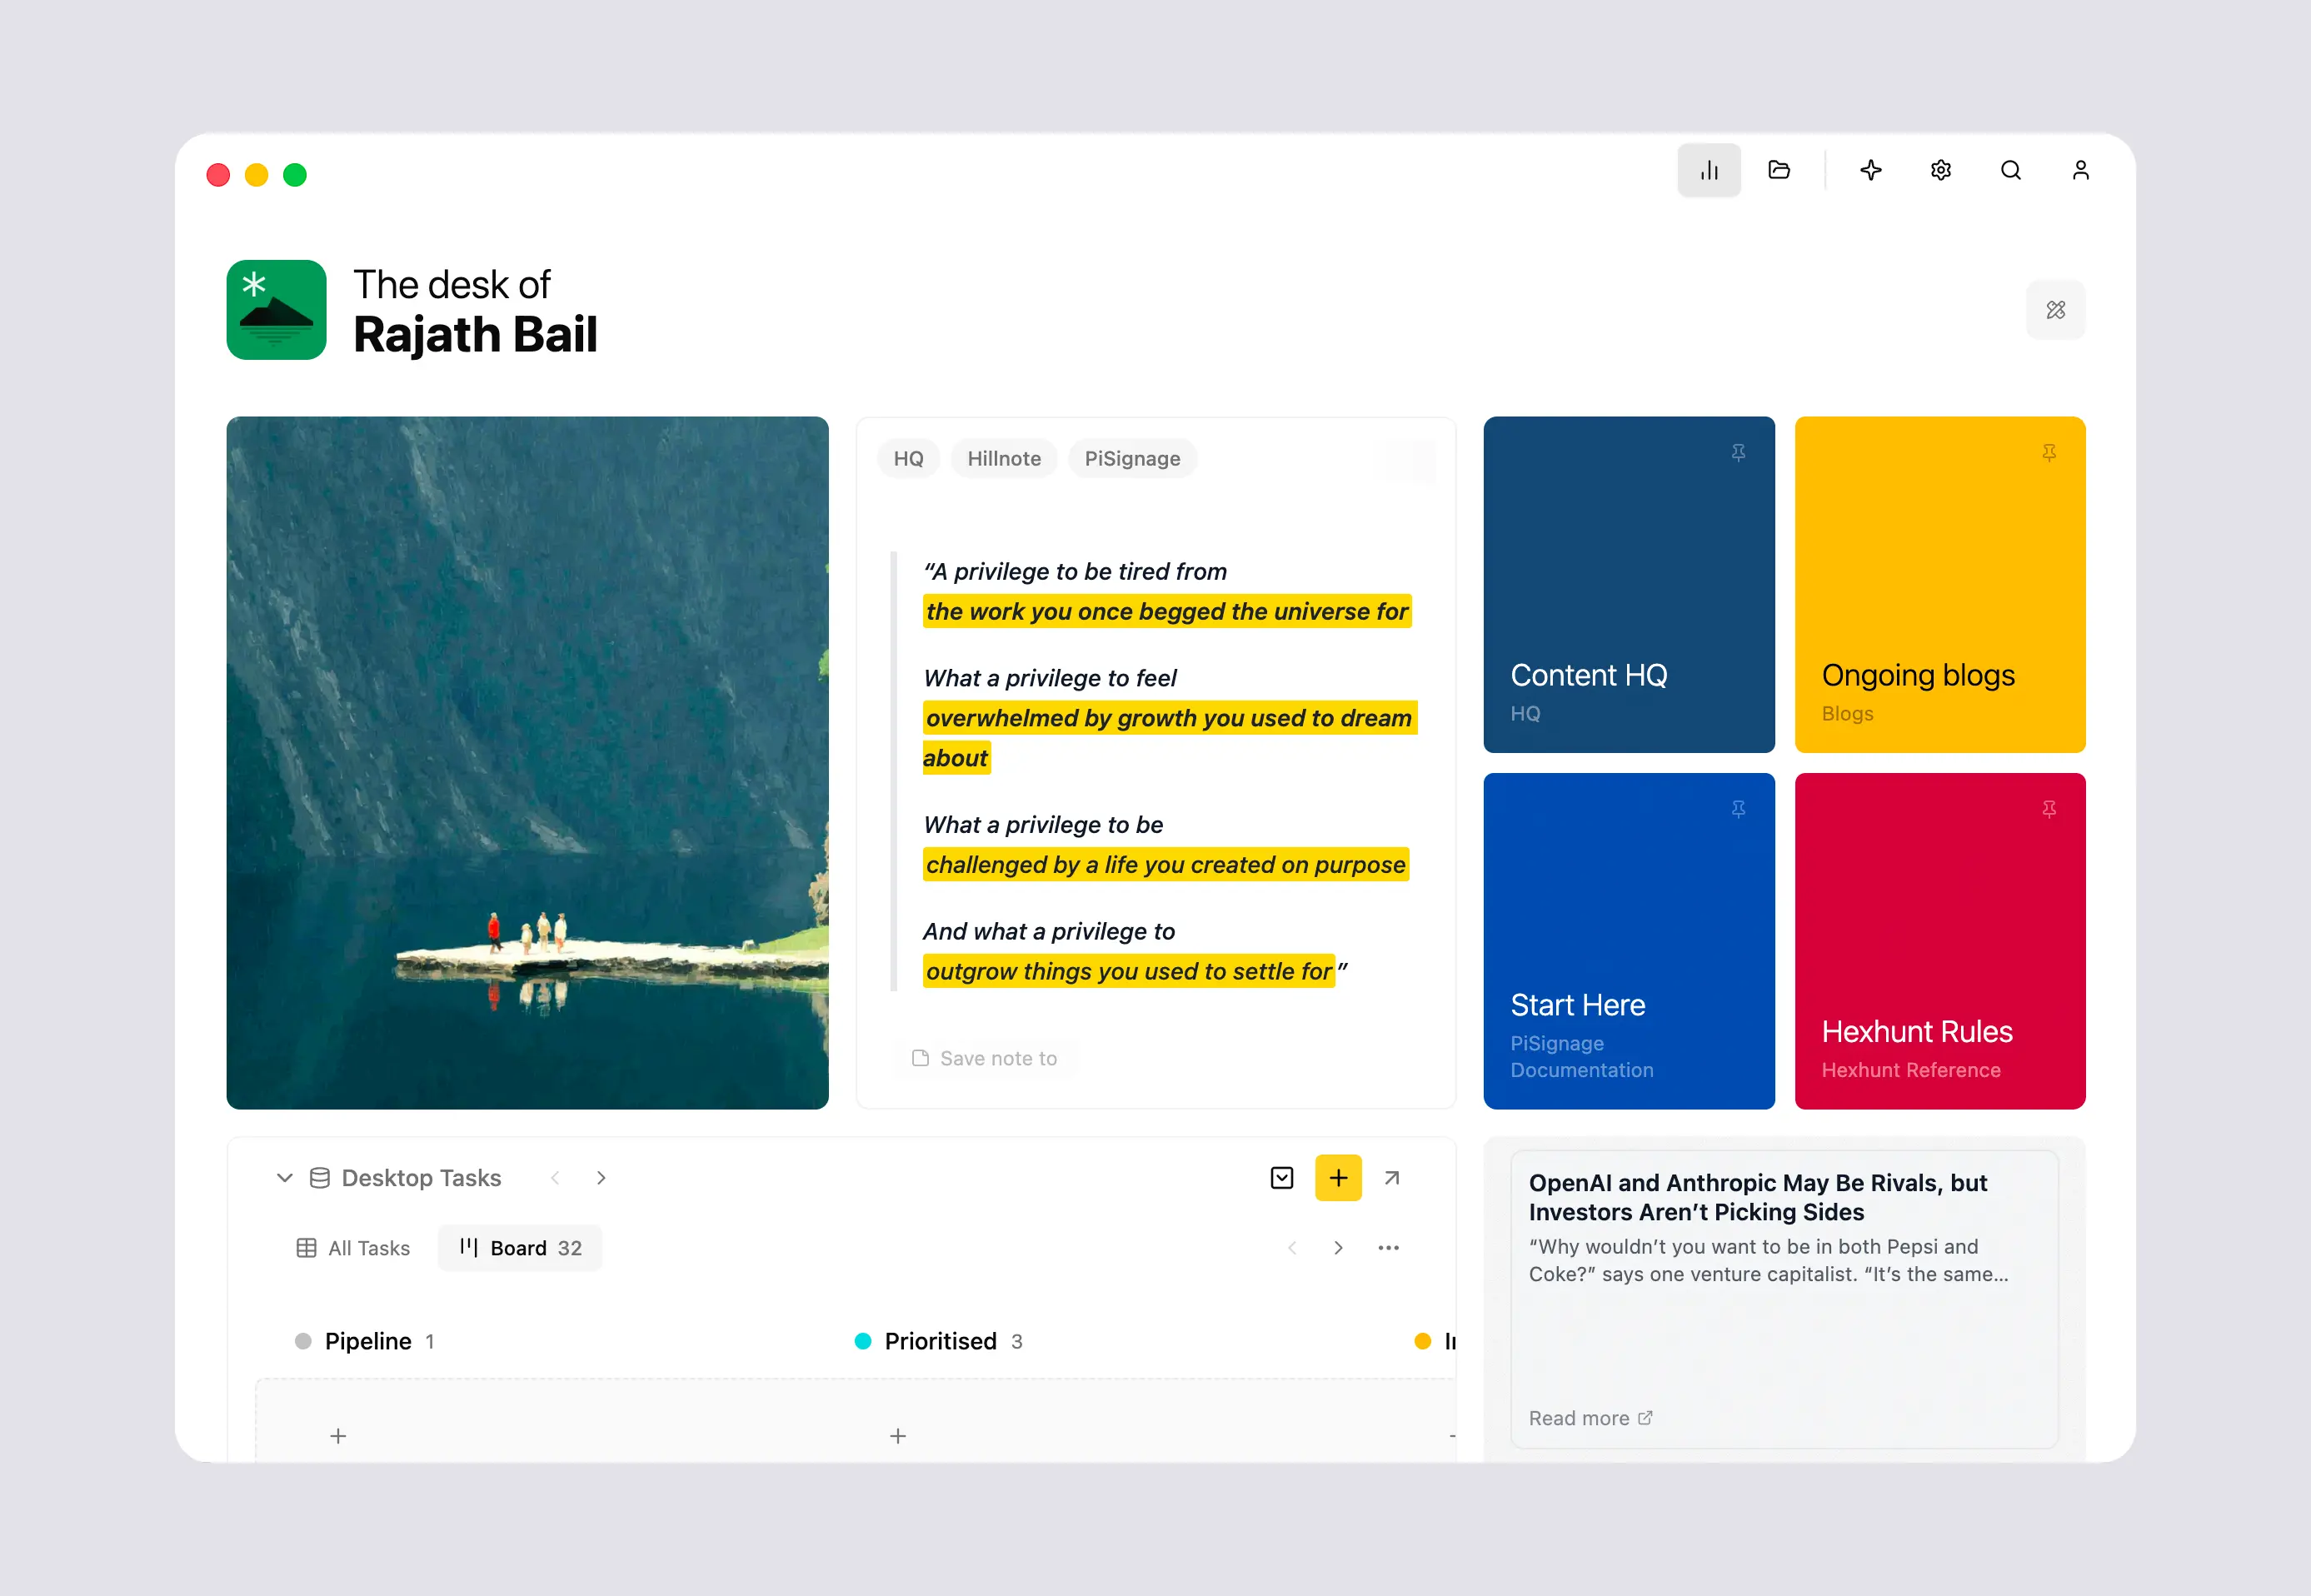
Customising and building your dashboard
Make sure the dashboard is in its edit mode by clicking the edit dashboard button in the top right.
The dashboard rests on a grid that moves left to right. Click on the “Add widget” button to add a widget. We have a few options to choose from. Once added you can then proceed to construct the dashboard using the right combination of widgets you need.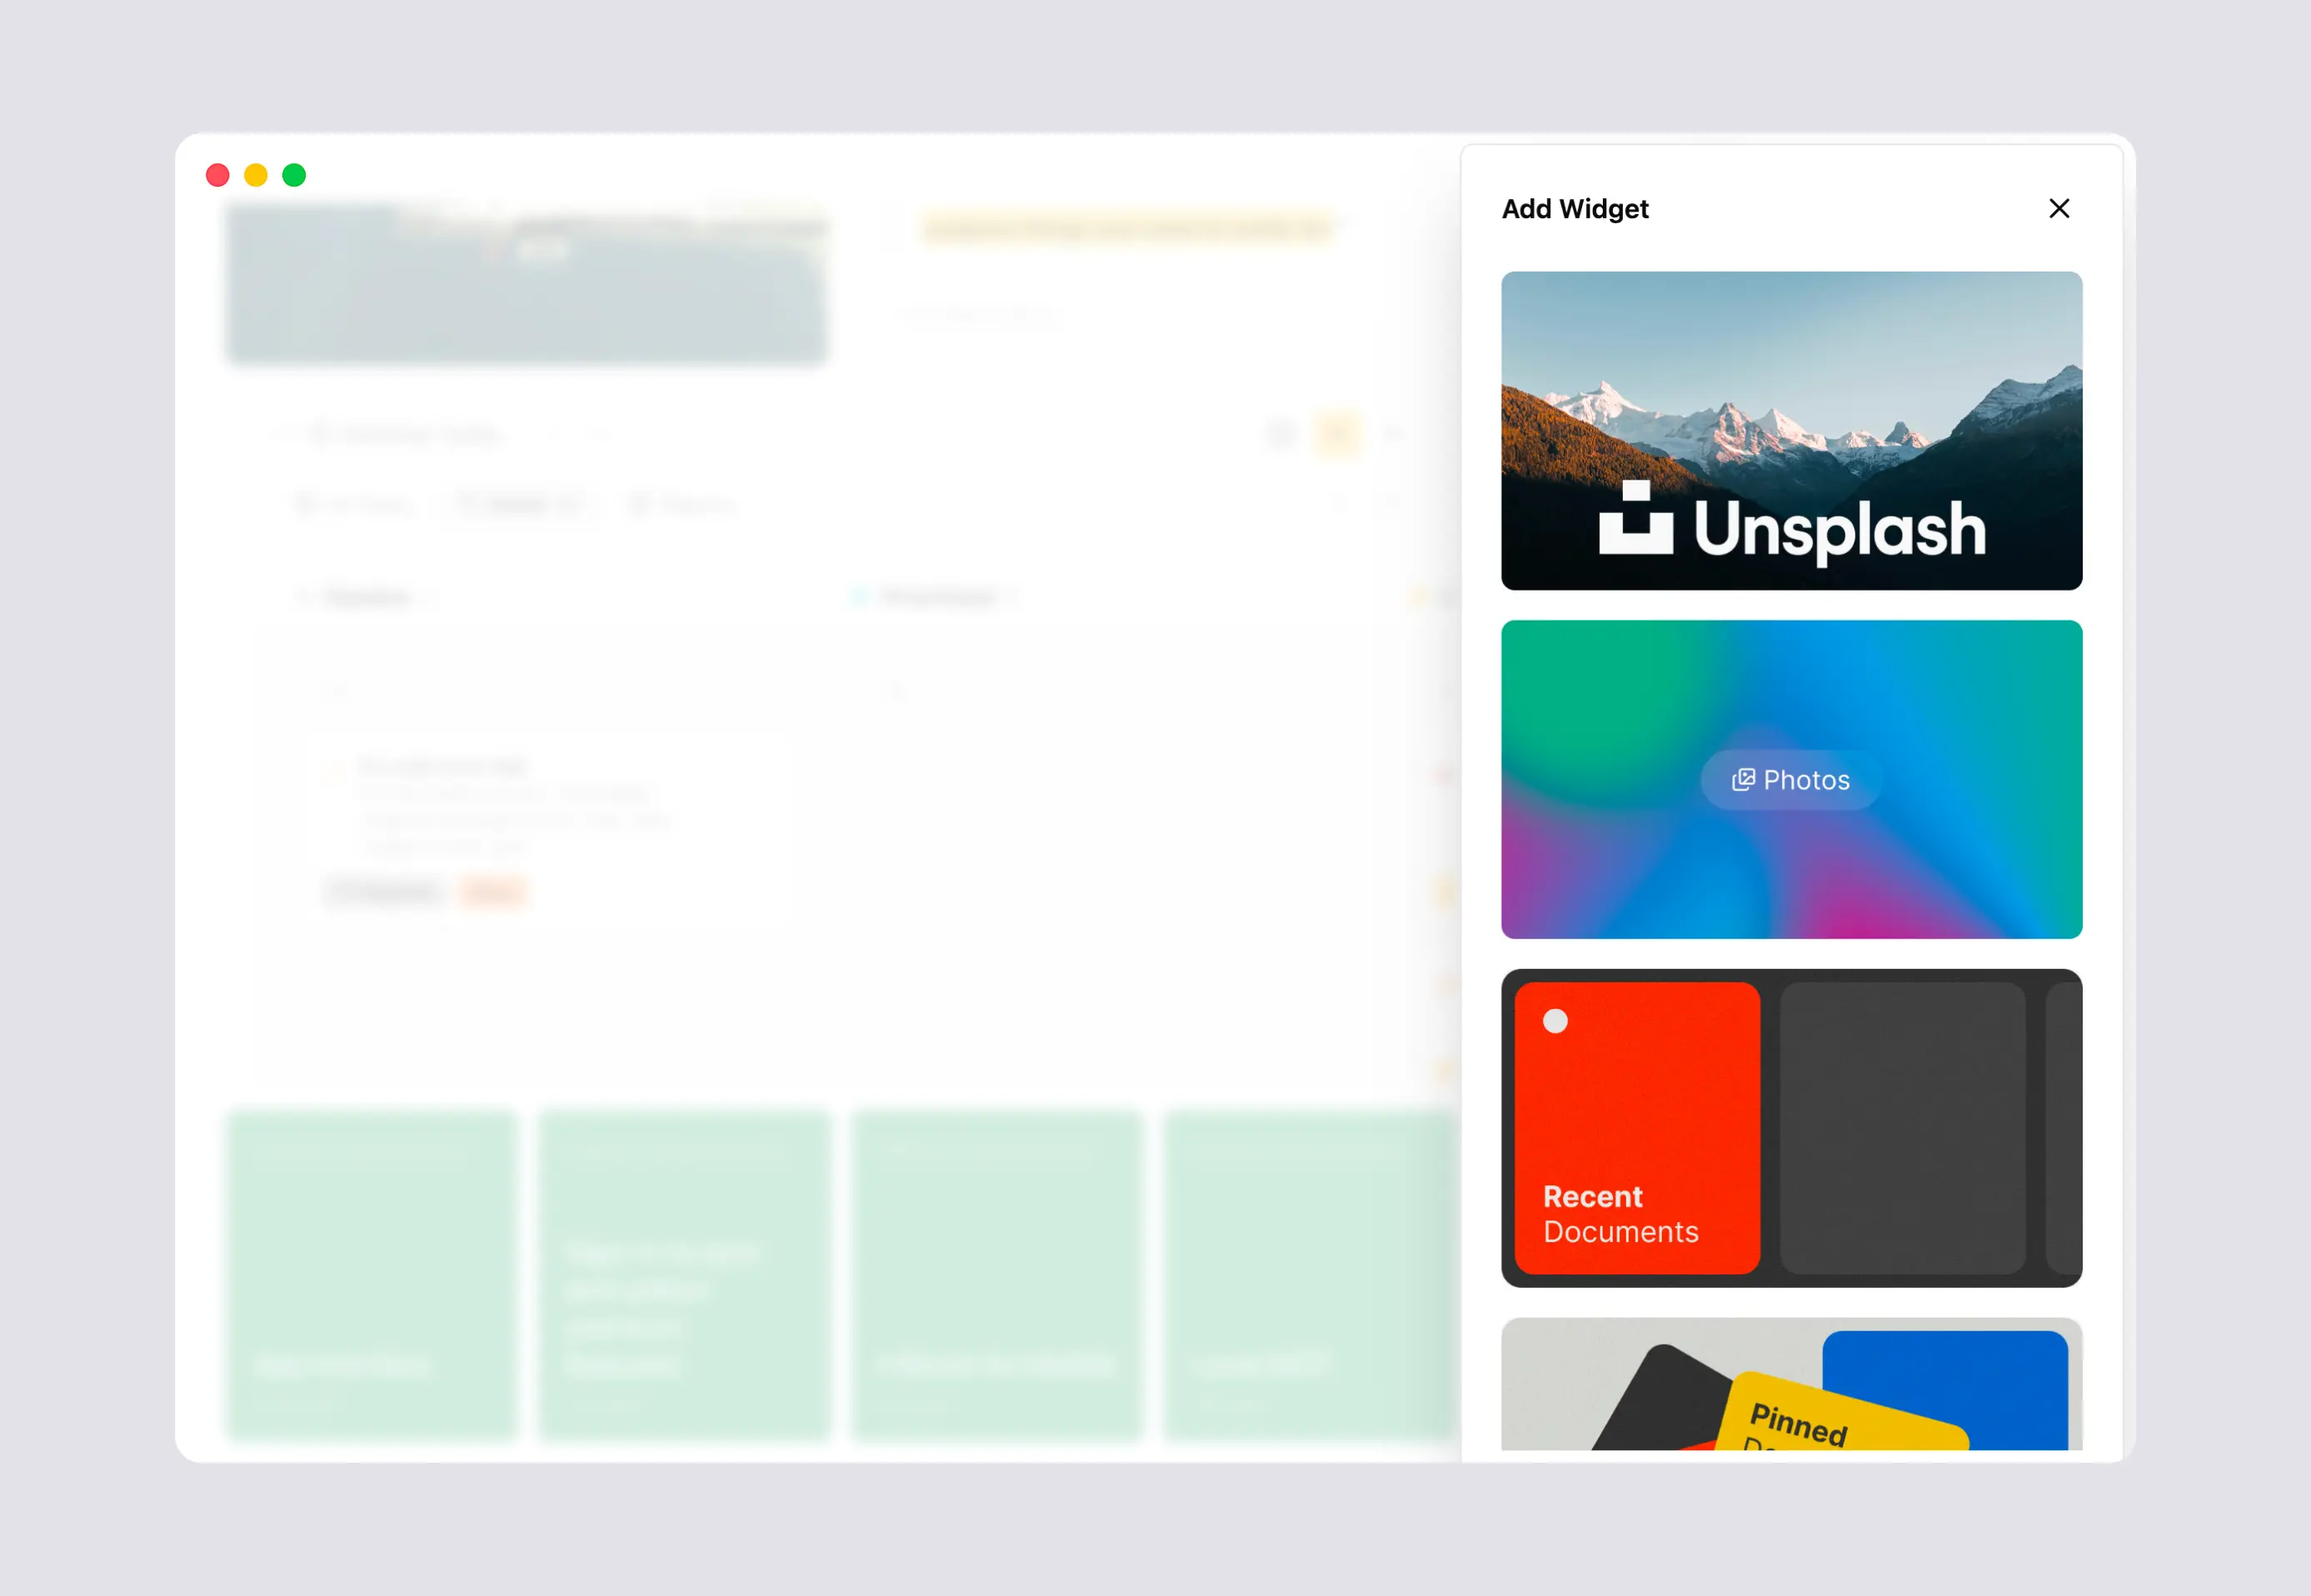
Edit a widget
Once you add a widget hovering over the widget while in edit mode should show you the widget options The options to the bottom left are the sizing options. The vertical bar helps set the height and horizontal bar sets the width.
The options to the top right are
- The drag handle
- Duplicate
- Switch widget with another
- Settings
- Delete
You can edit a widgets contents by clicking on setting to open the edit widget panel as shown below.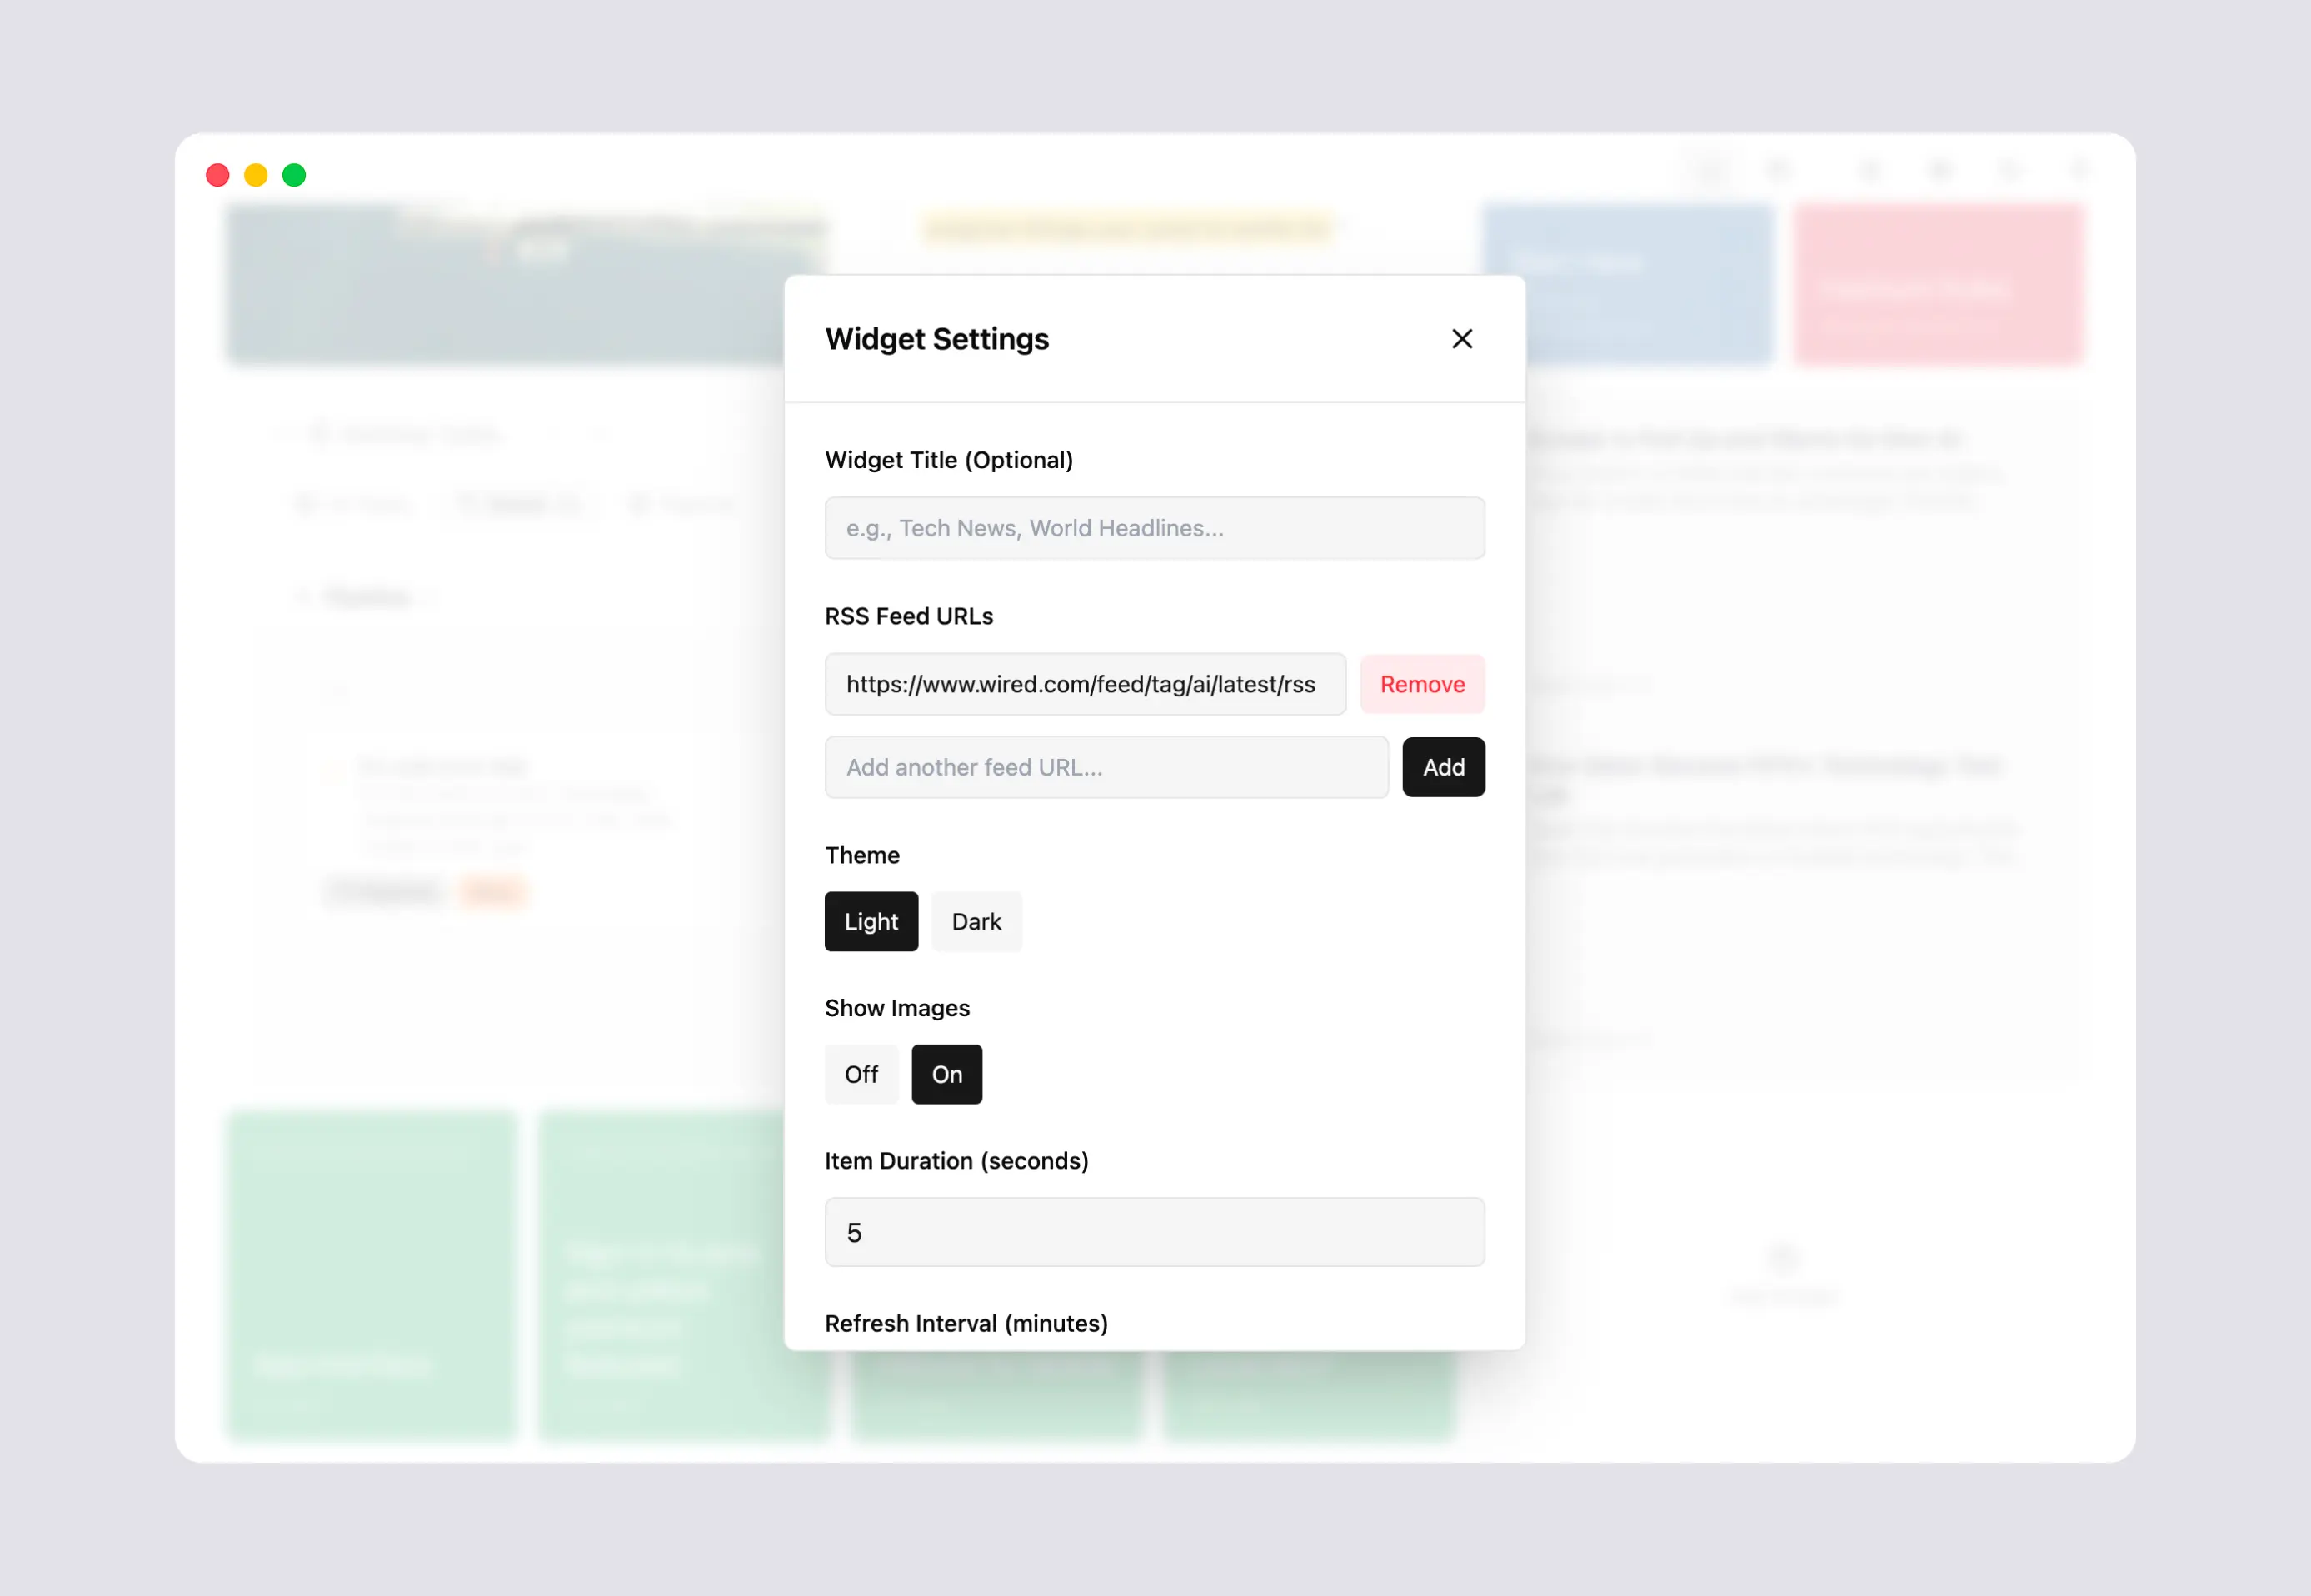
Local AI
The AI tab allows you to manage your local models and download them. Hillnote runs on a version of Ollama and supports models across Ollama and Hugging face.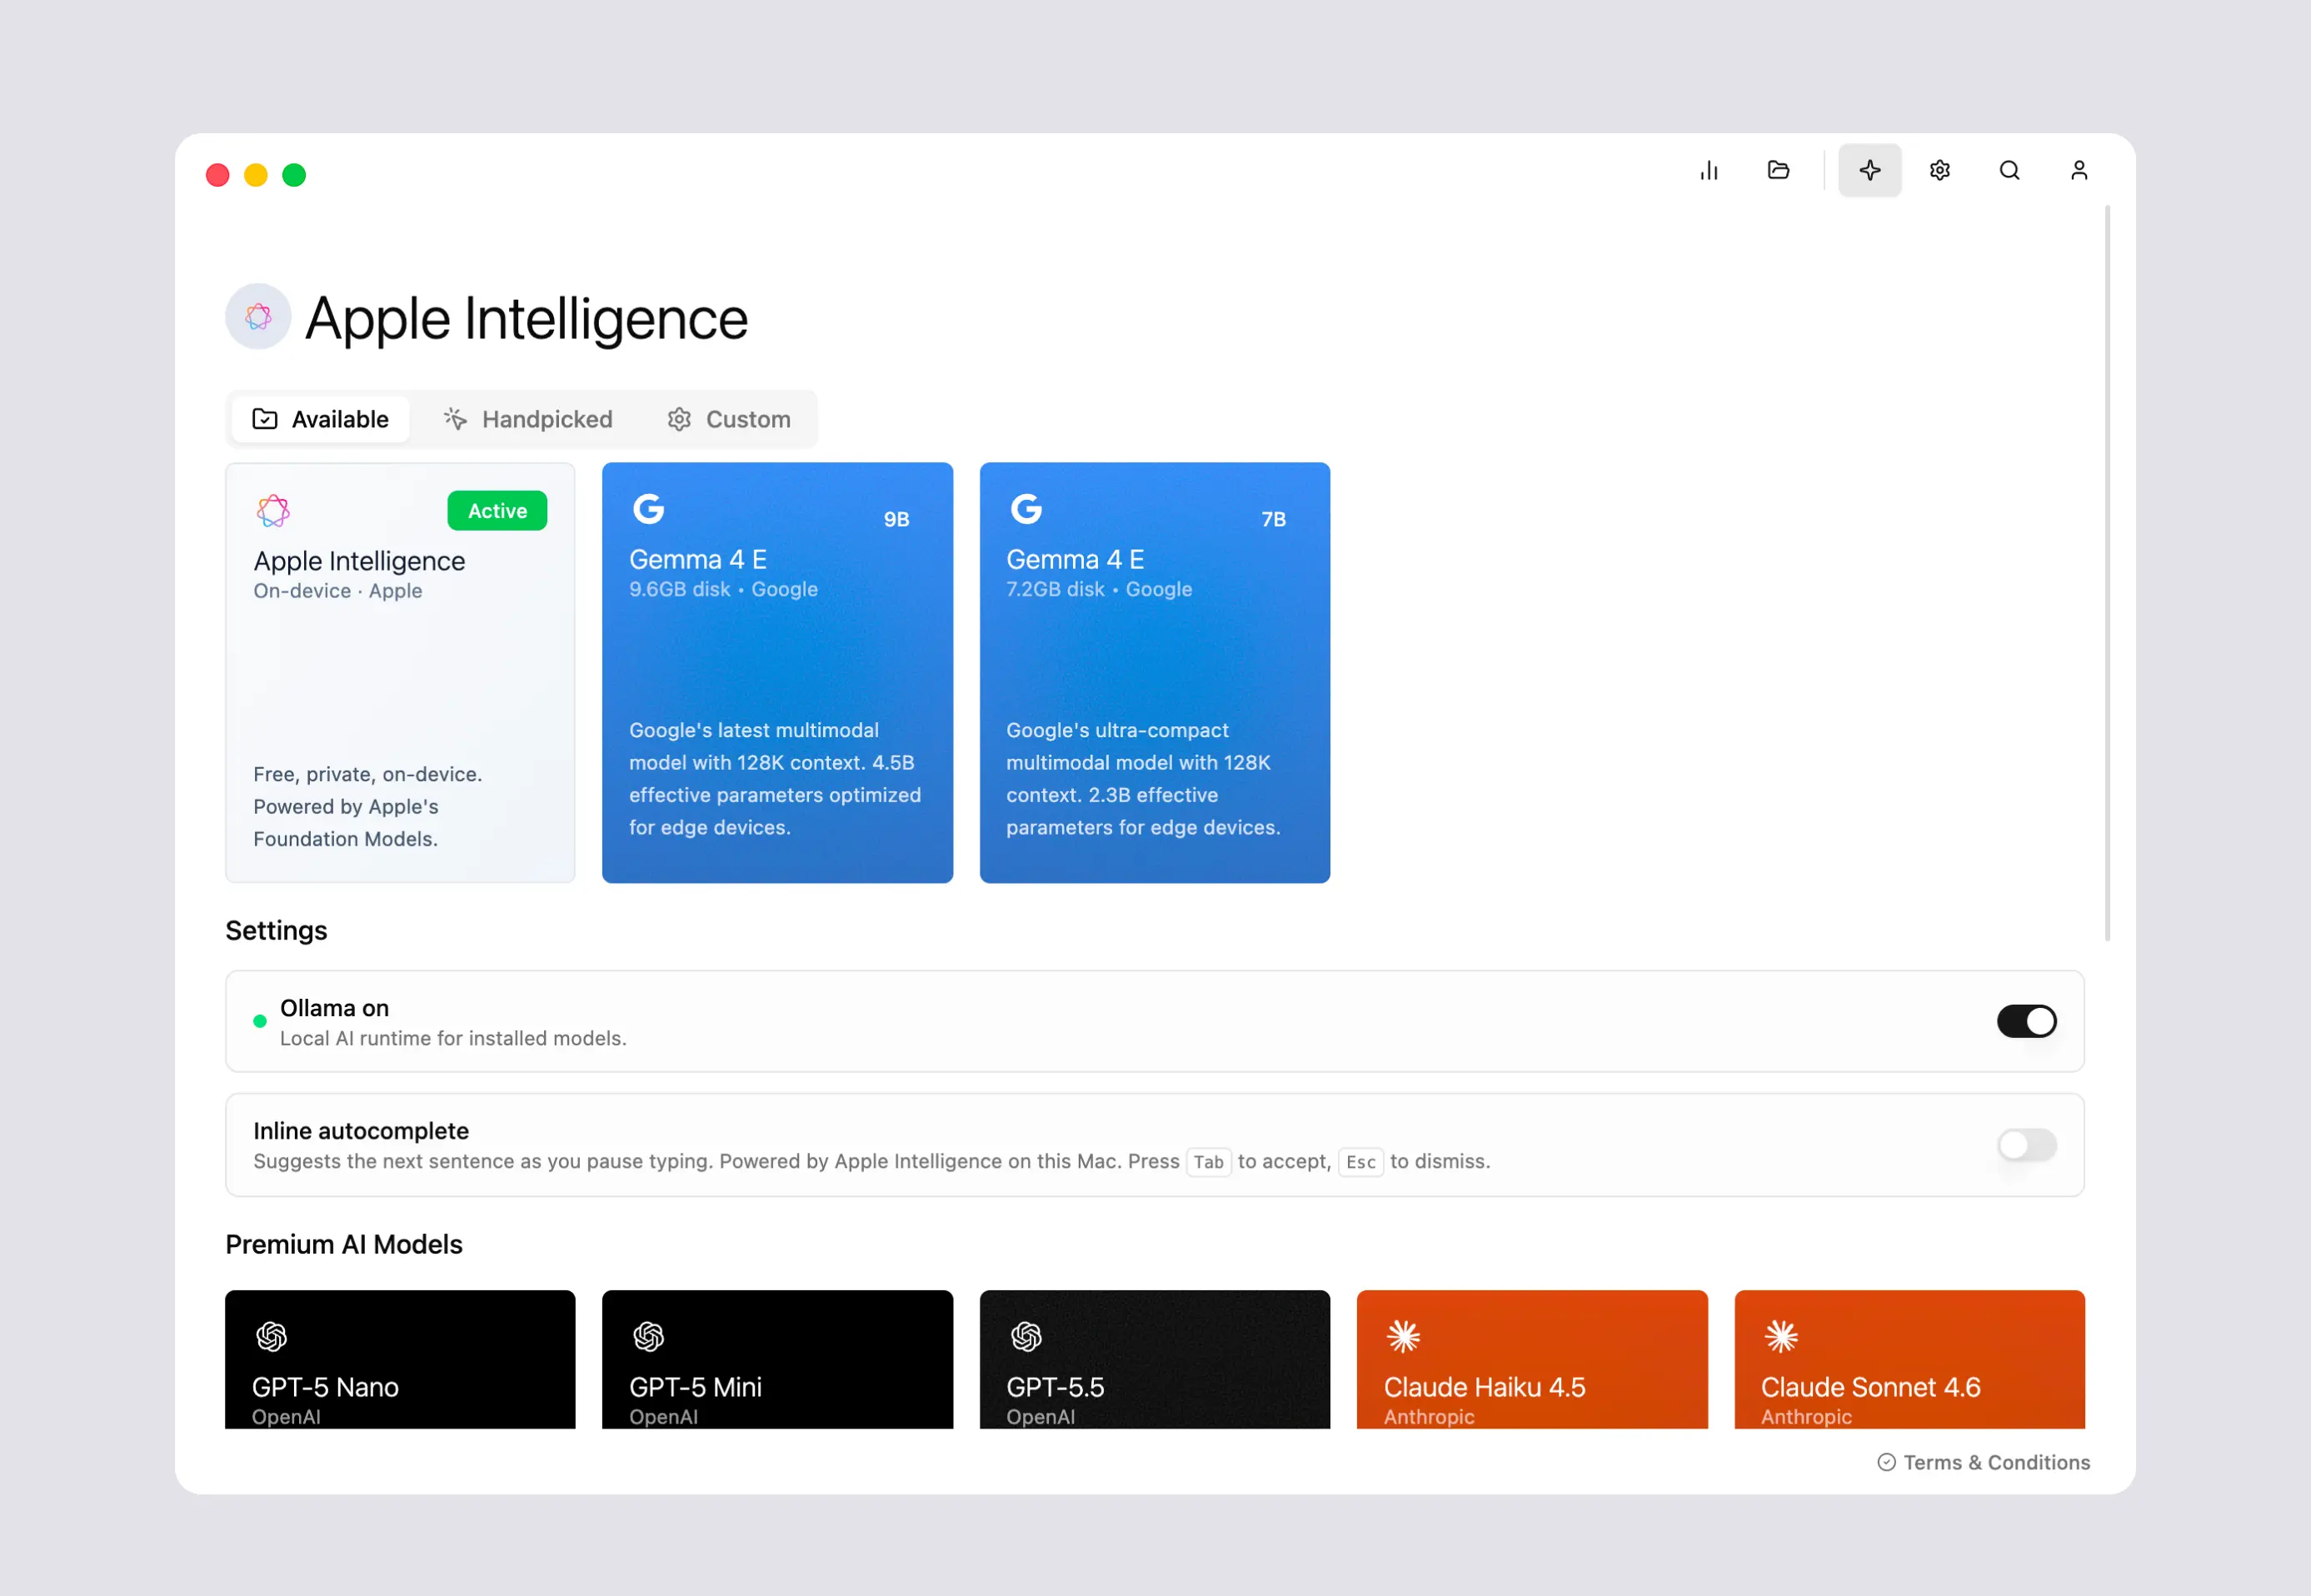
Downloading a model
Visit the handpicked tab to download a handpicked model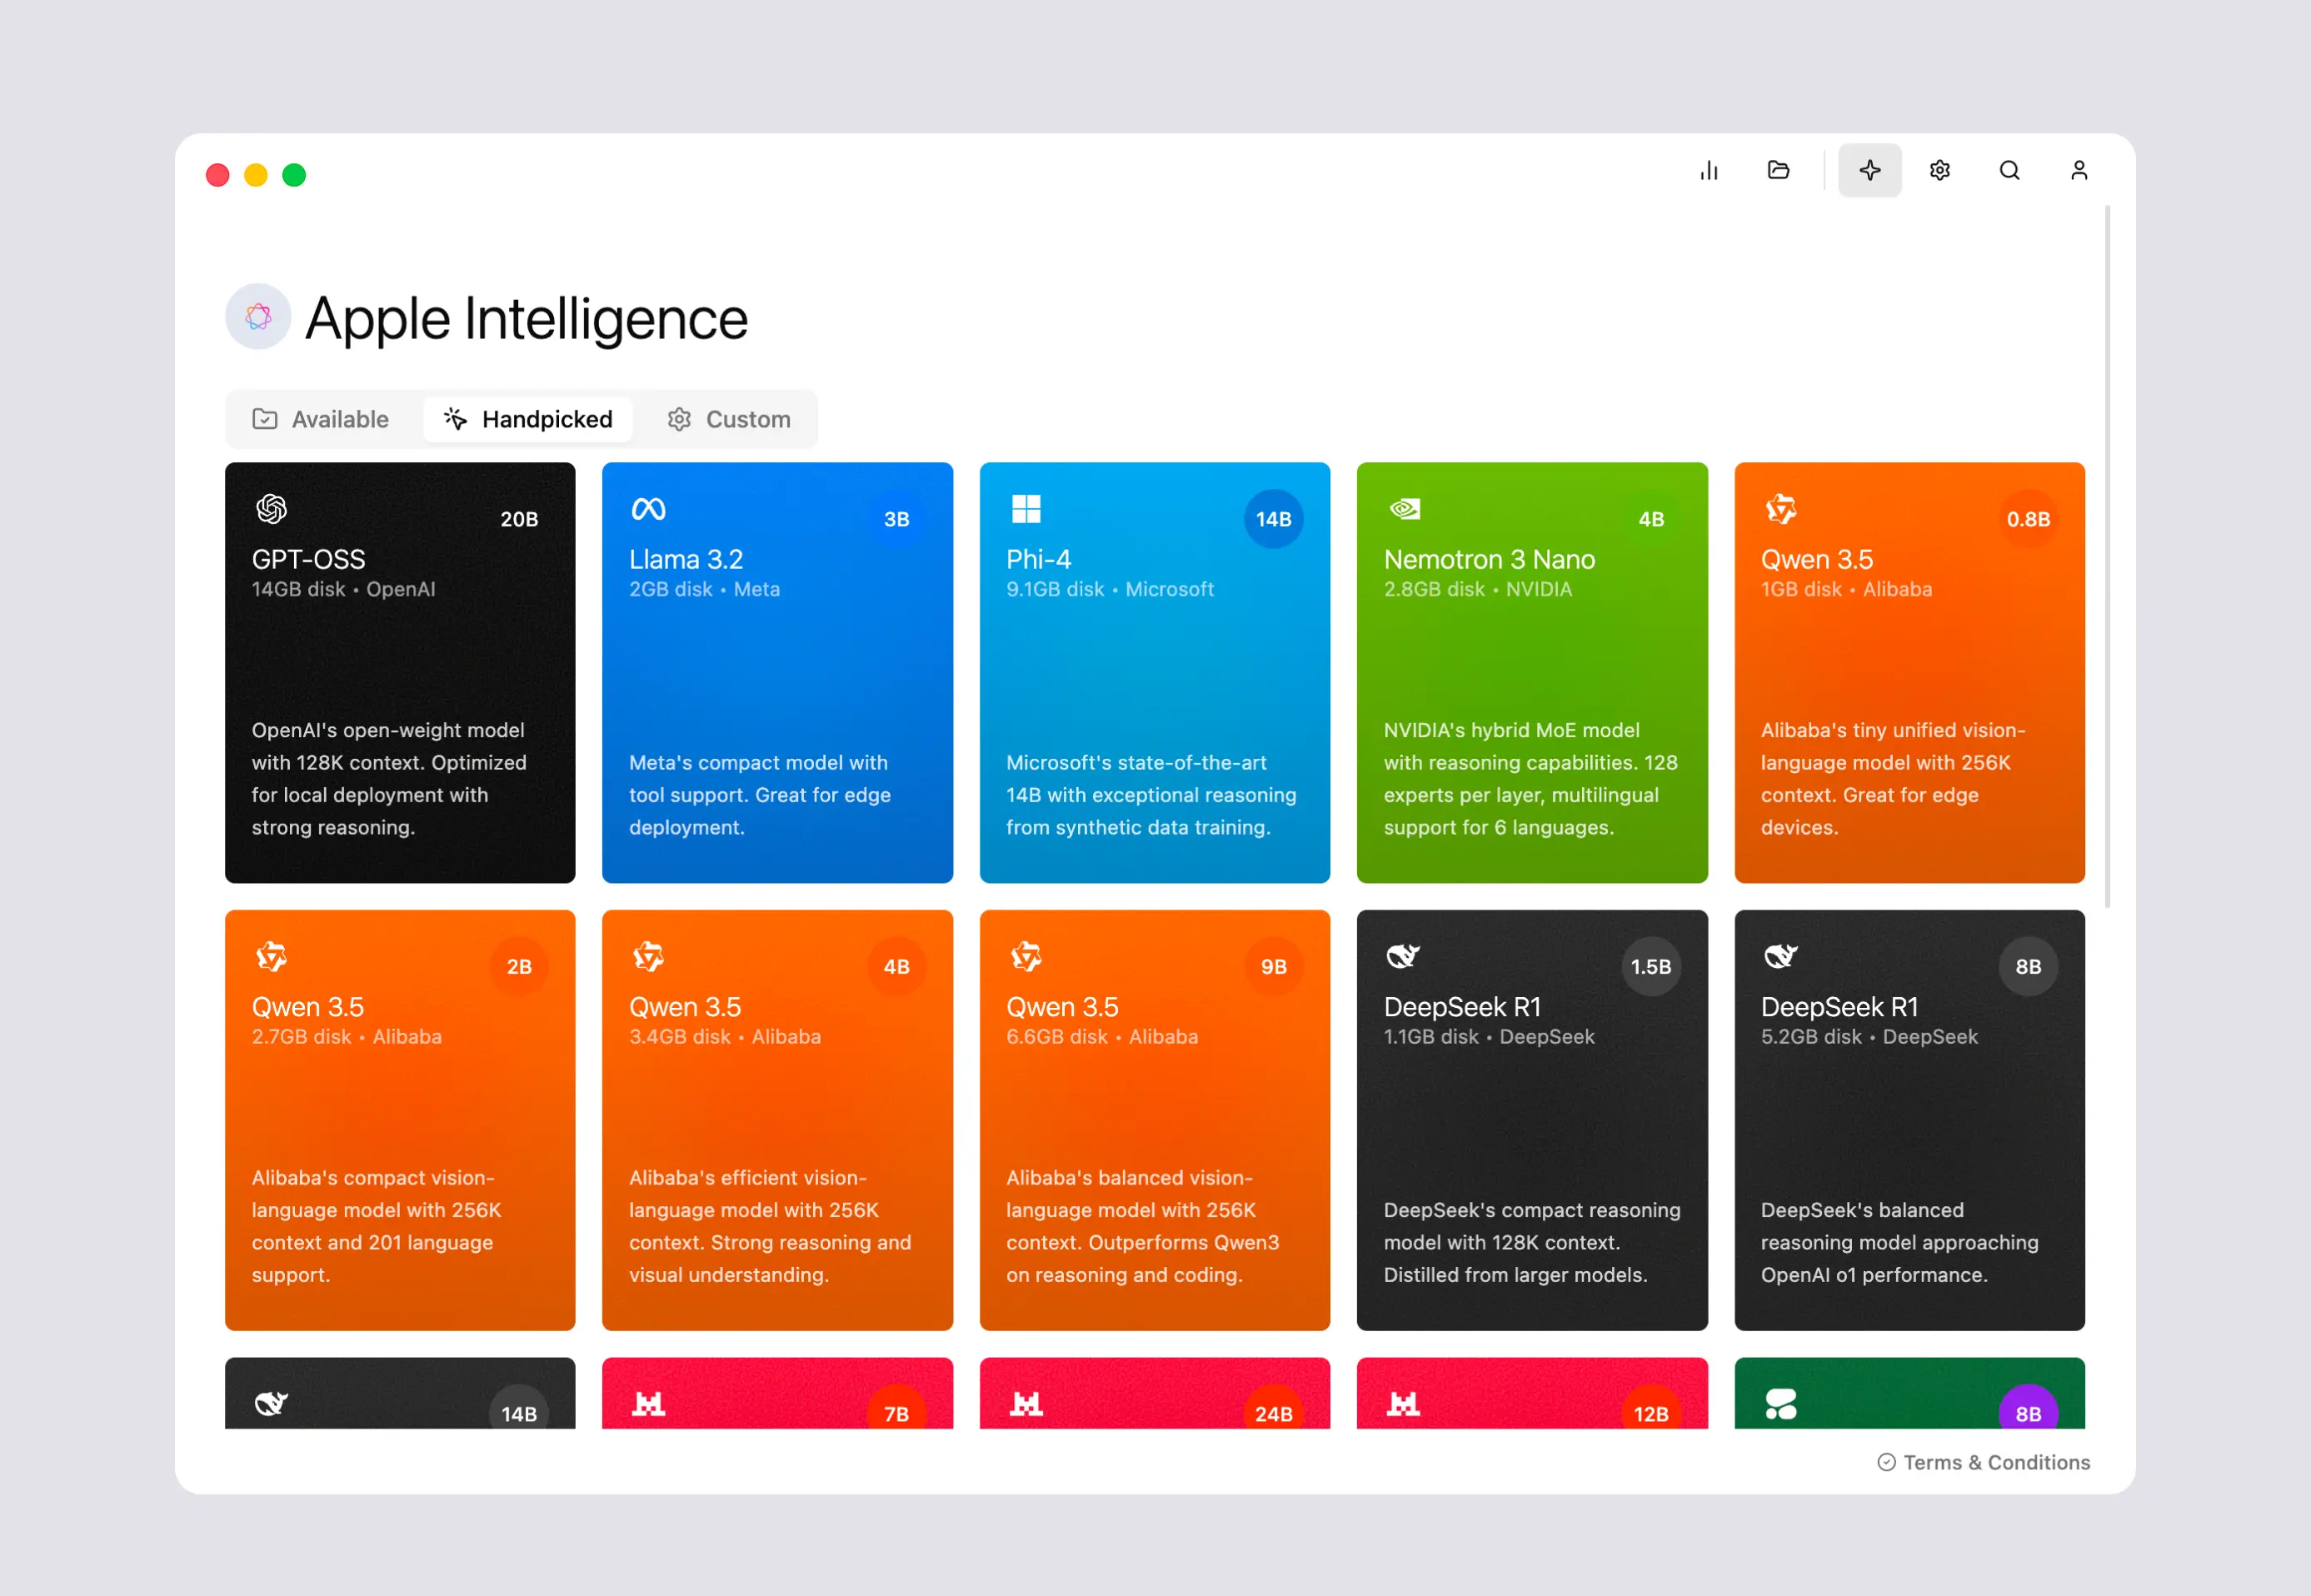 To download a custom model just copy the ollama command or the hugging face link and paste it in the appropriate input box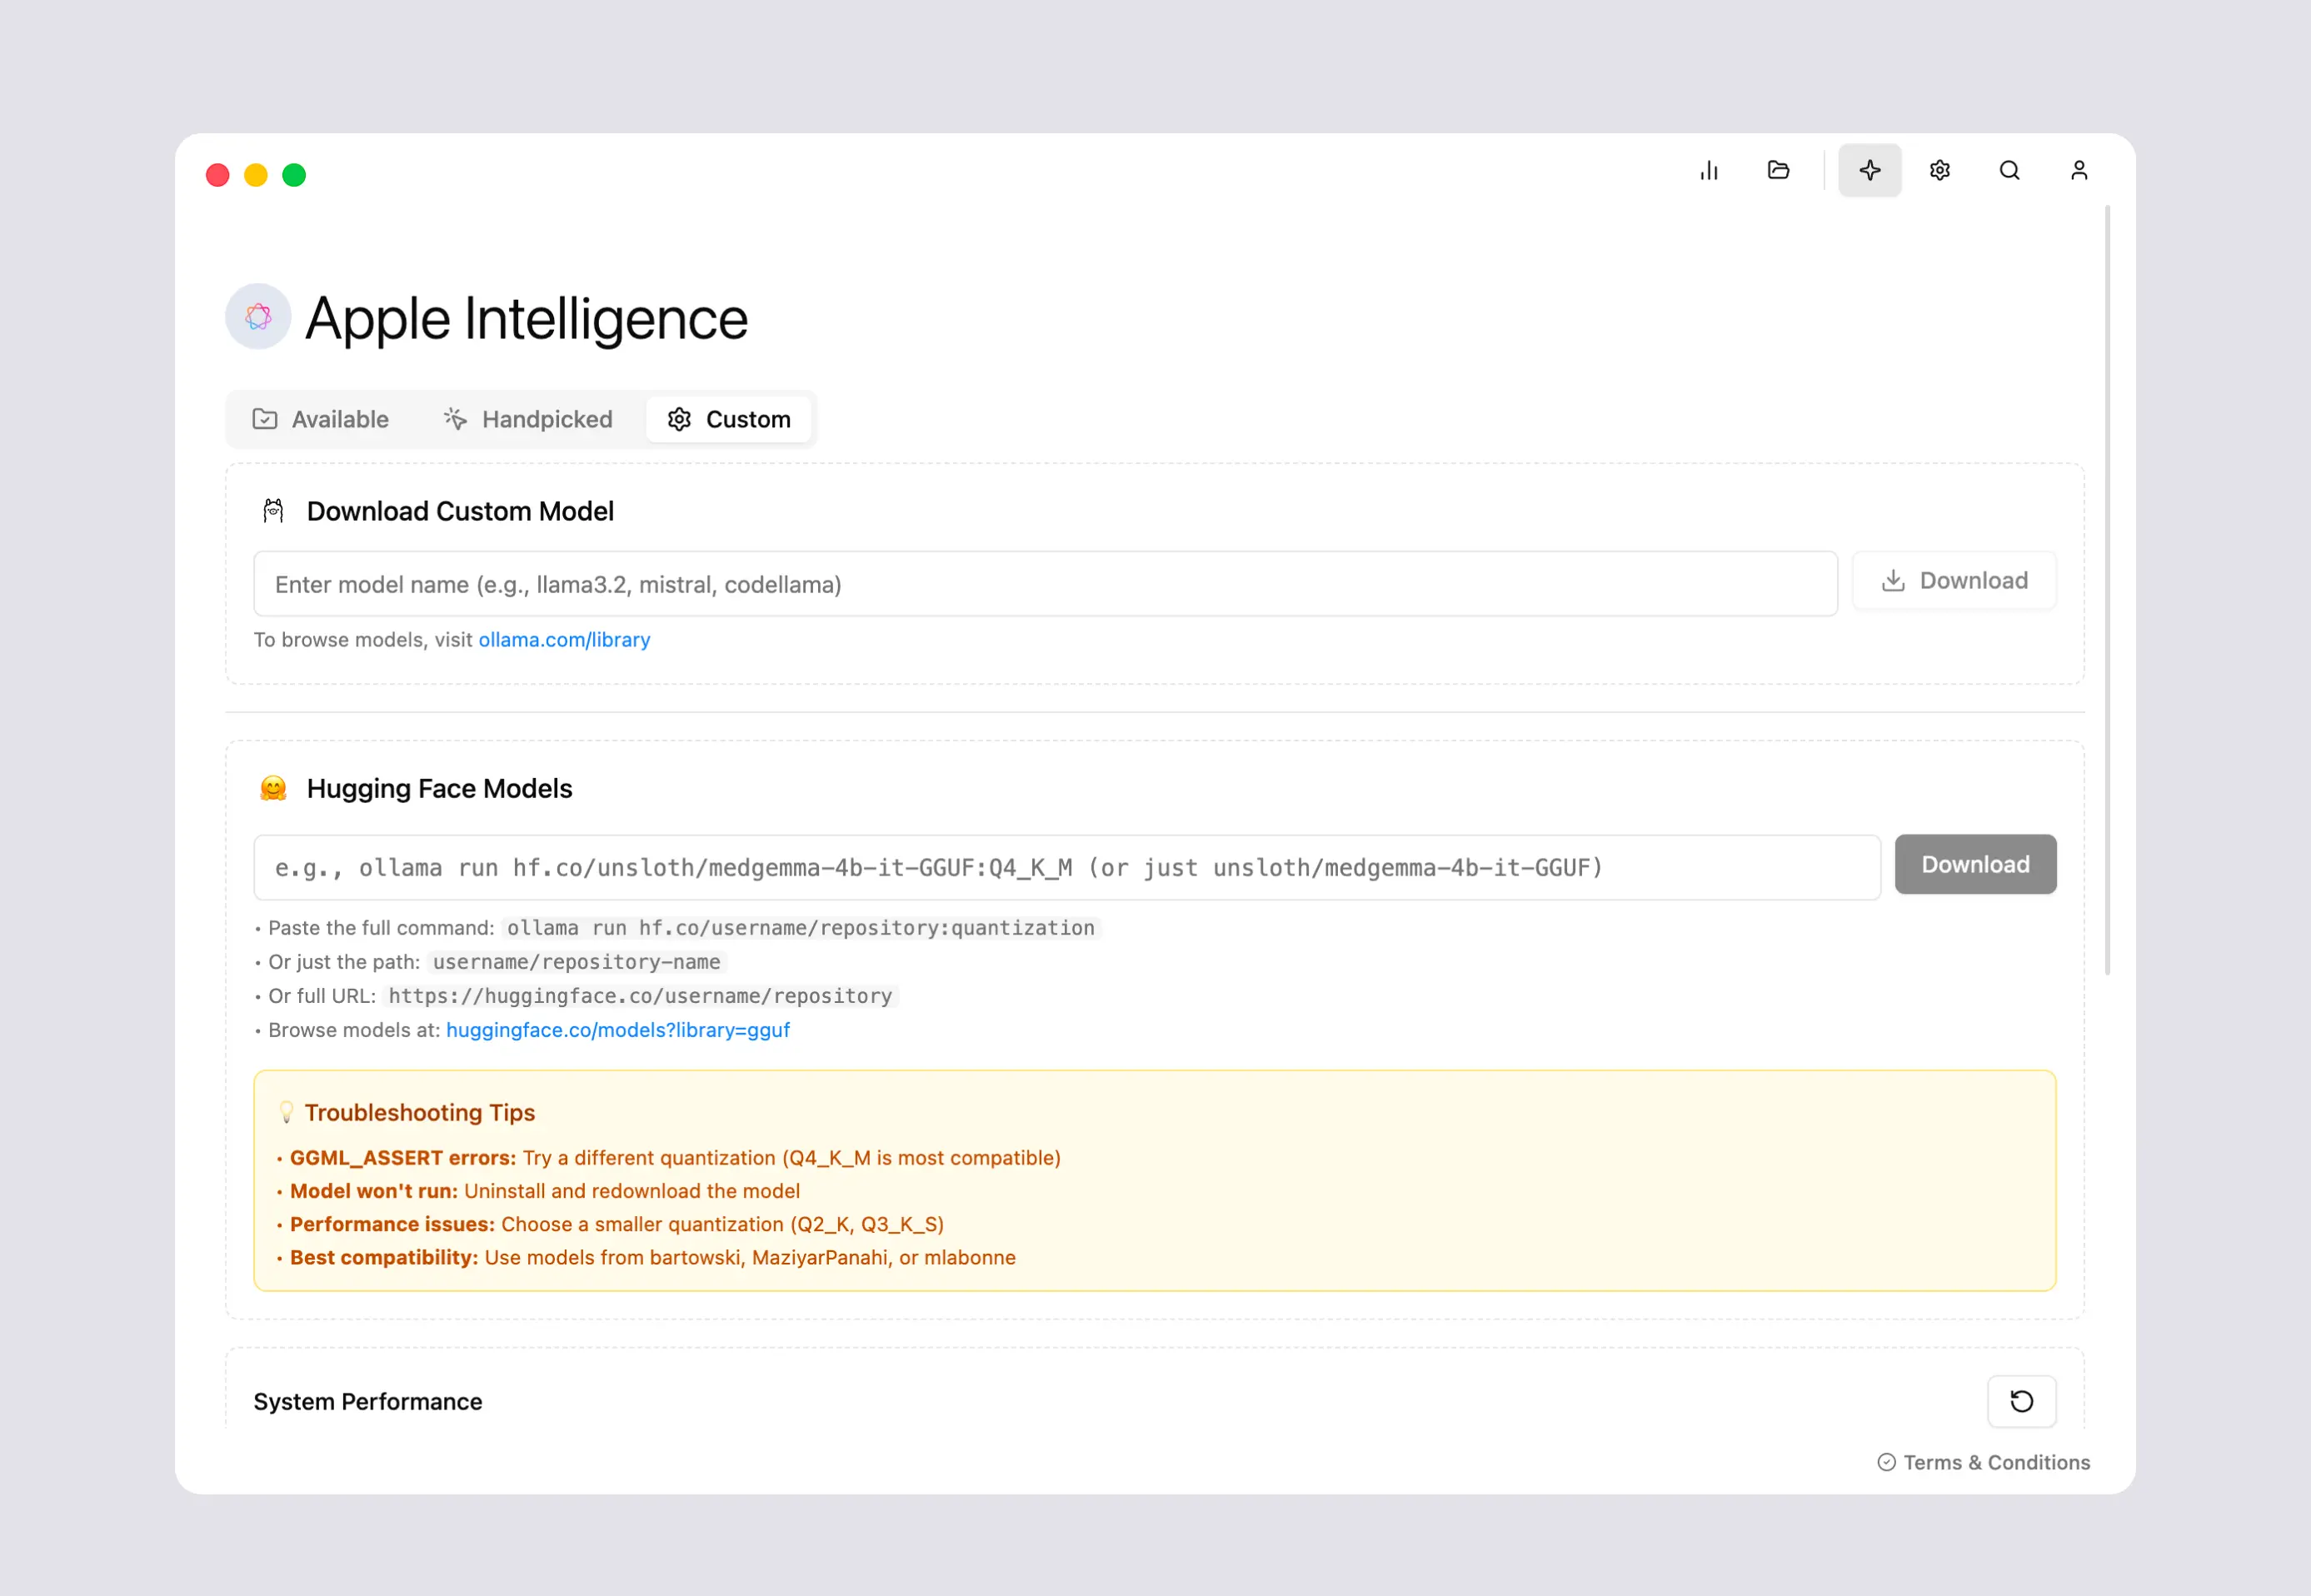
Settings
Most settings and methods to configure and customise hillnote are available in settings.
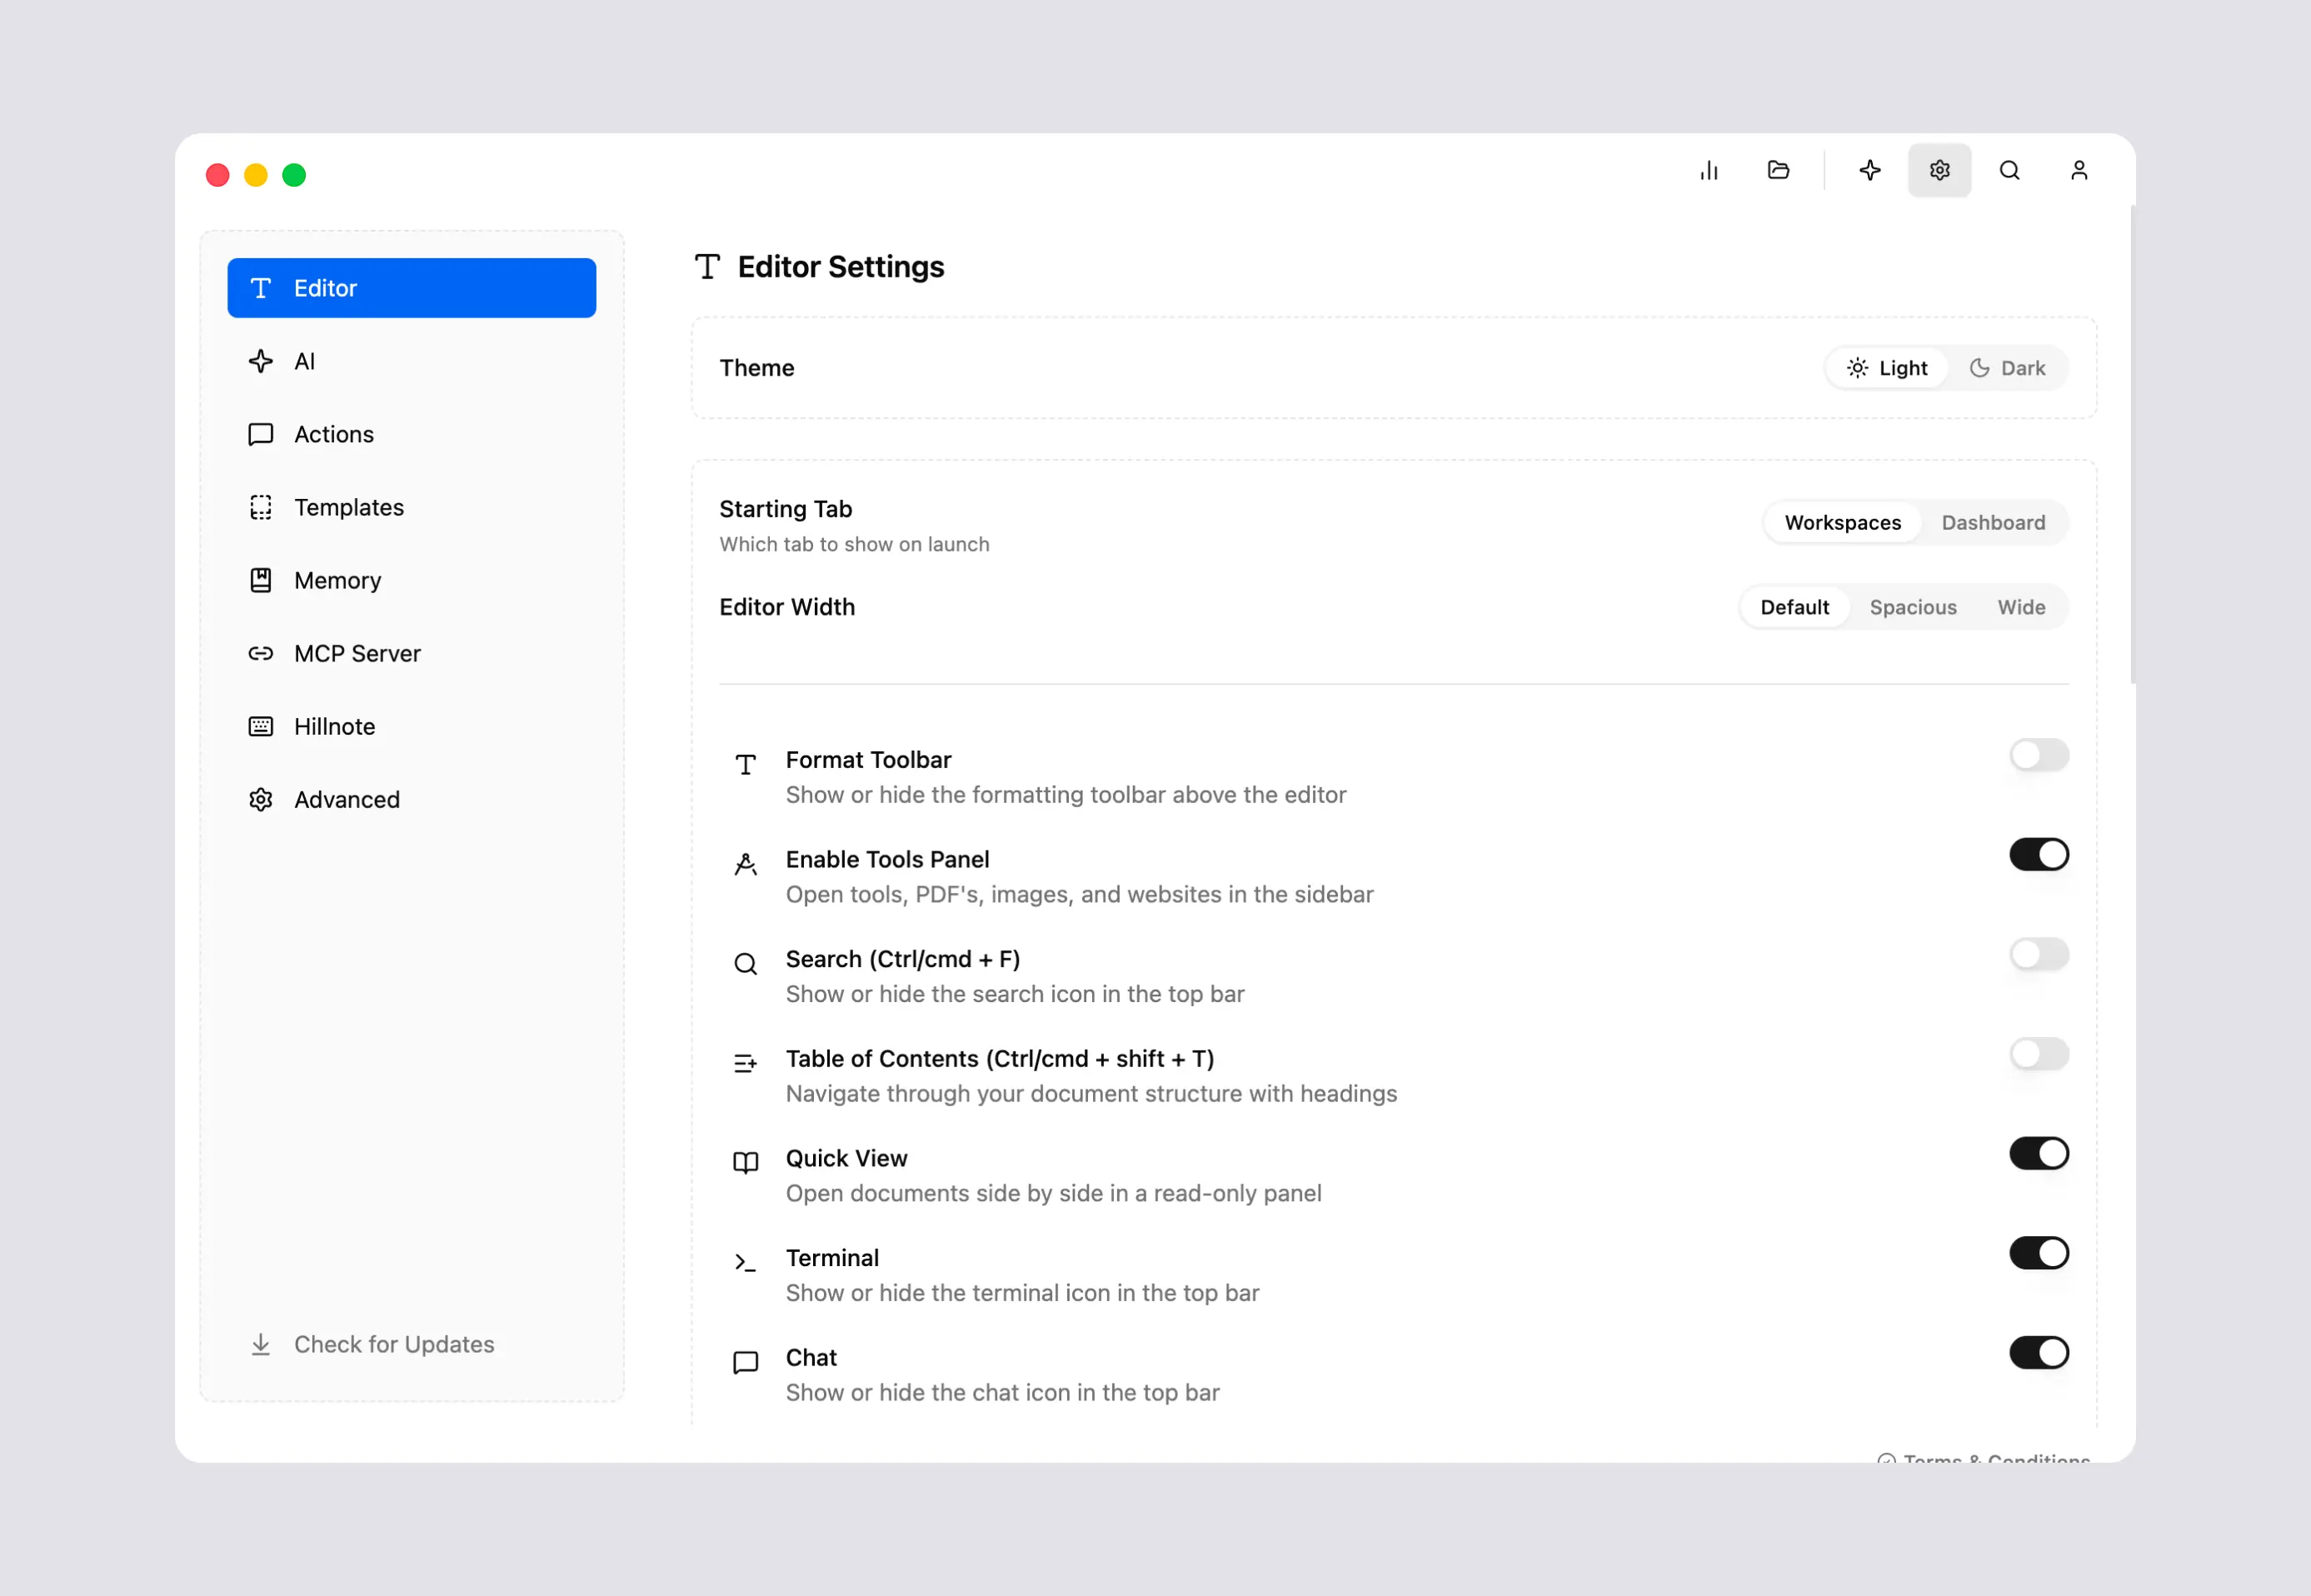
Editor: Customise the editor width, the theme, the landing page and toggle on and off interface elements in the editor.
A notable setting here is to choose your own emoji set for the documents and to enable and disable different CLI tools.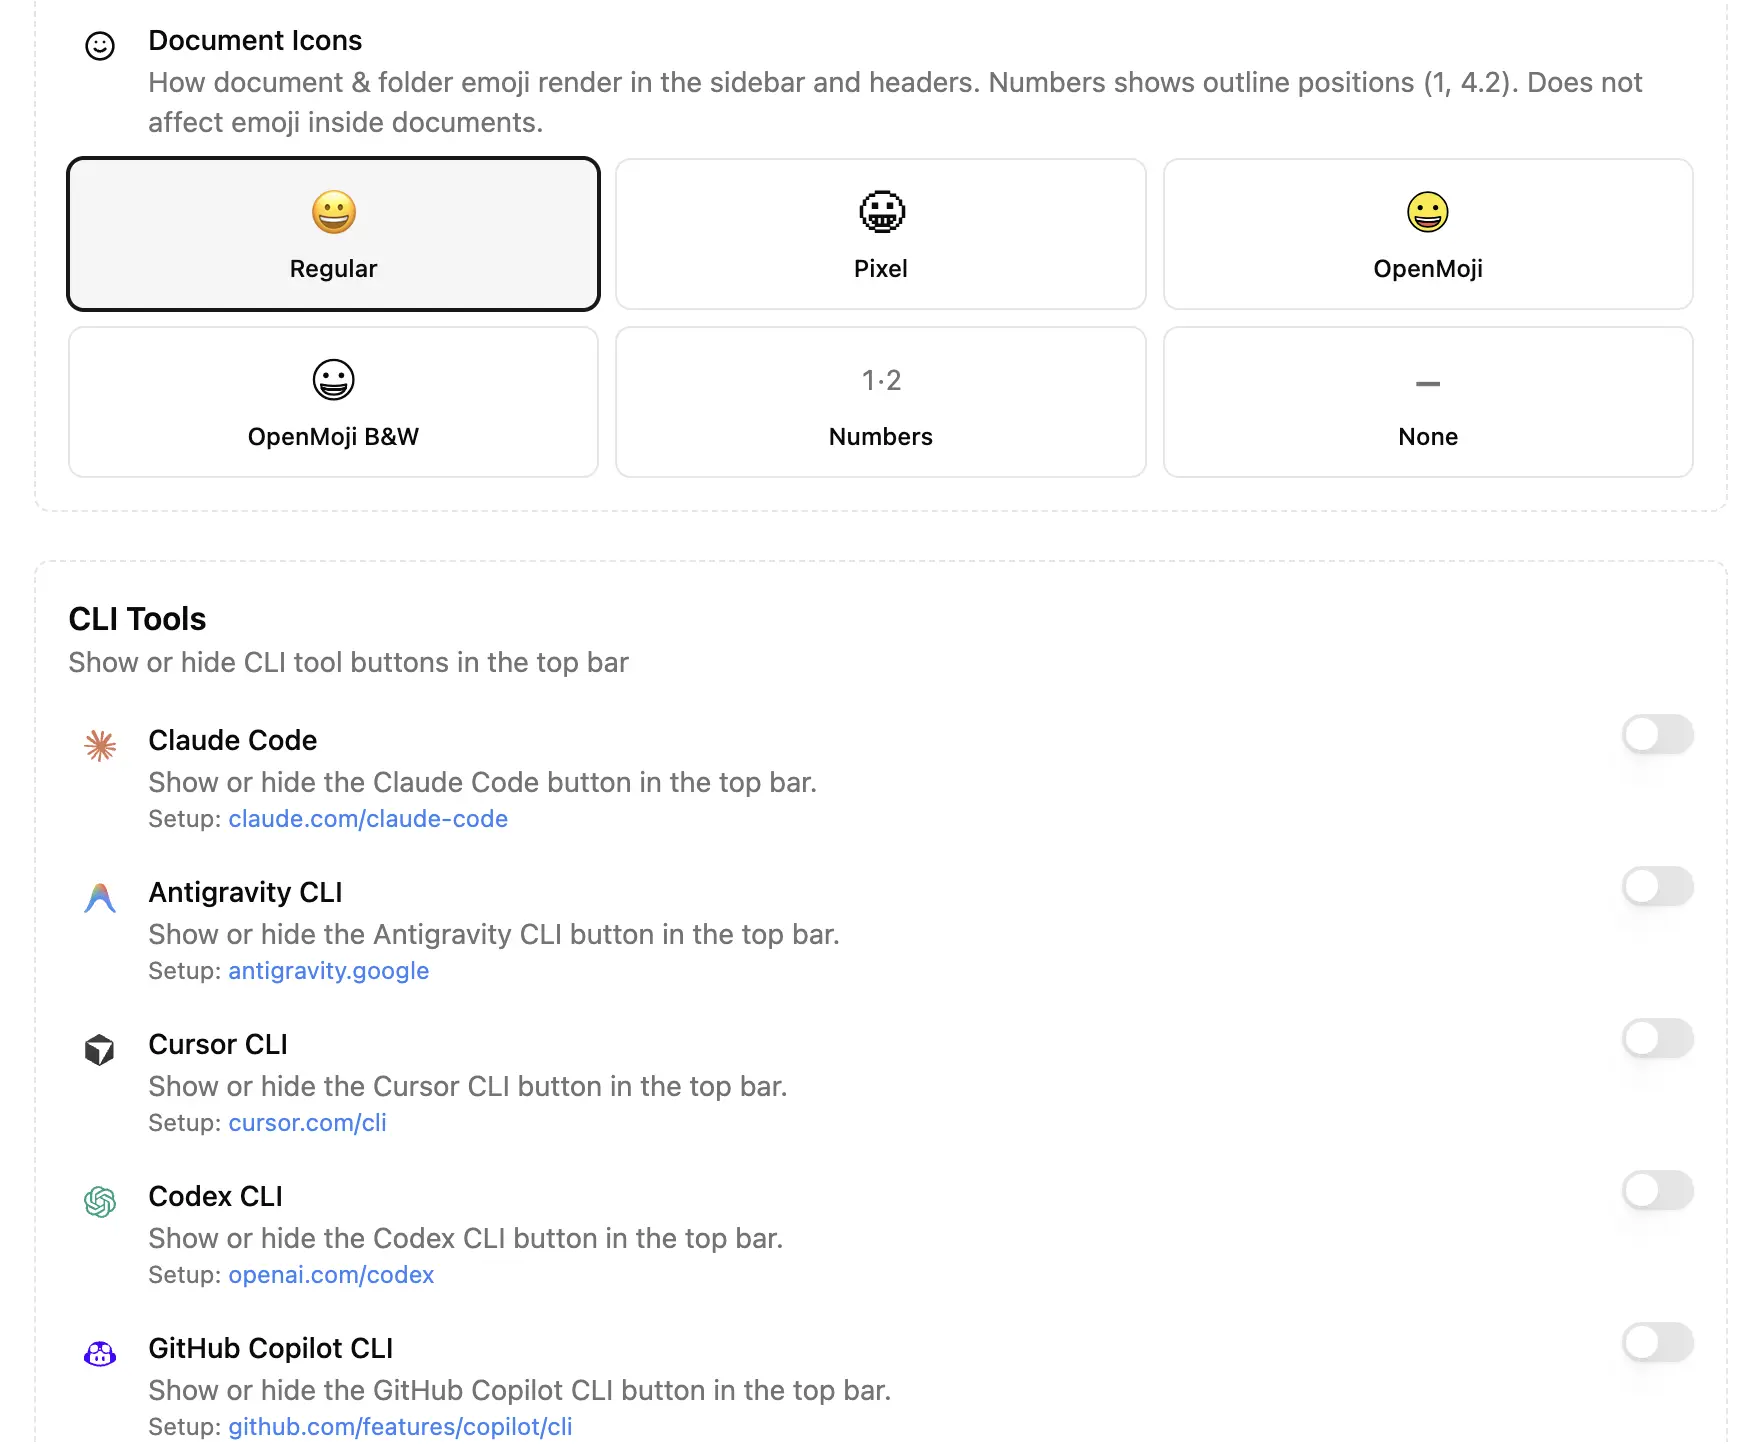
AI: Allows you to set the model temperature and set its performance metrics
Actions: Customise the AI actions in the bubble menu. More information in Customise Hillnote on the same.
Templates: Choose and customise the default templates available in the / menu. More information in Customise Hillnote on the same.
Memory: Manage the memory snippets saved by AI as you work in the workspace.
MCP: Contains instructions and controls for the local and cloud MCP servers
Hillnote: Manage your dock icon options and shortcuts
Advanced: Manage system prompts and other advanced features. More information in Customise Hillnote on the same.
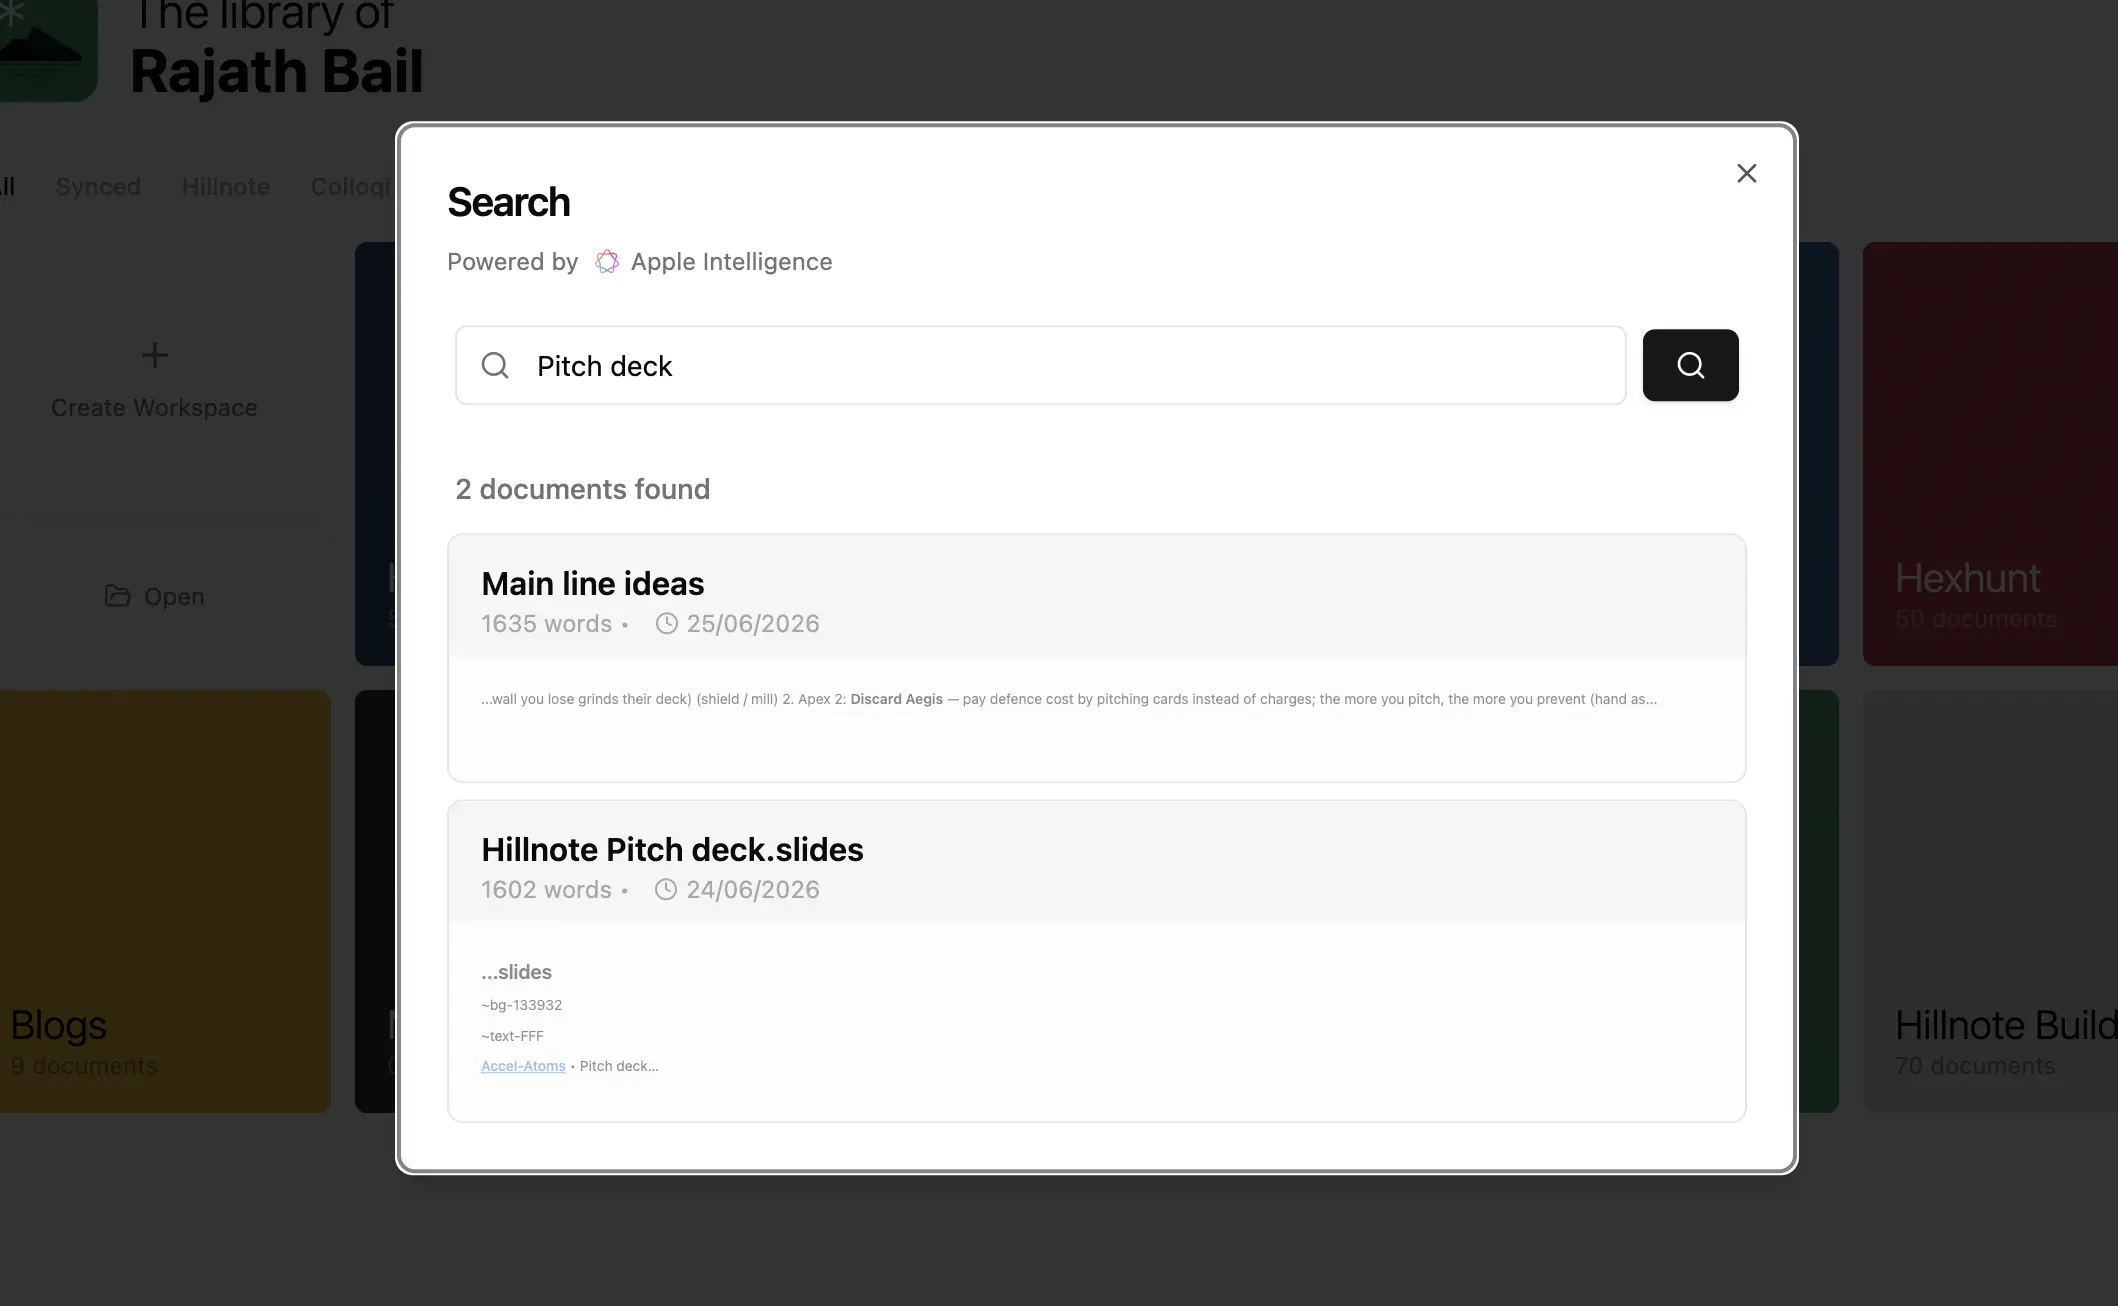
Search
Search across all documents with phrases, words or thoughts? AI creates the keywords and tags to search across documents. Search outputs documents organised by relevance.
Account
You can create or login to your account by clicking the account button. learn more about accounts on Hillnote in Sign-in to sync and unlock premium features!
You can also change the icon in the workspaces dashboard to an icon of your choice here.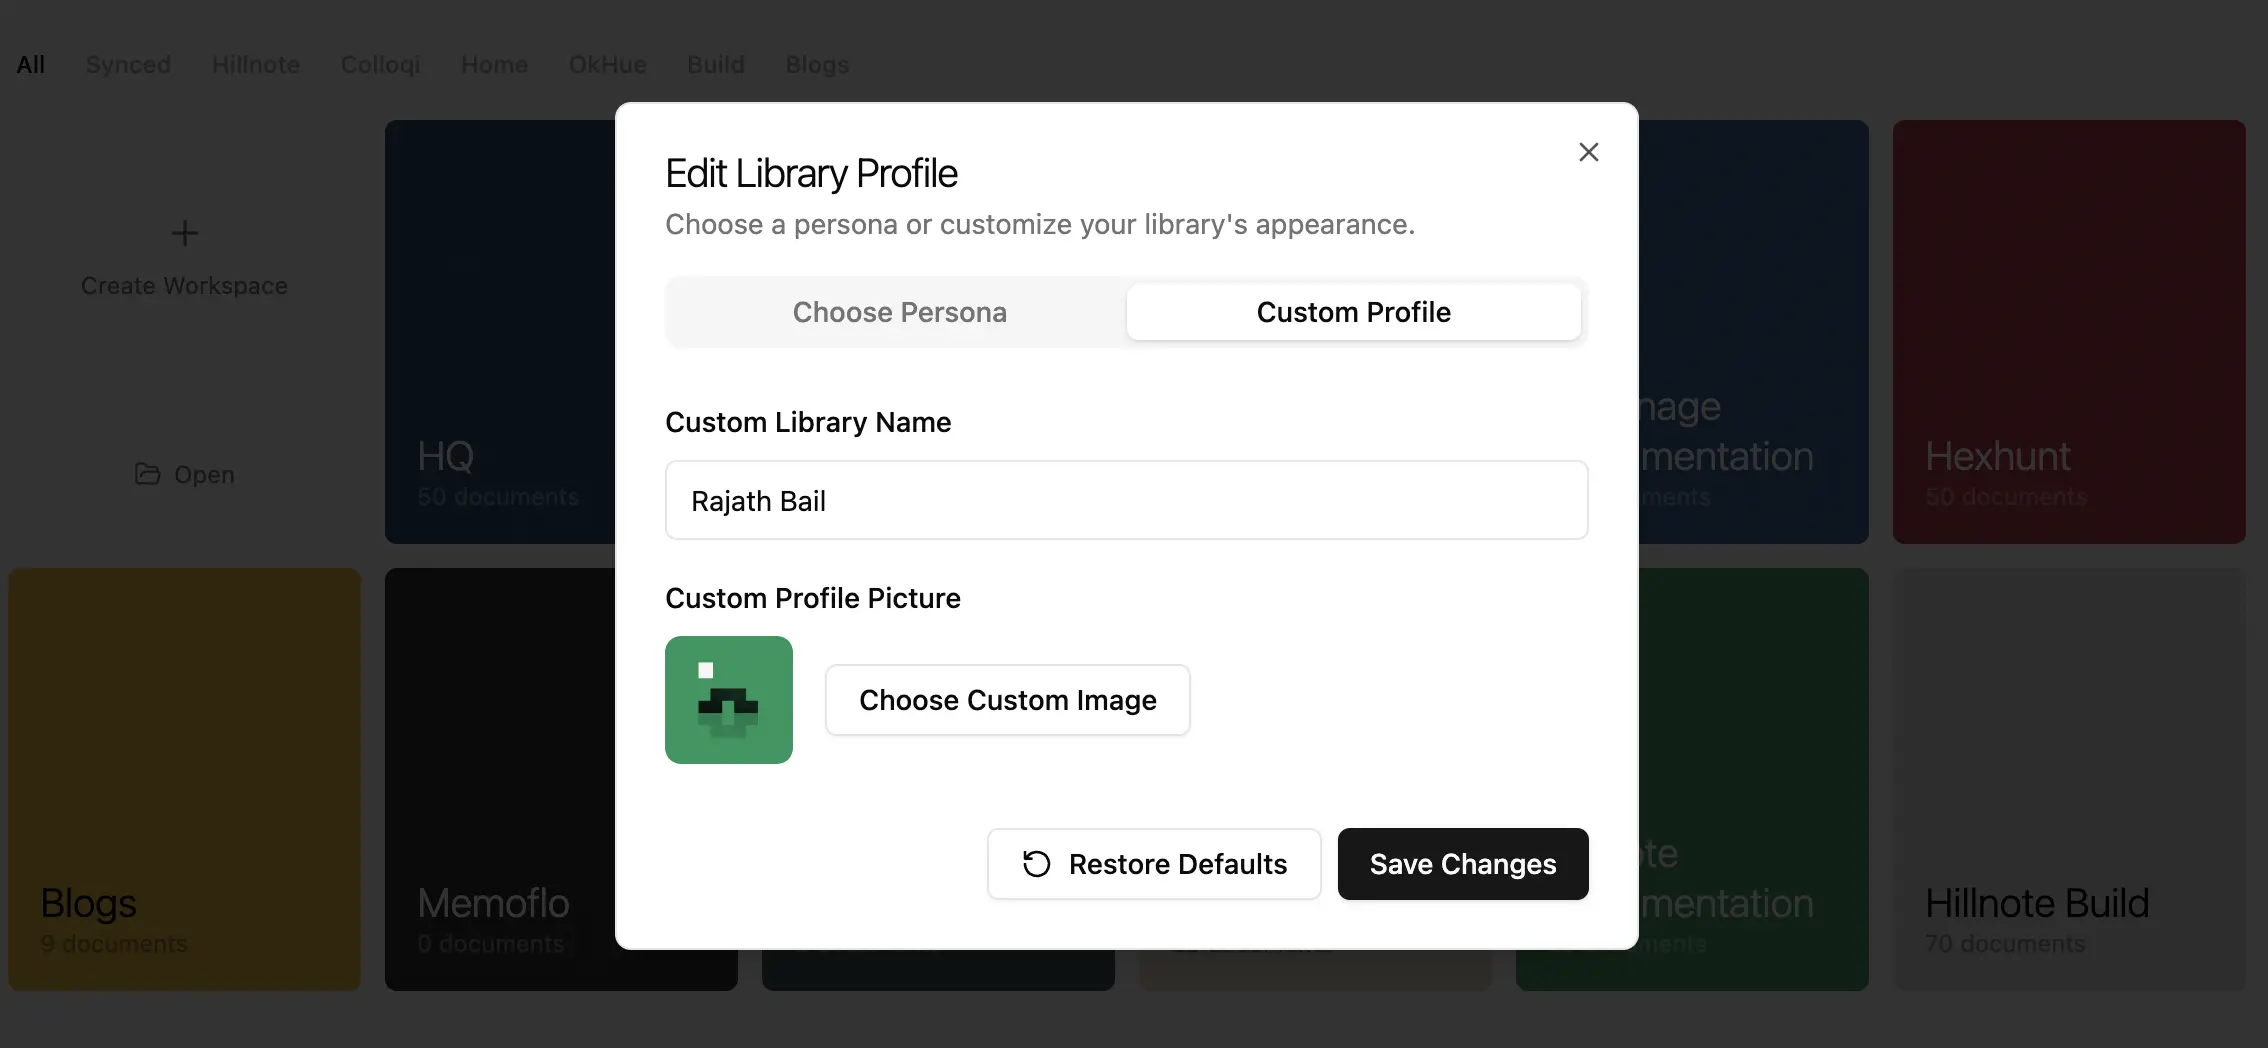
Within a workspace
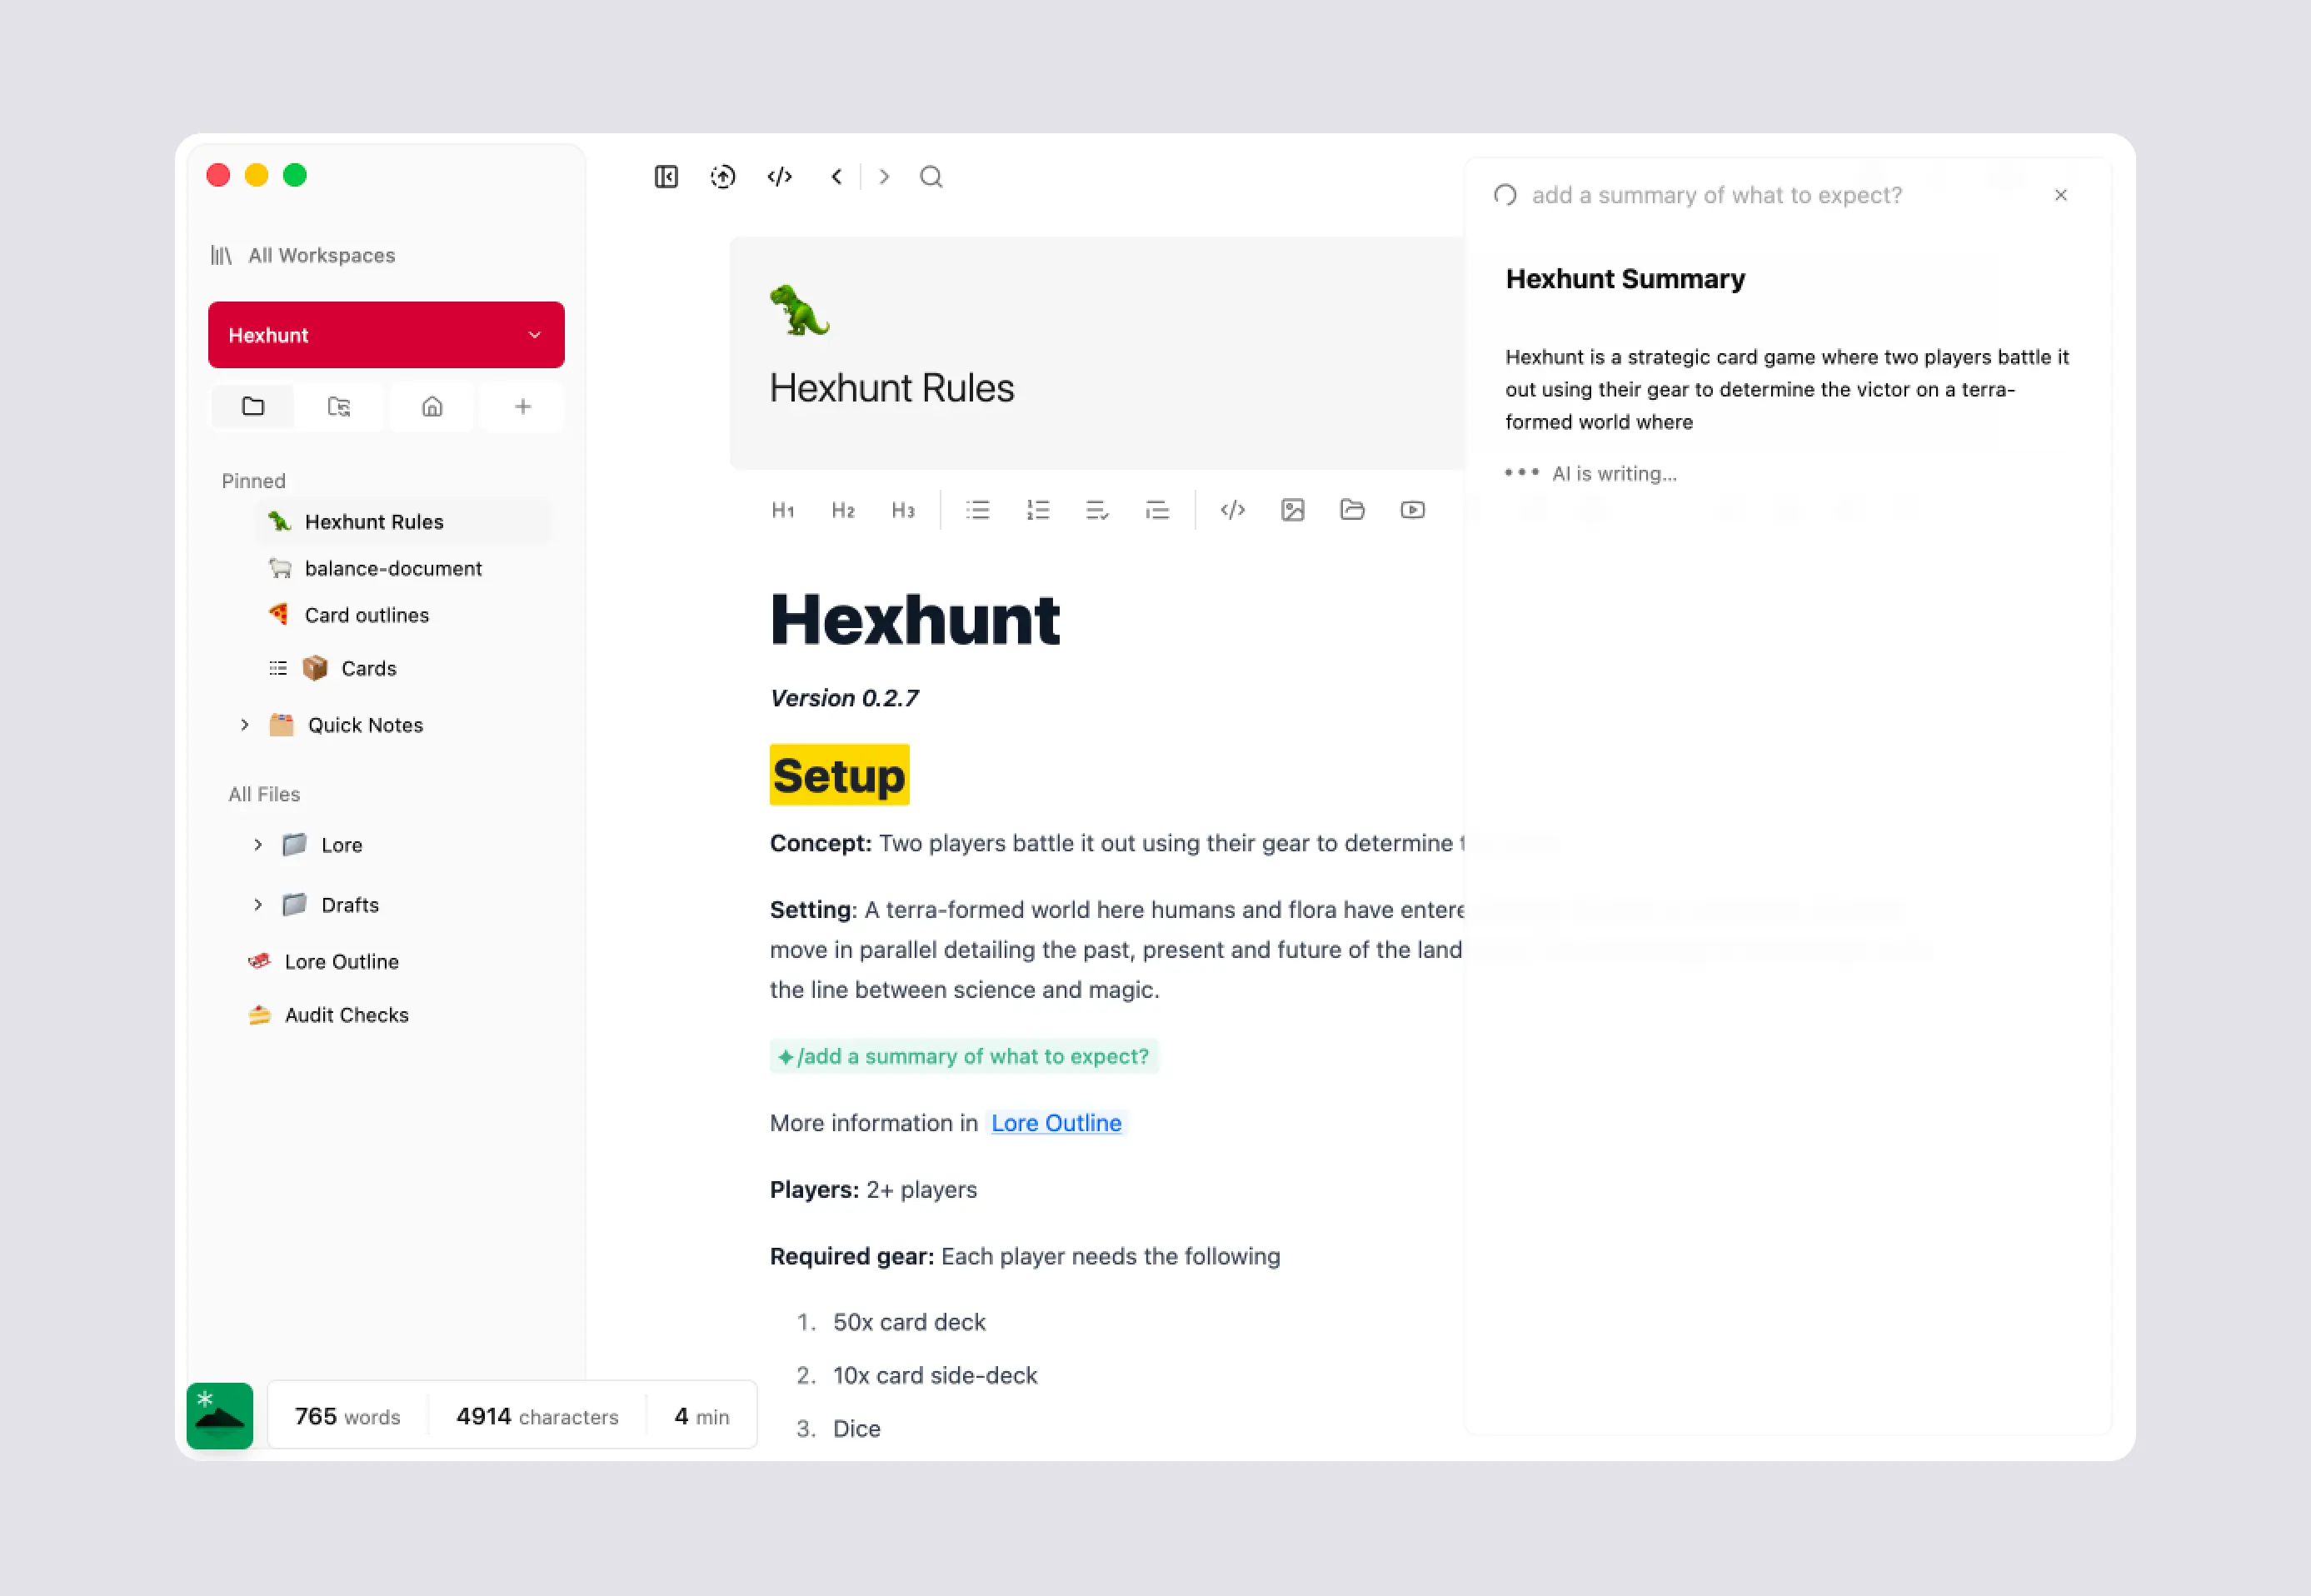
The workspace is the main editor where you can view, edit and work on the various files across your workspace.
The various types of files are defined in
Pages
Slides
Canvas
Database
The interface is covered below
Workspace home
The landing page has 2 main modes. A document mode and a dashboard mode. You can choose the default by clicking on the settings icon in the page.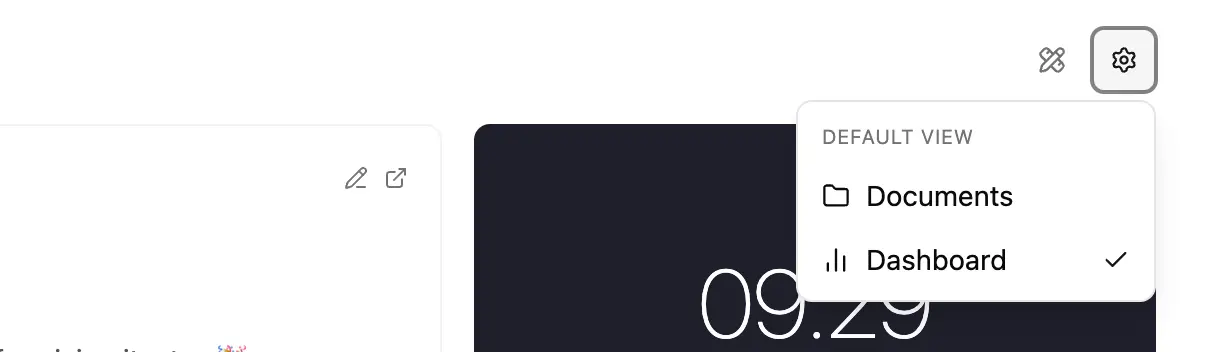
Documents
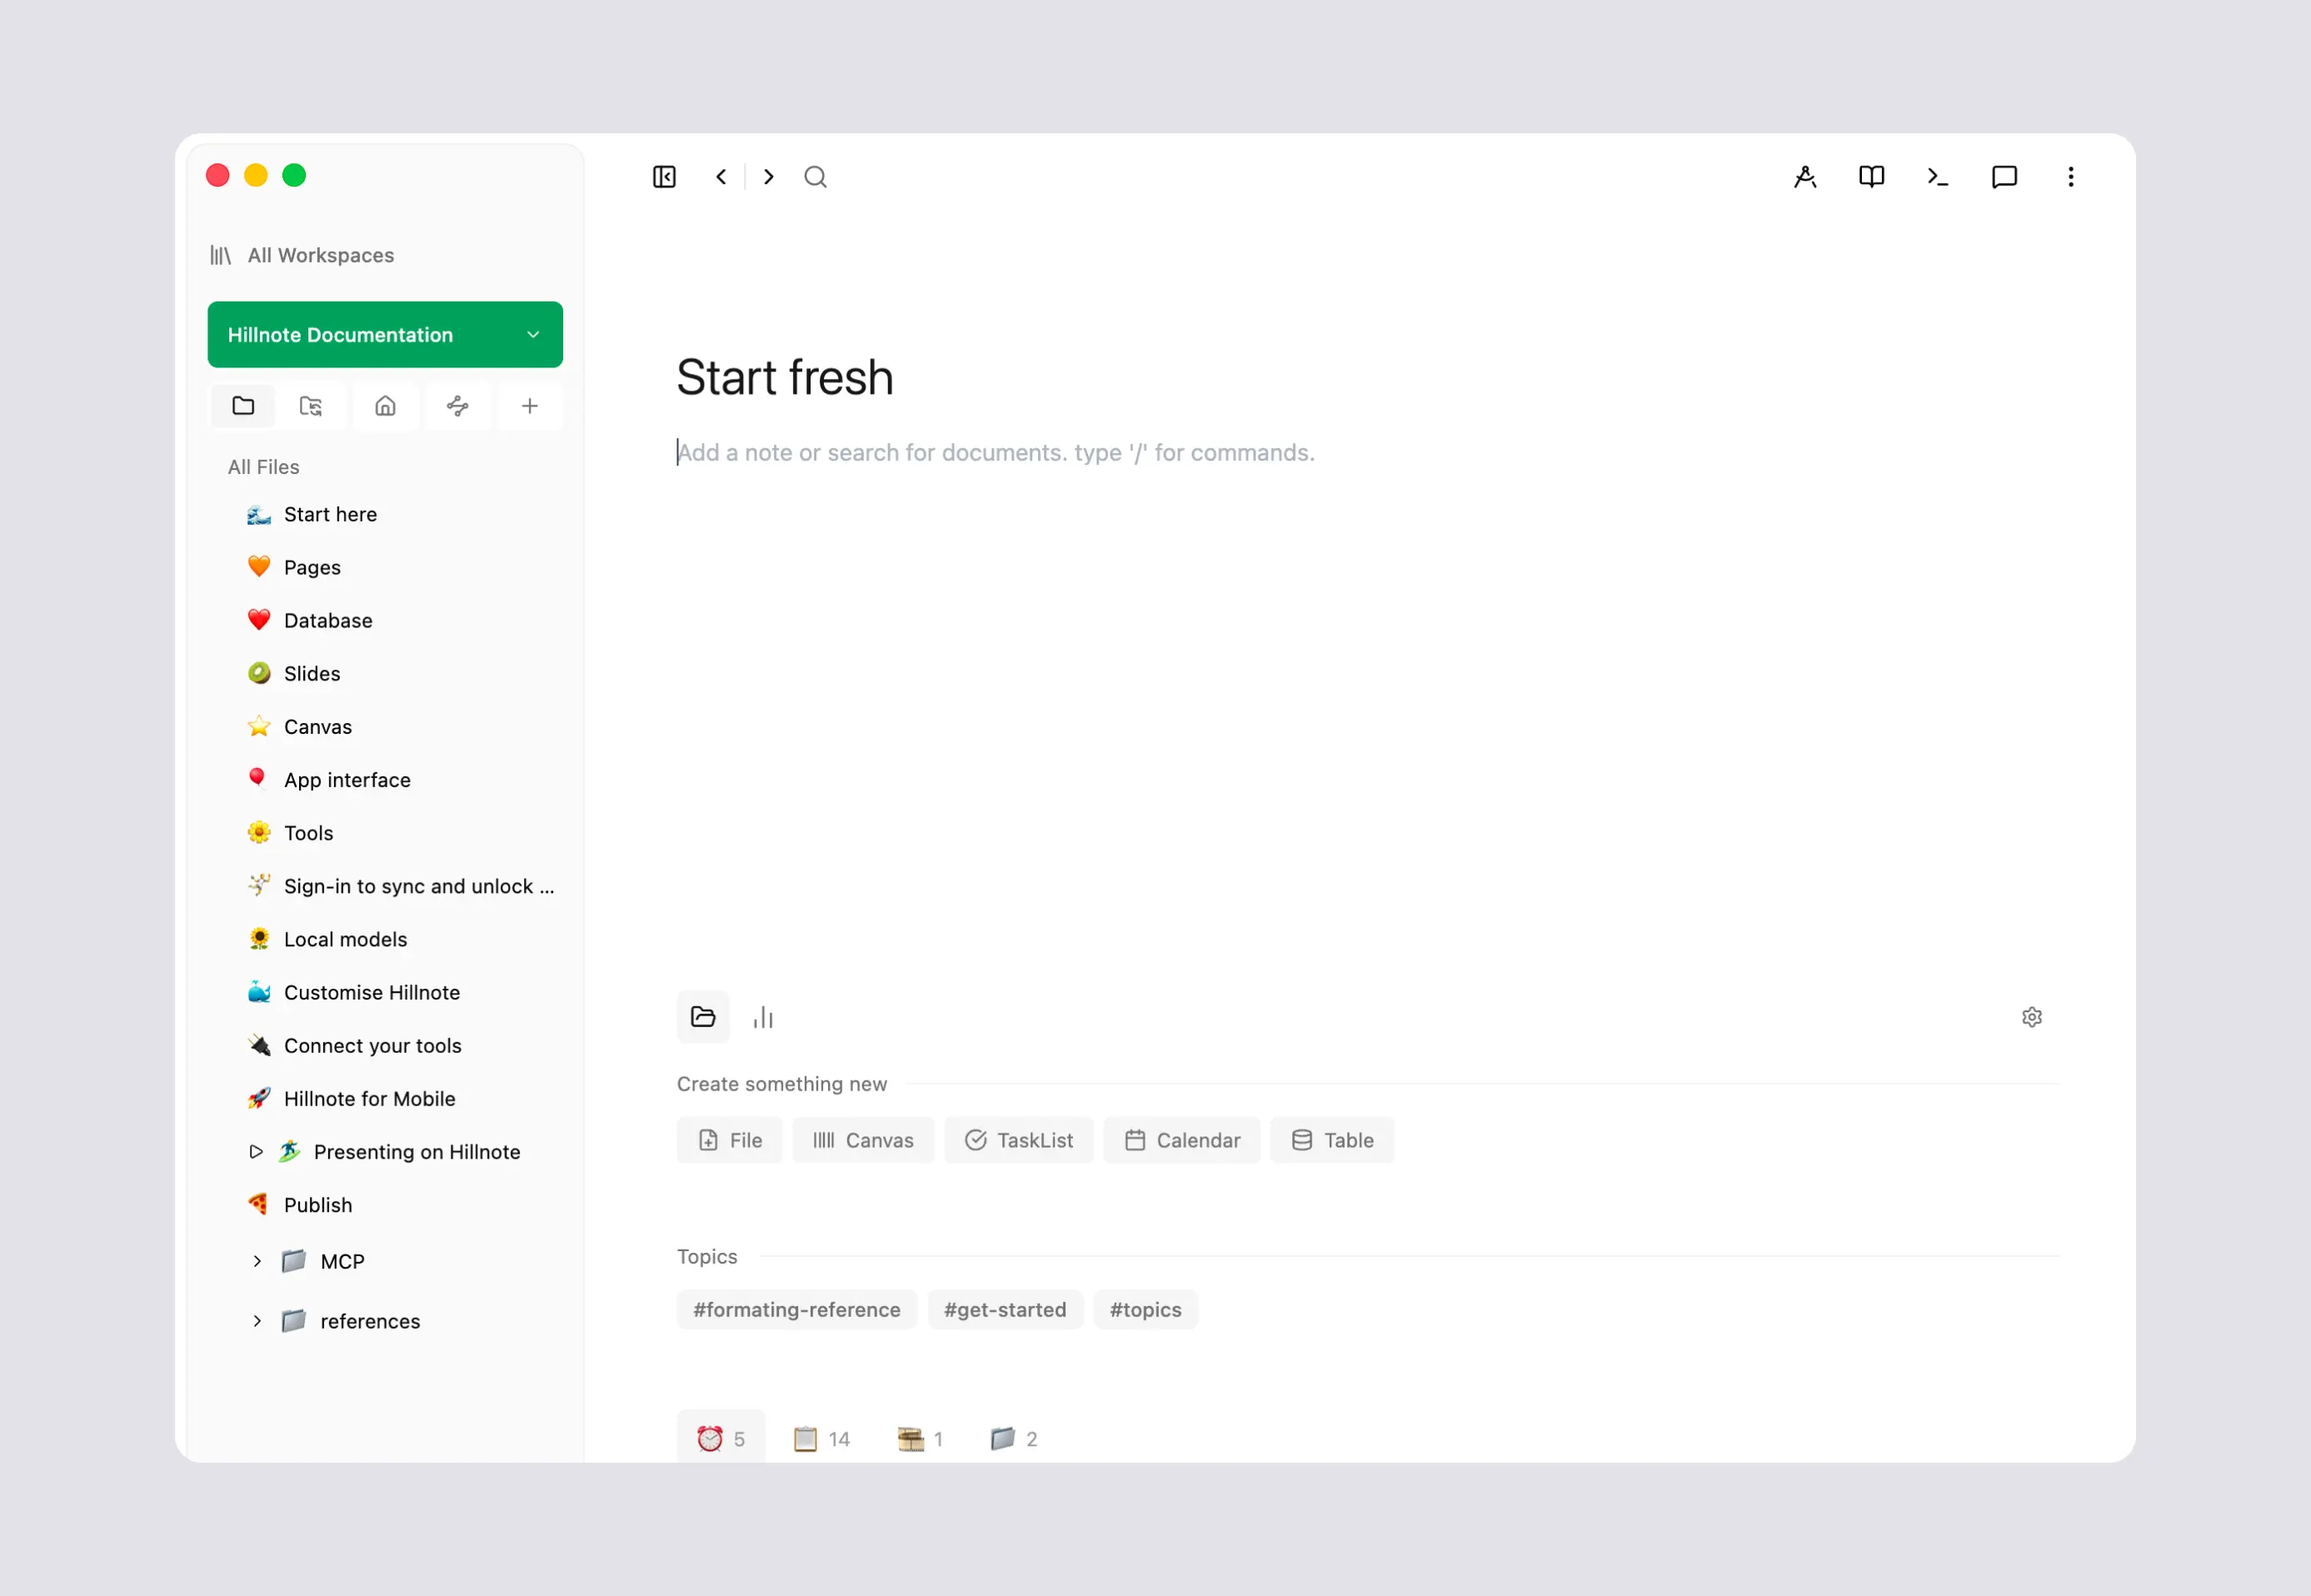 This view combines a quick note module on top and a document tree below. You can also create a new file using the create module and clicking on the buttons below “Create something new” title.
The document tree allows you to filter and sort through all of the files in your workspace.
Quick note: Search for files or keep typing to save a quick document. You can format the document via AI before you save it.
Dashboard
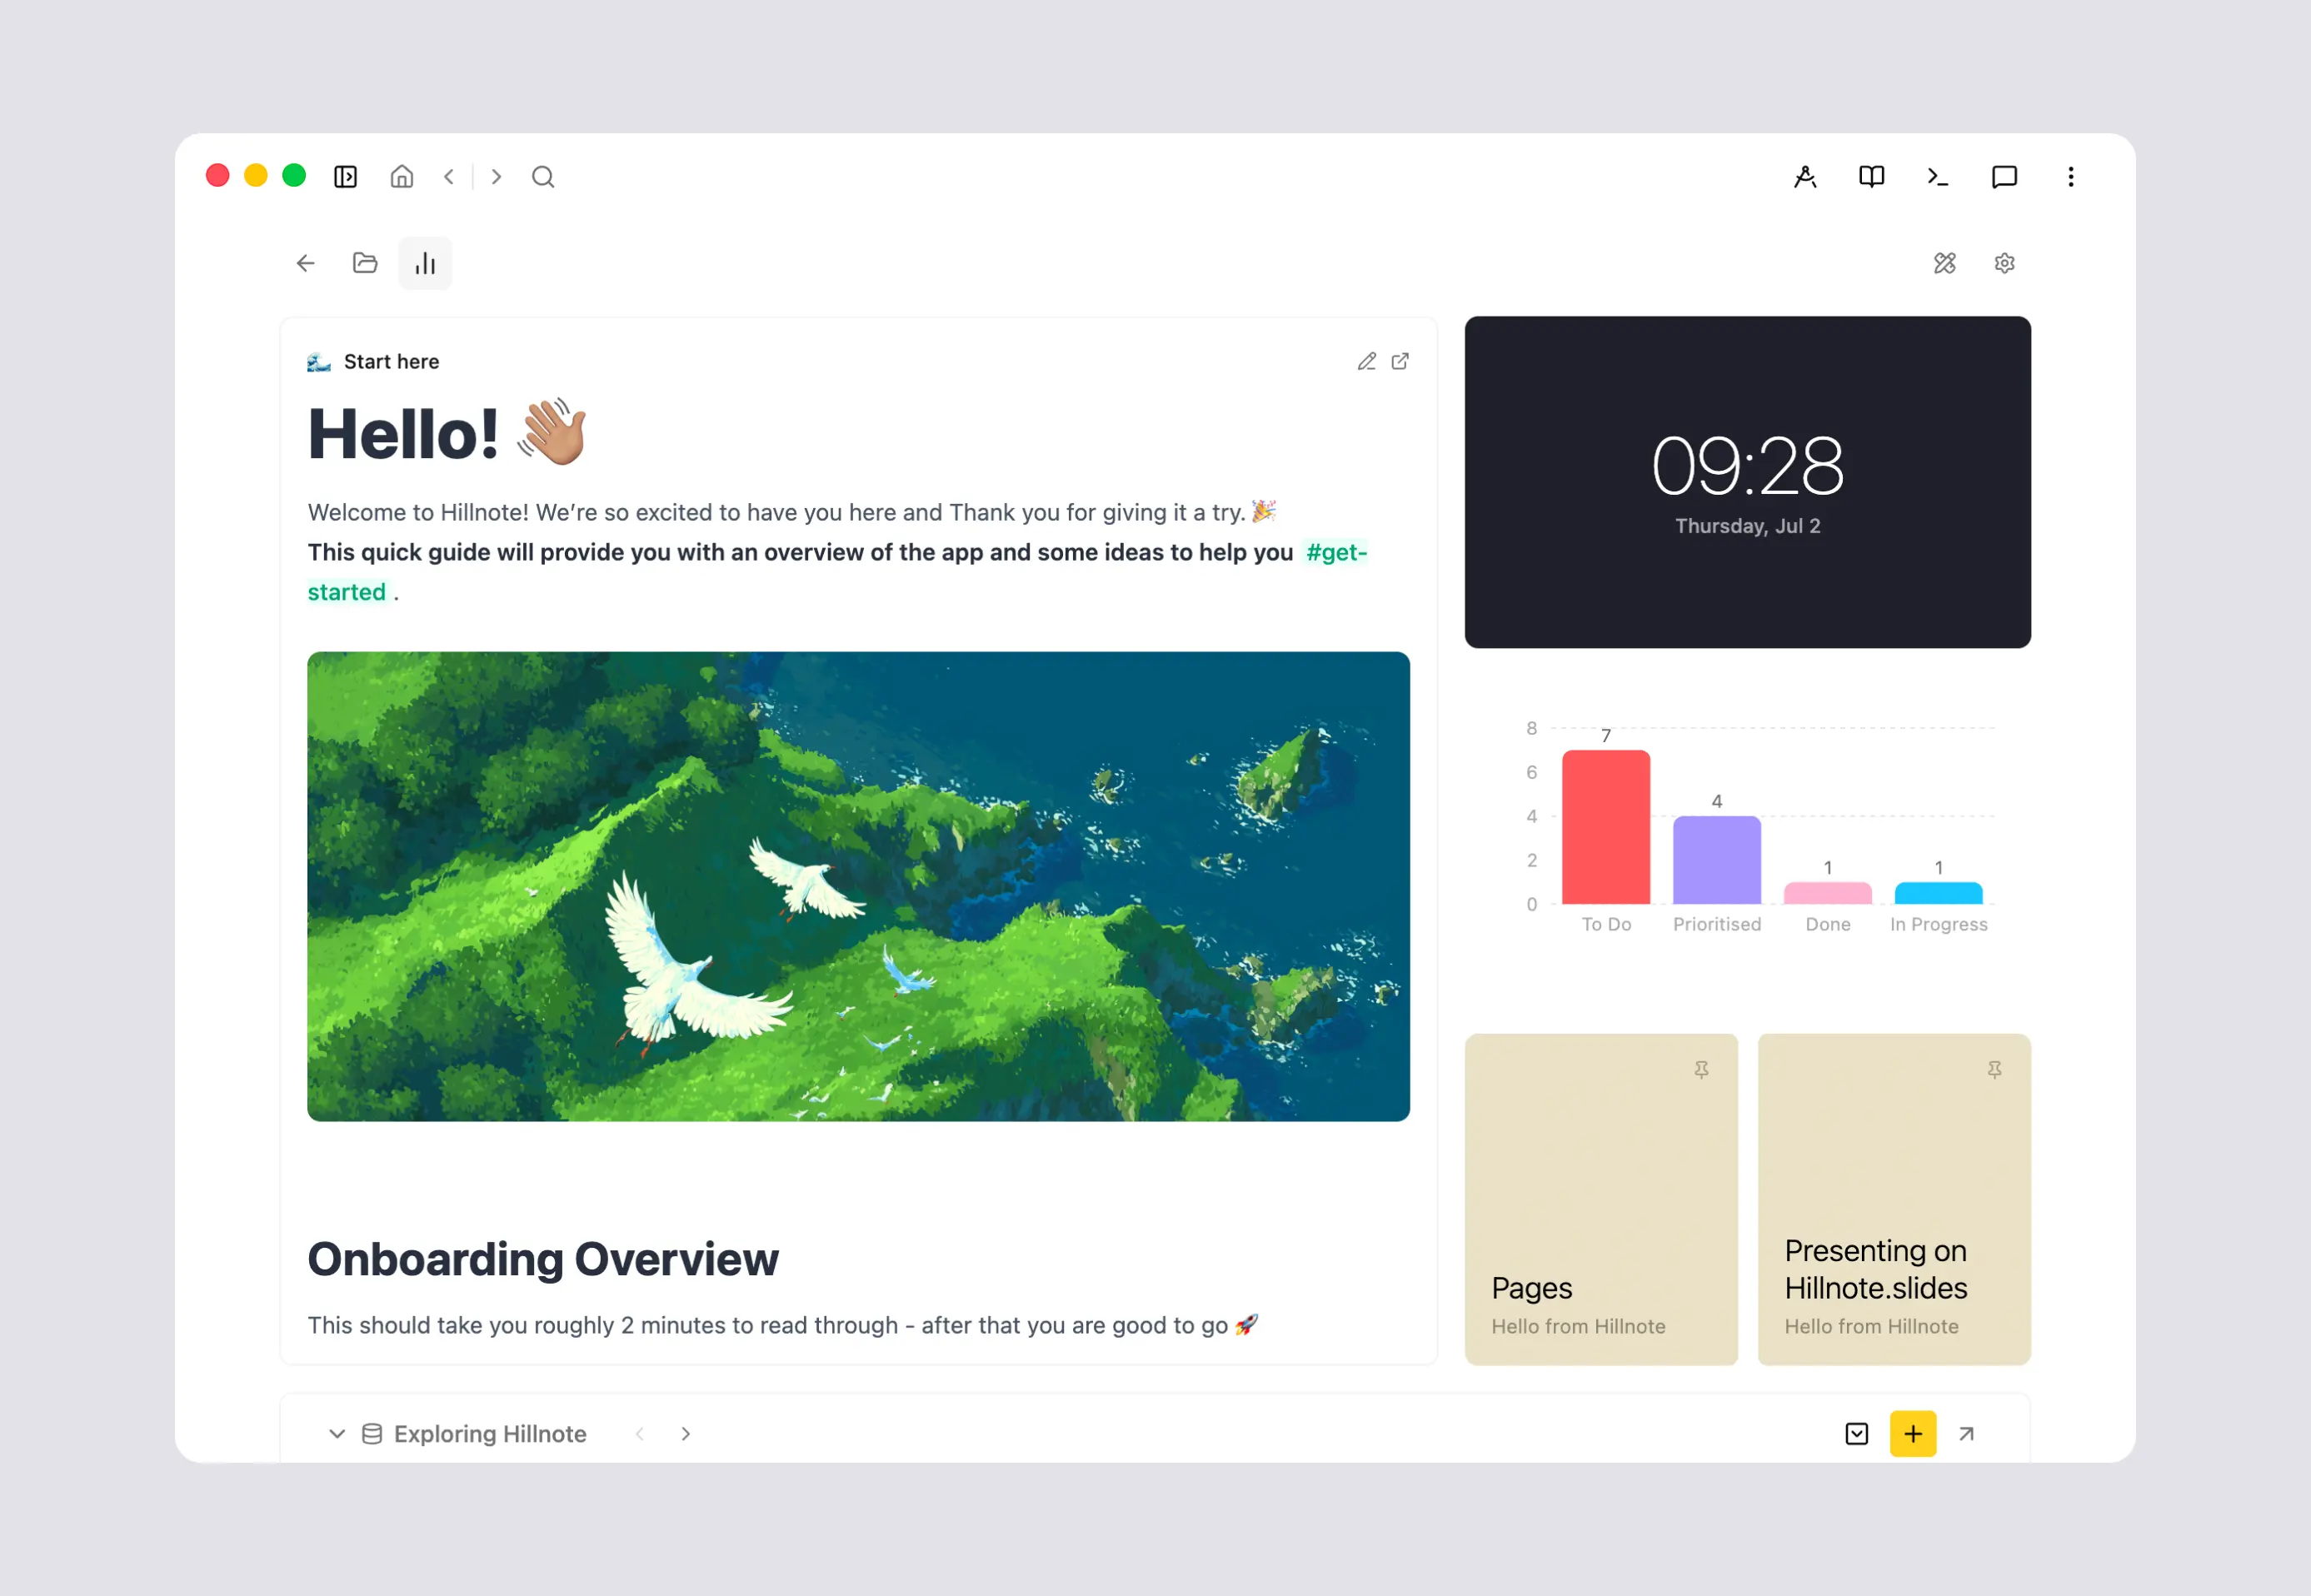 Each workspace can have its own dashboard. It works similar to the main dashboard but all files are scoped to the workspace as defined above.
Navigation
The side bar is where all files are listed and it has several modes and sections to choose from.
File tree
By default the navbar shows all files in the workspace and allows you to navigate between them.
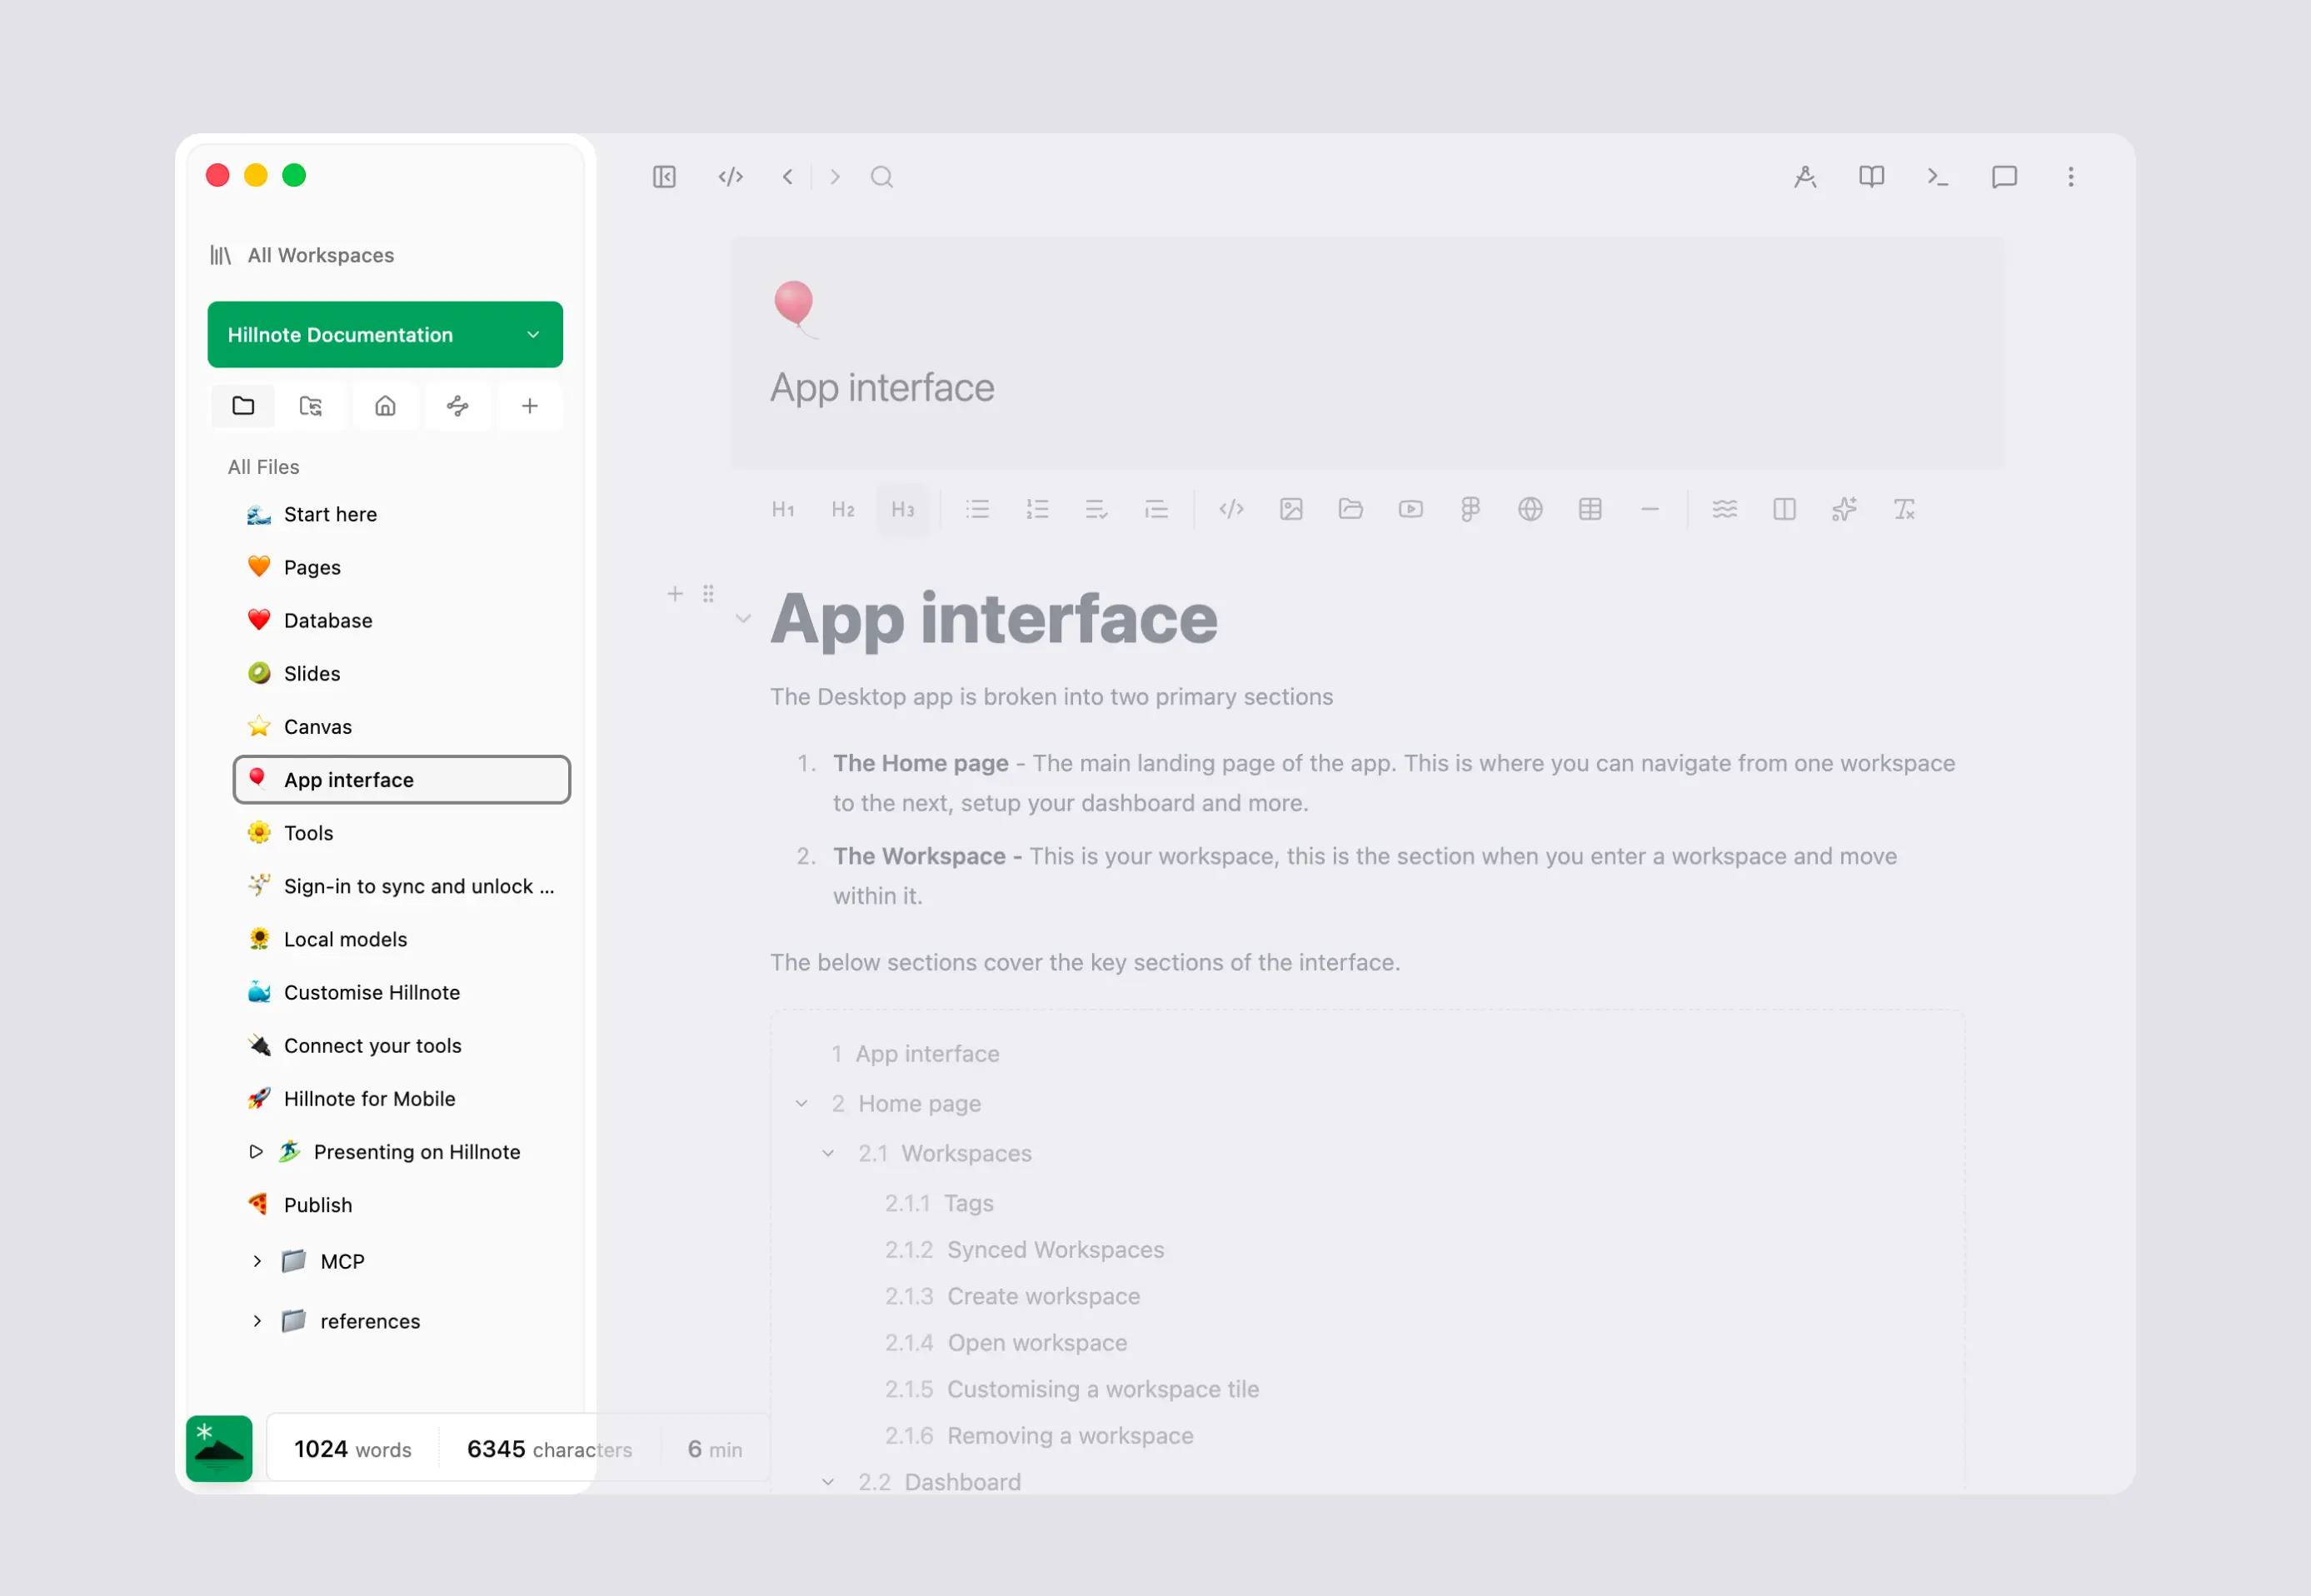
Three dot menu has a few options specific to the file. They are namely
- Pin a file to the top (pictured below)
- Rename a file
- Share a file
- Open to the left in a sidebar
- Lock with password (see Pages )
- Delete
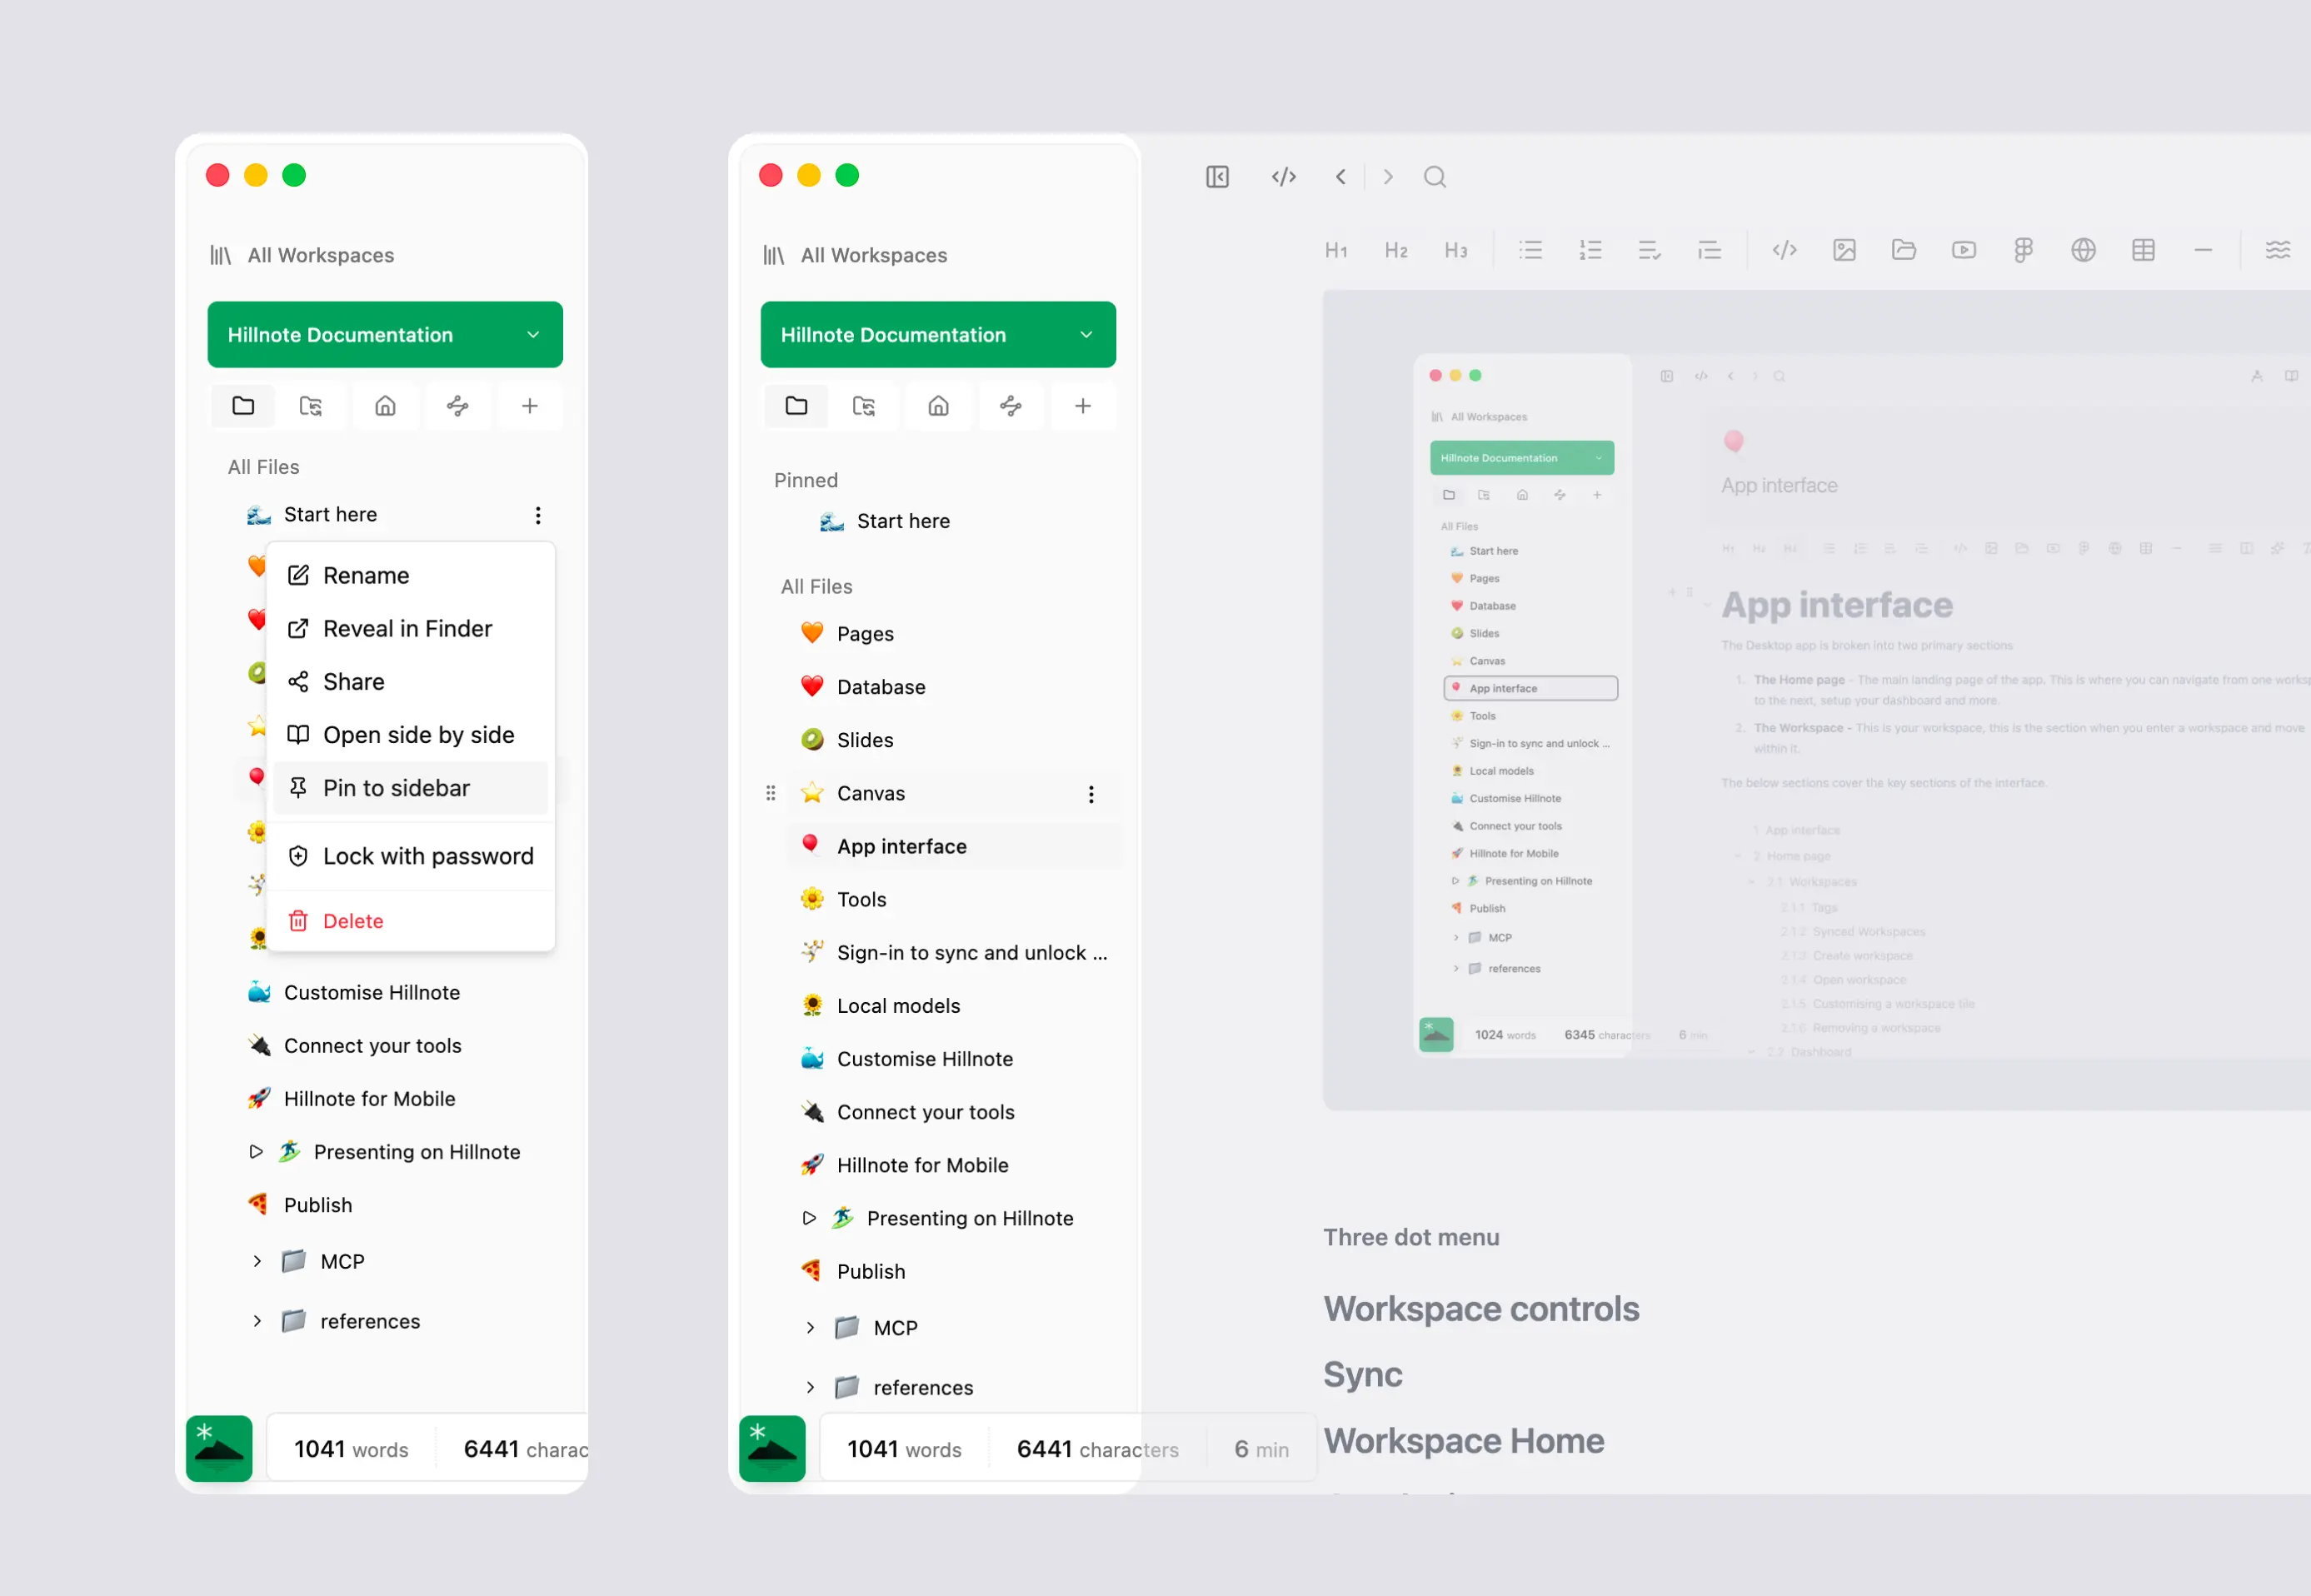
Workspace controls
Expanding the workspace dropdown should reveal all of the available workspace specific controls. They are namely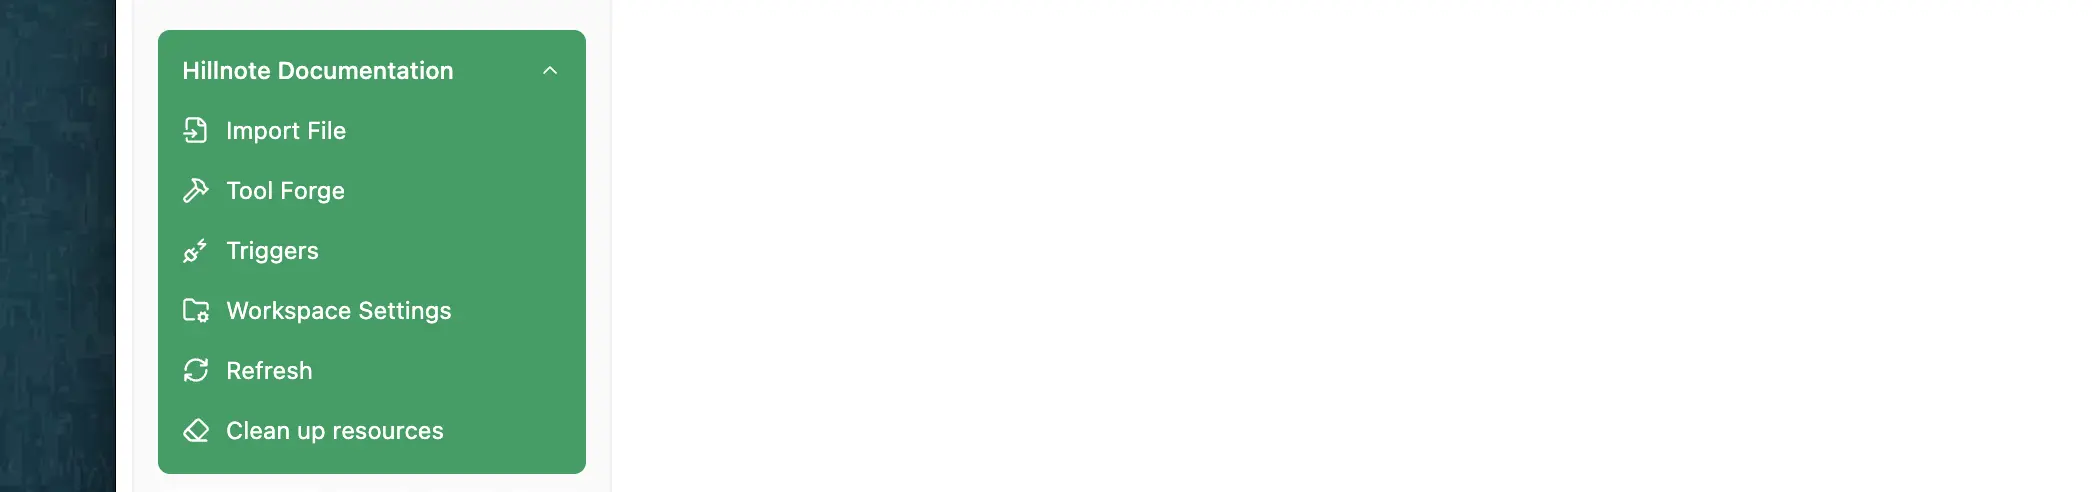 Import File: Import a multitude of files from PDF’s , excel sheets, word documents and more and add them to your workspace as markdown files.
Tool forge: Build custom tools and HTML files using tool forge and AI. Just describe the tool, choose a model and build the tool! More information available in Tools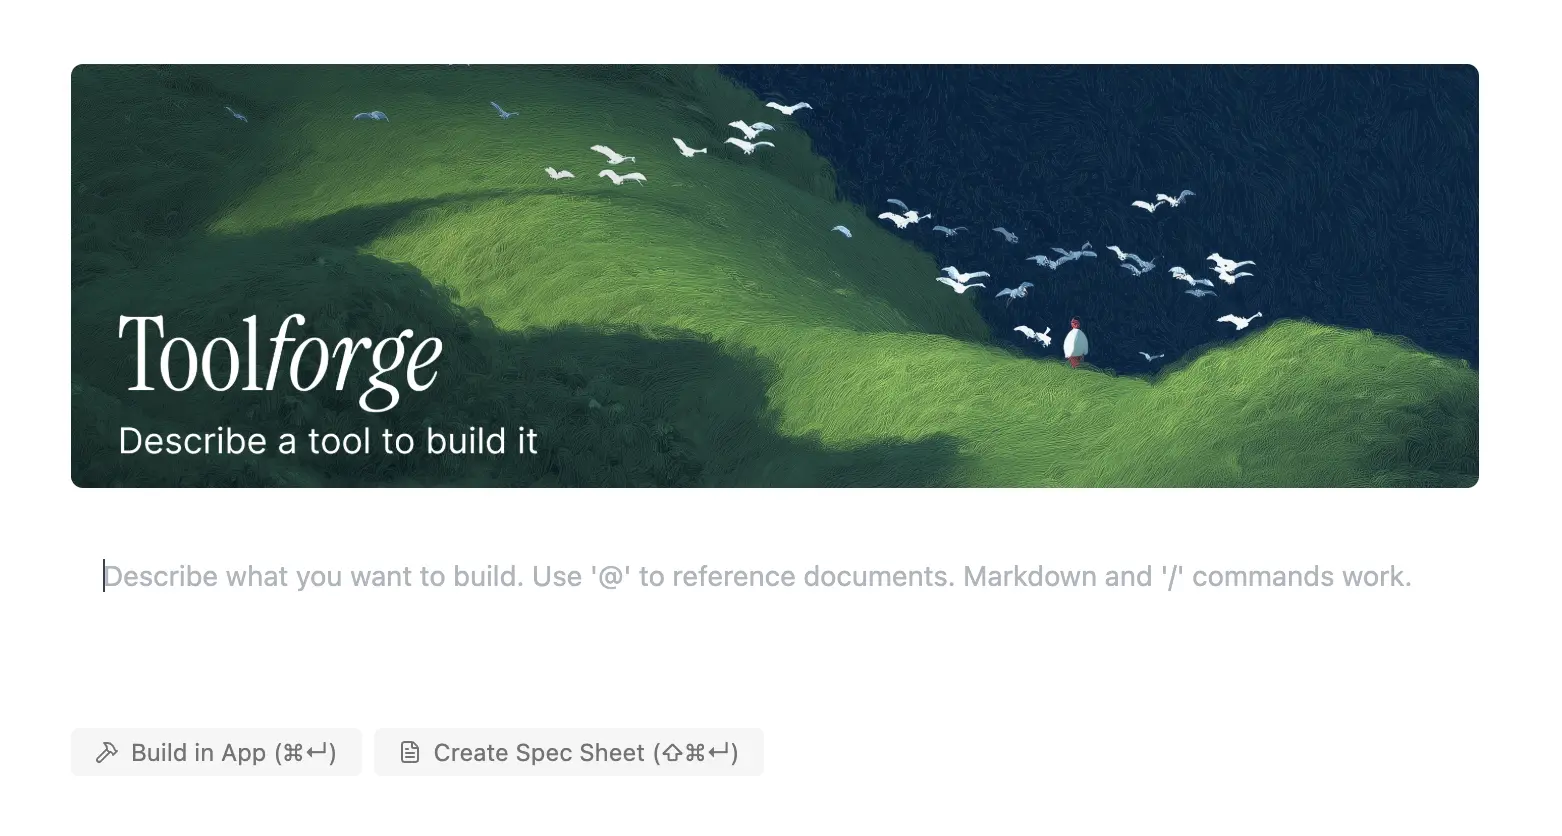 Triggers: Triggers help setup routines or actions in the server based on the your files changes and your workspace actions. These actions can be then setup at hillnote.com/dashboard.
  Workspace settings: Is the document registry to allow you to add descriptions or notes to files for models to know while traversing the registry. You also can prepare recipes here. Recipes are preset prompts to access via the ‘/' command in chat or in a document. They accept specific inputs and allow you to run a preset command with preset context.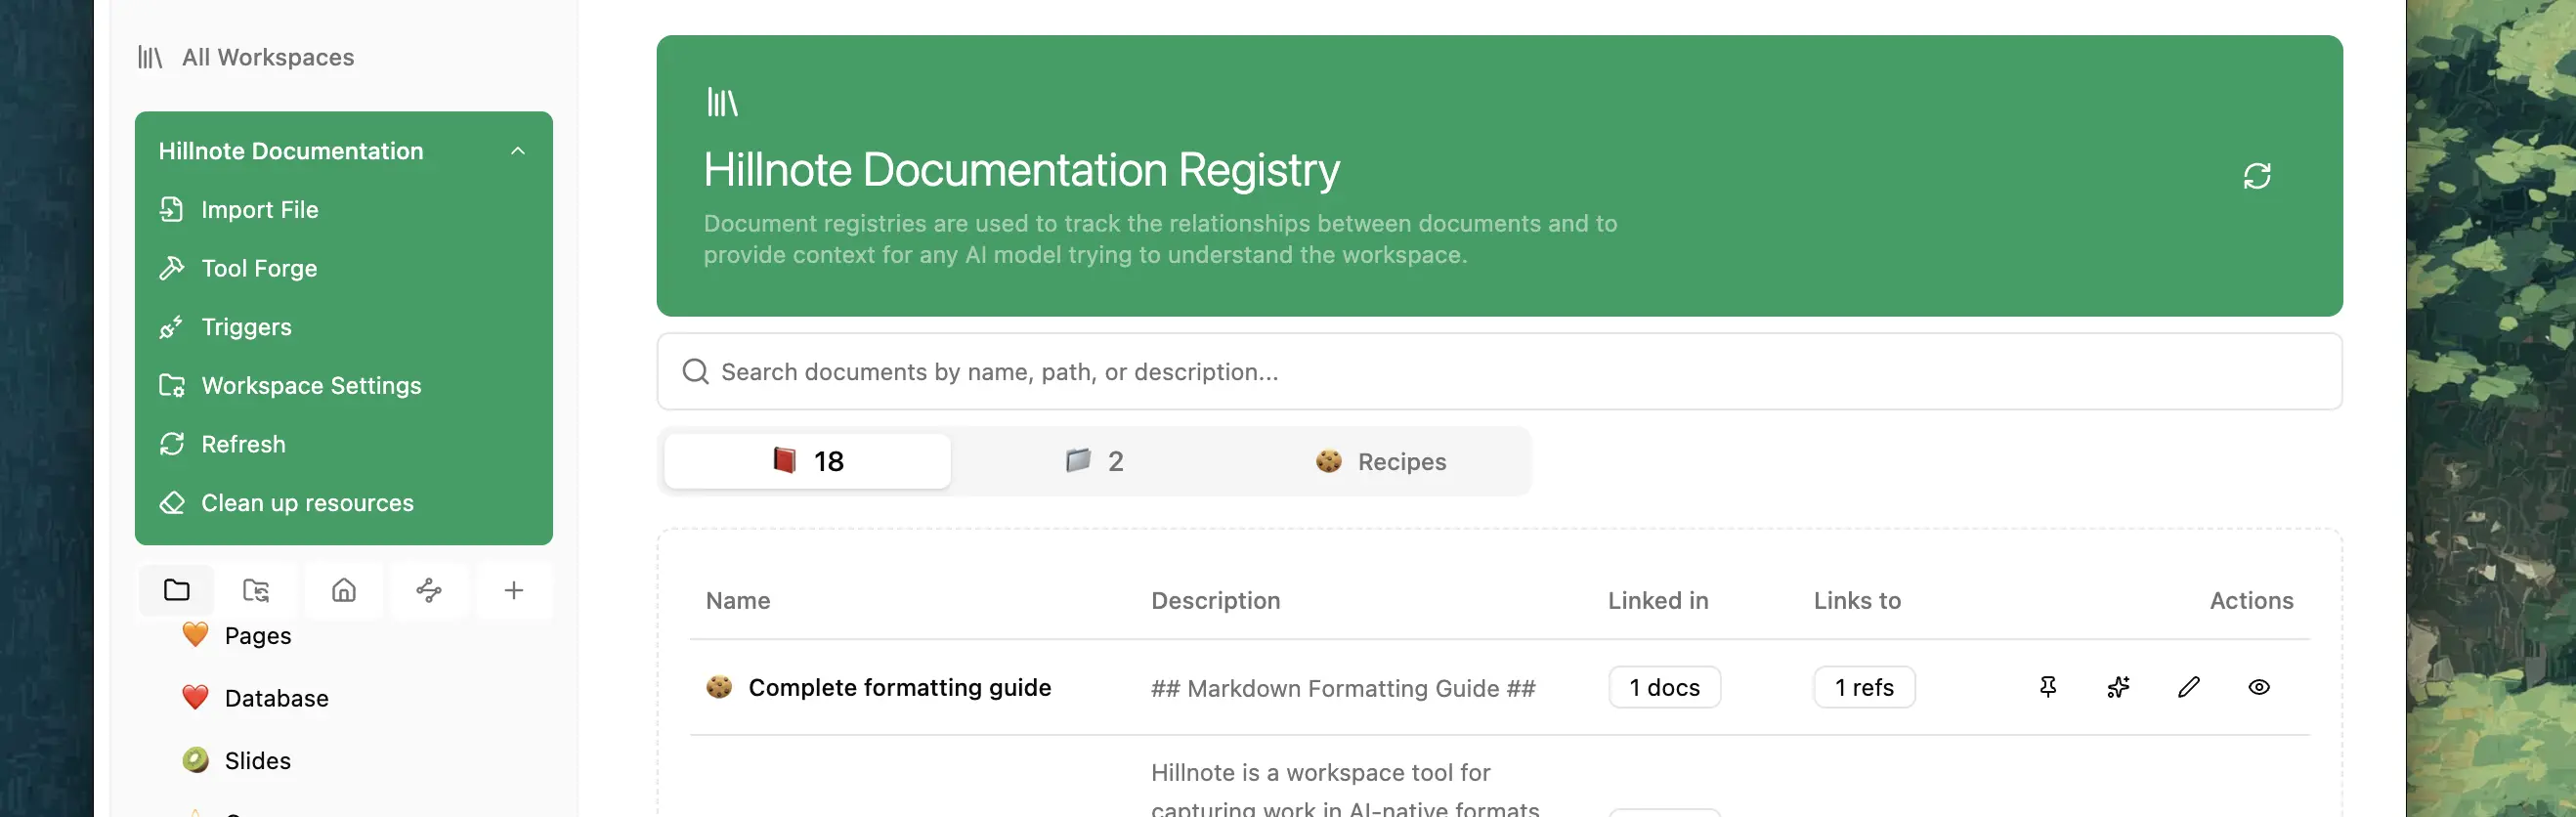
Refresh: refreshes the file tree based on any external changes outside of hillnote.
Clean up resources: deletes any extra assets in the resources folder not currently used in the workspace.
Sync
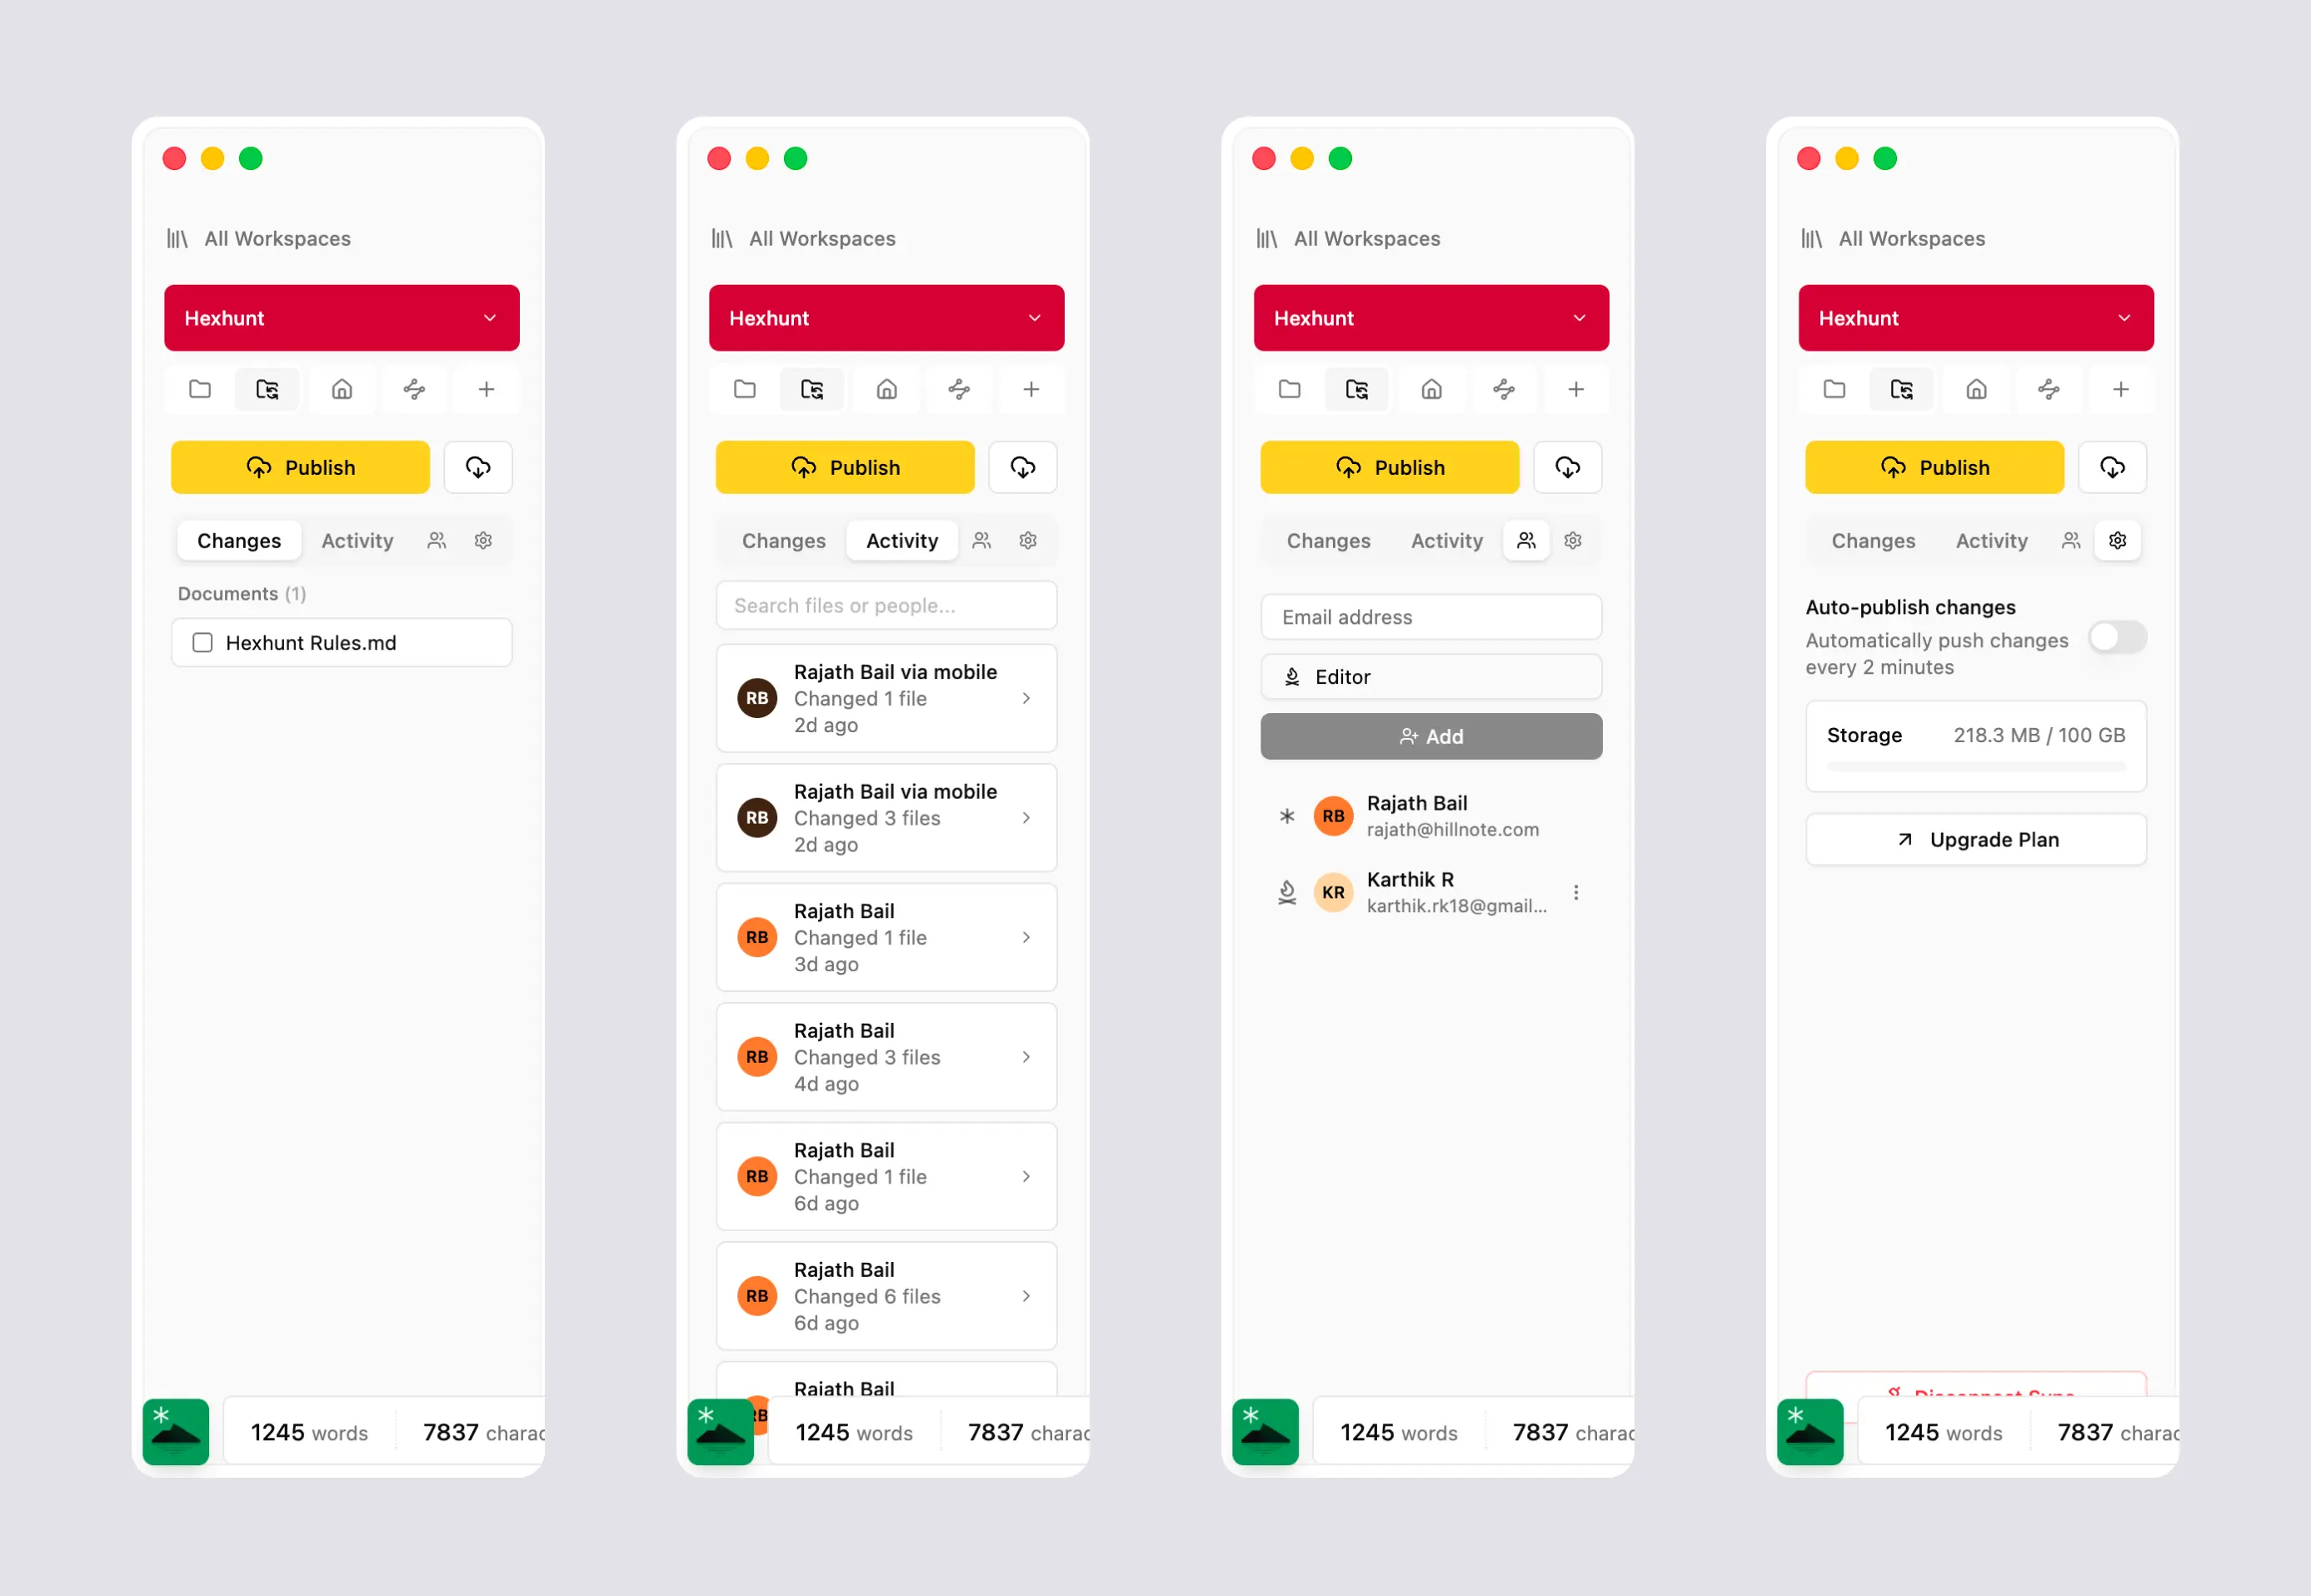 The sync tab is where all of your sync related controls live. To sync a workspace you need first click on publish. Once published you can view all activity and begin using the sync tab.
- Changes showcases all of the files changed. You can always select a file and discard changes.
- Activity covers all activity both by you and the models
- Collaborators allows you to add collaborators to the account. Collaborators are of 2 types. Admin and editor
- Admins can add other users and edit and work on files
- Editors can ONLY work on files and not add other users
- Settings allows you to configure the sync settings.
- Auto publish eliminates the need for manual publishing and pushes your changes every 2 minutes.
- Storage show cases the storage remaining in your account.
Workspace Home
Clicking on home takes you back to the workspace home tab
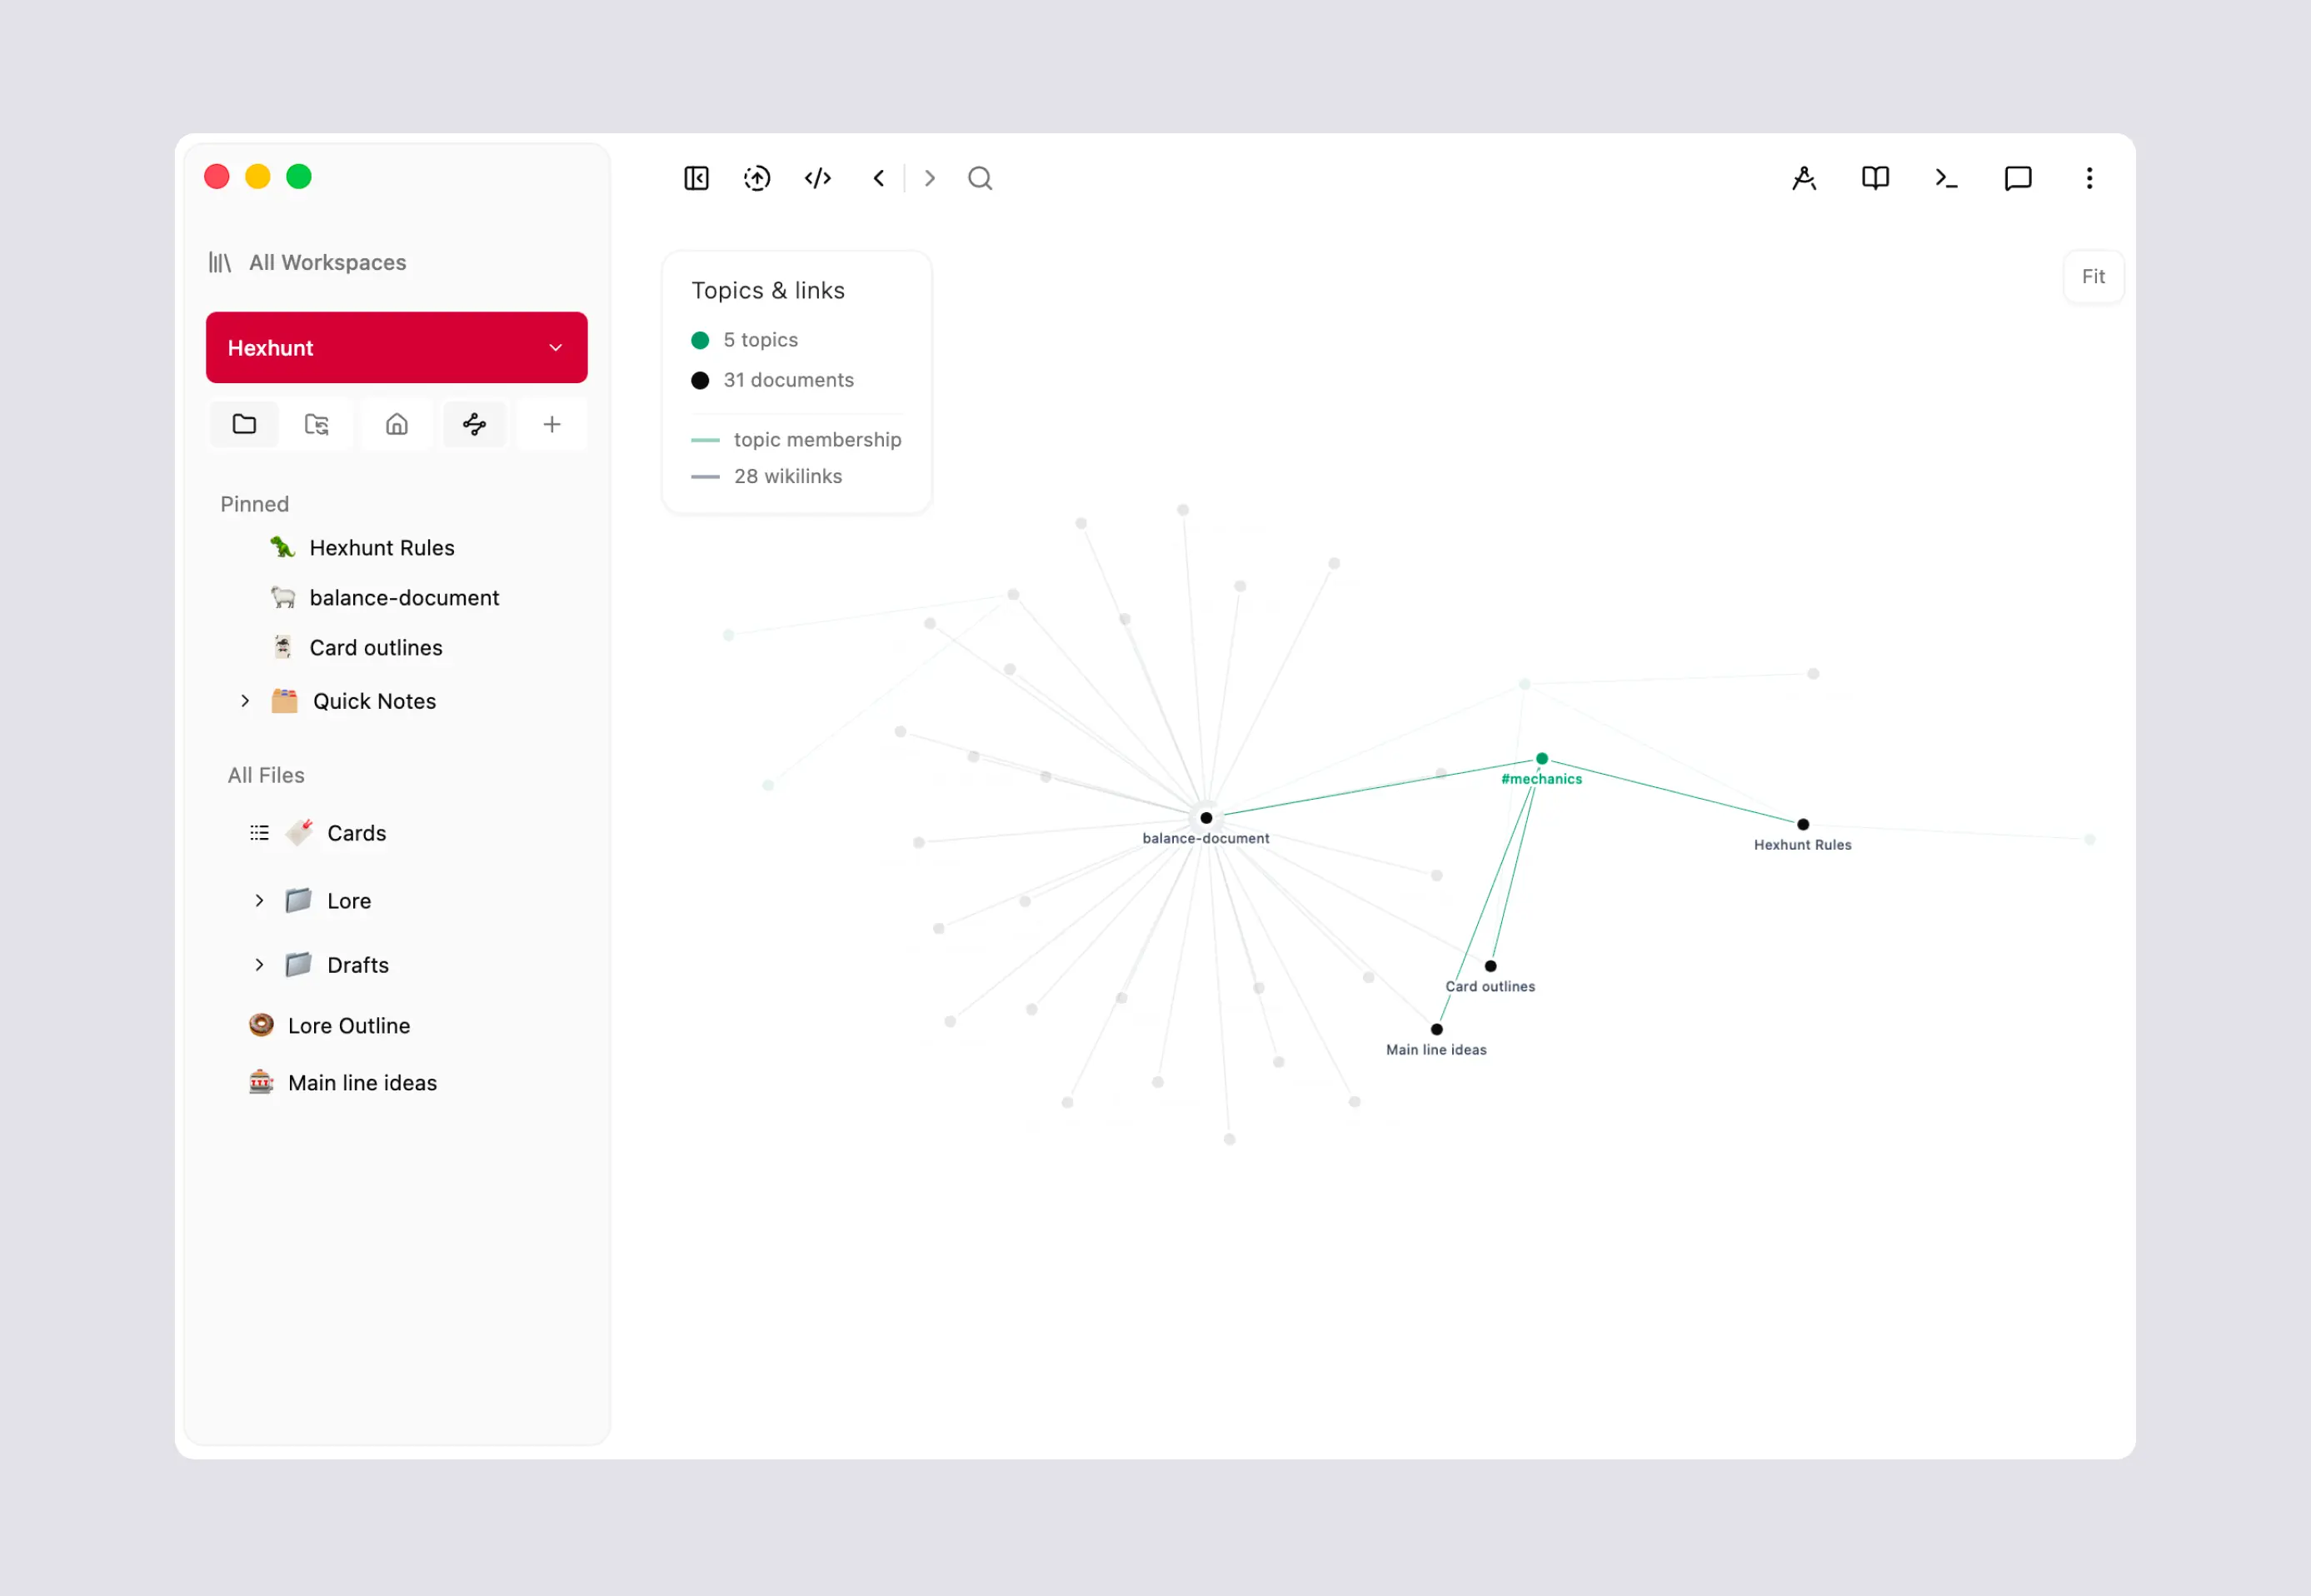
Graph view
You can get an overview of how your documents connect and the topics relate across your workspace in an interactive graph view. This helps surface relationships that you may have otherwise not seen.
Topics are ‘#’ led words that are used to connect documents across one-another.
Create
Pressing the ‘+’ button opens the create menu to add a new page, slide, canvas, folder, database, calendar, Kanban board and more in the workspace.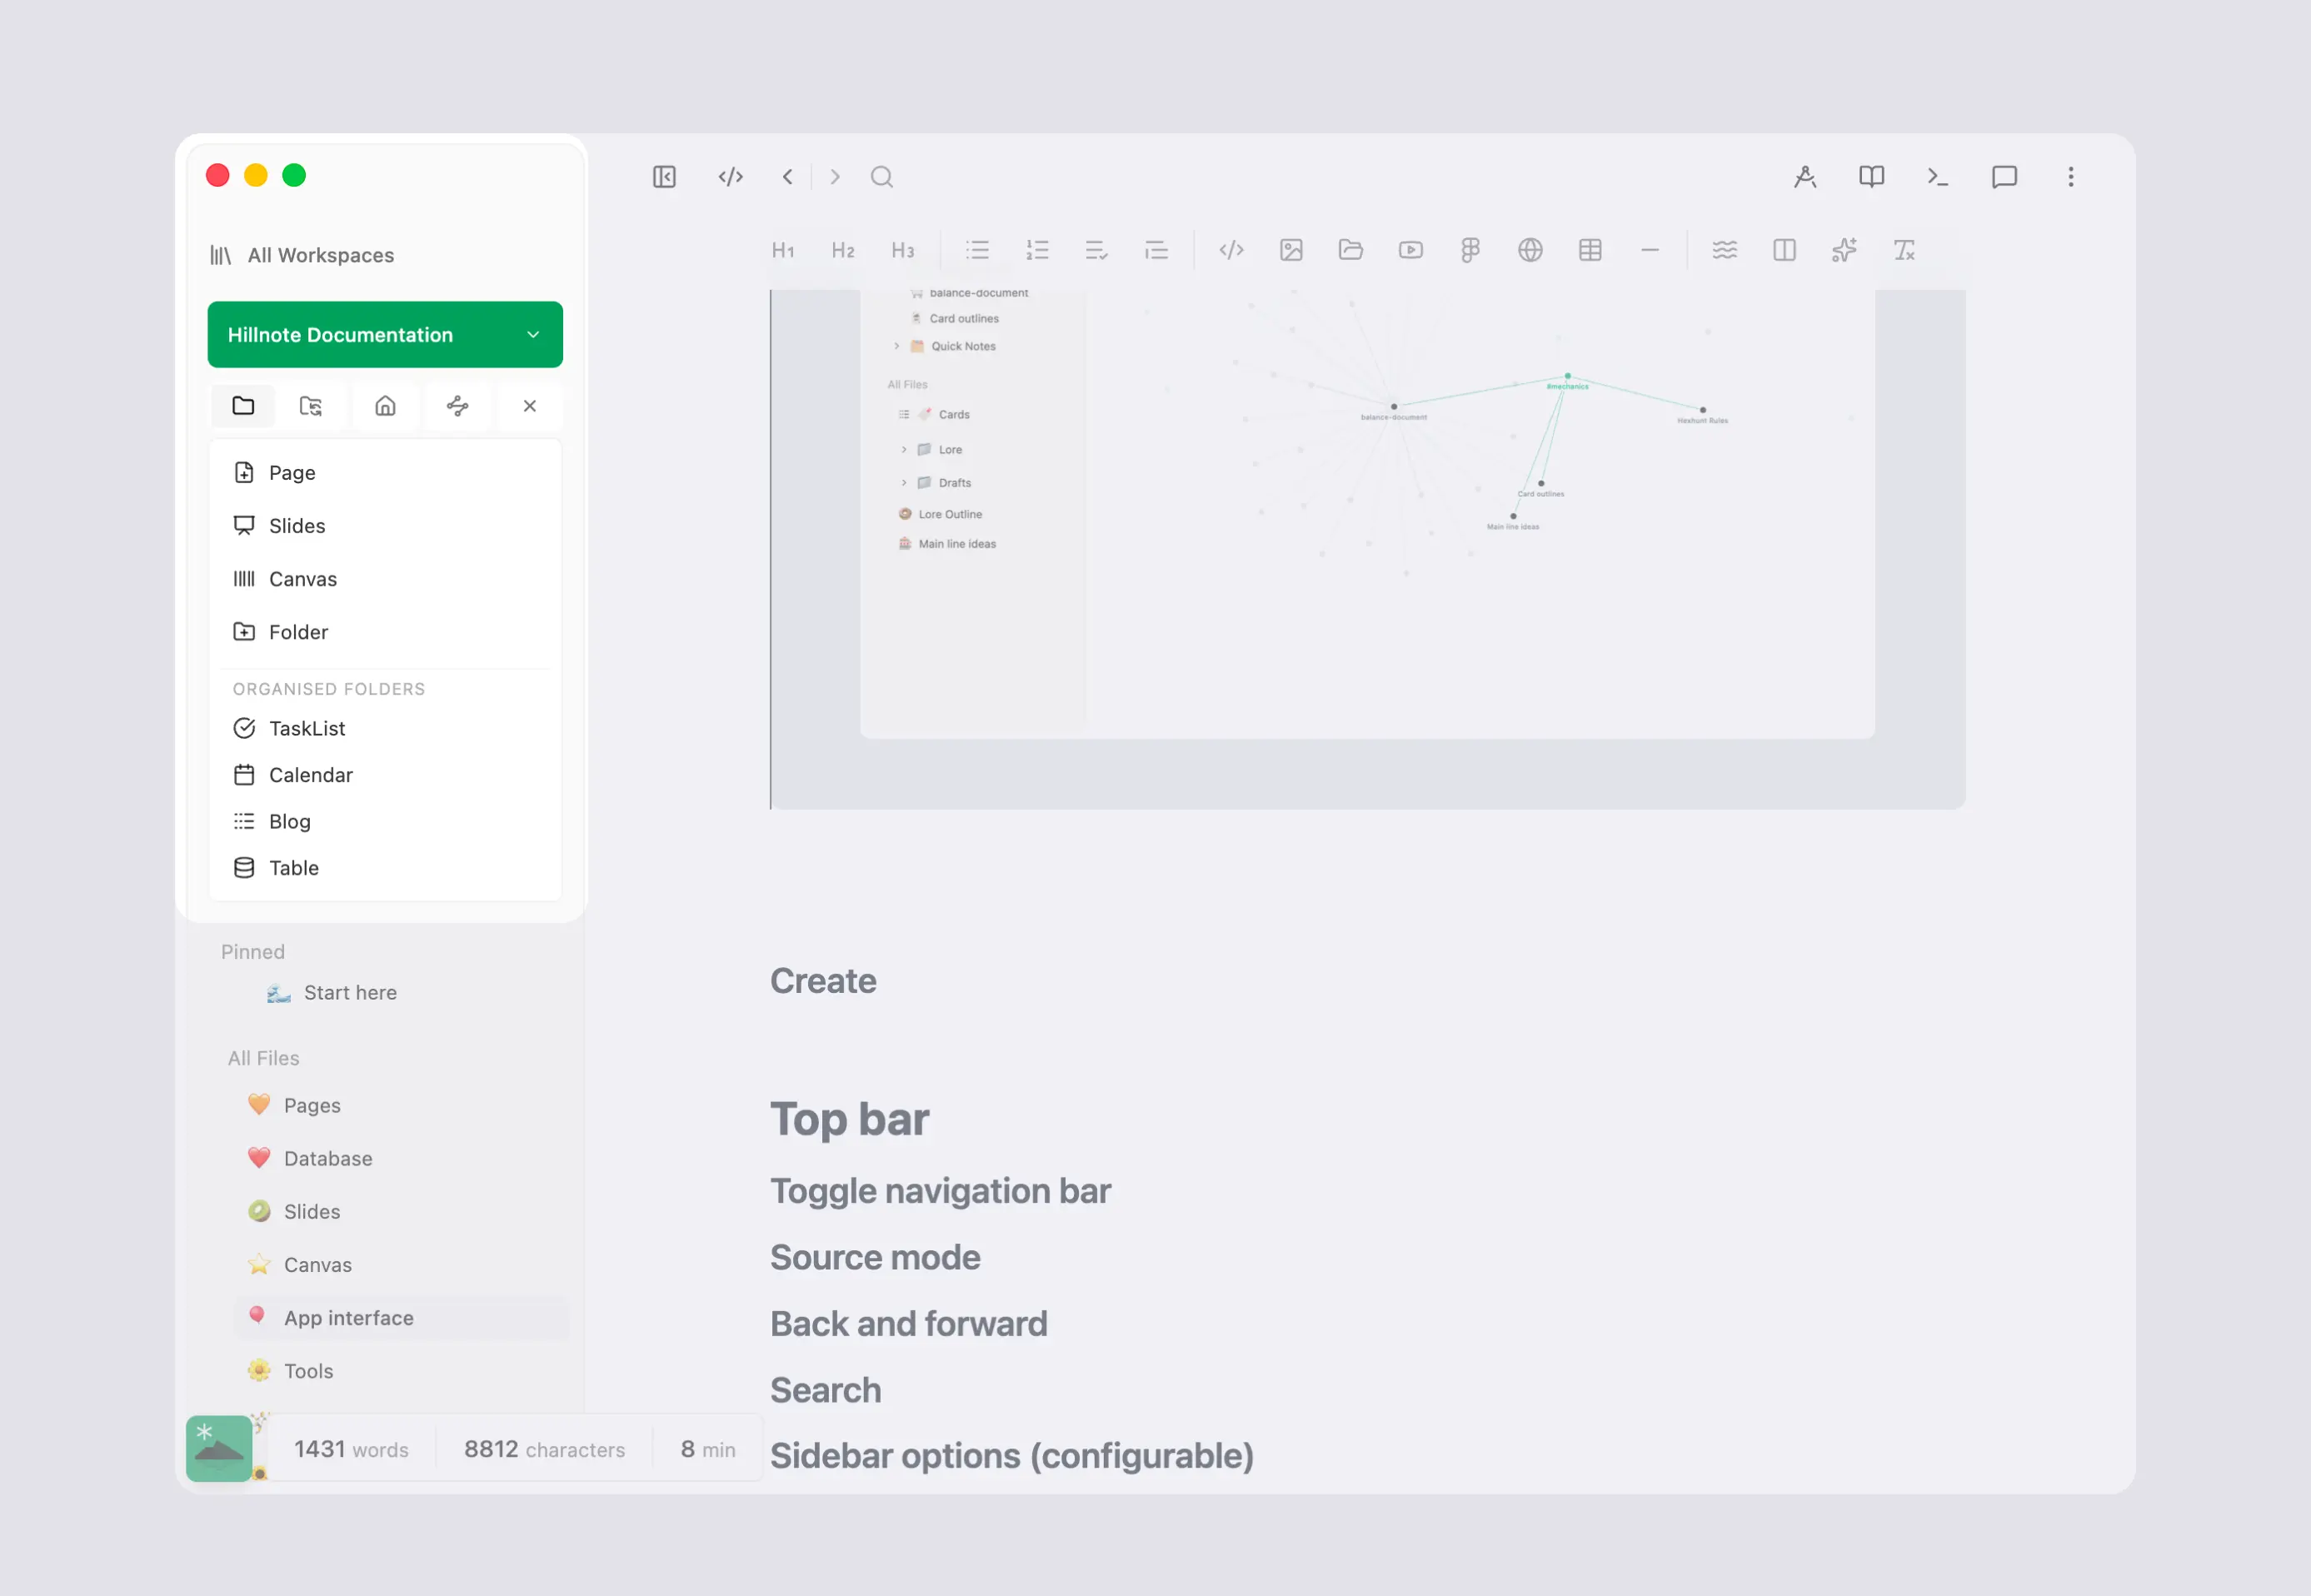
Top bar
The top bar is the main surface for all the tools you need while on your workspace.
Toggle navigation bar: allows you to open and close the navigation sidebar to the left
Source mode: switches to show you the markdown version of your file
Back and forward: allows you to move to the previous file that you were on and the file that you navigated back from respectively.
Search: Allows you to search across the workspace for files, databases, etc to quickly navigate across.
Sidebar options (configurable): These are the buttons on the top right of the app. These buttons help open different tools in your sidebar and are configurable from settings.
Side bar options
The list of notable sidebar options are as below
Terminal
Opens a CLI panel on the right. If you have an existing Claude, OpenAI, Gemini, Cursor or Github copilot subscription you can open the CLI tools for the same to edit your files right from the terminal sidebar.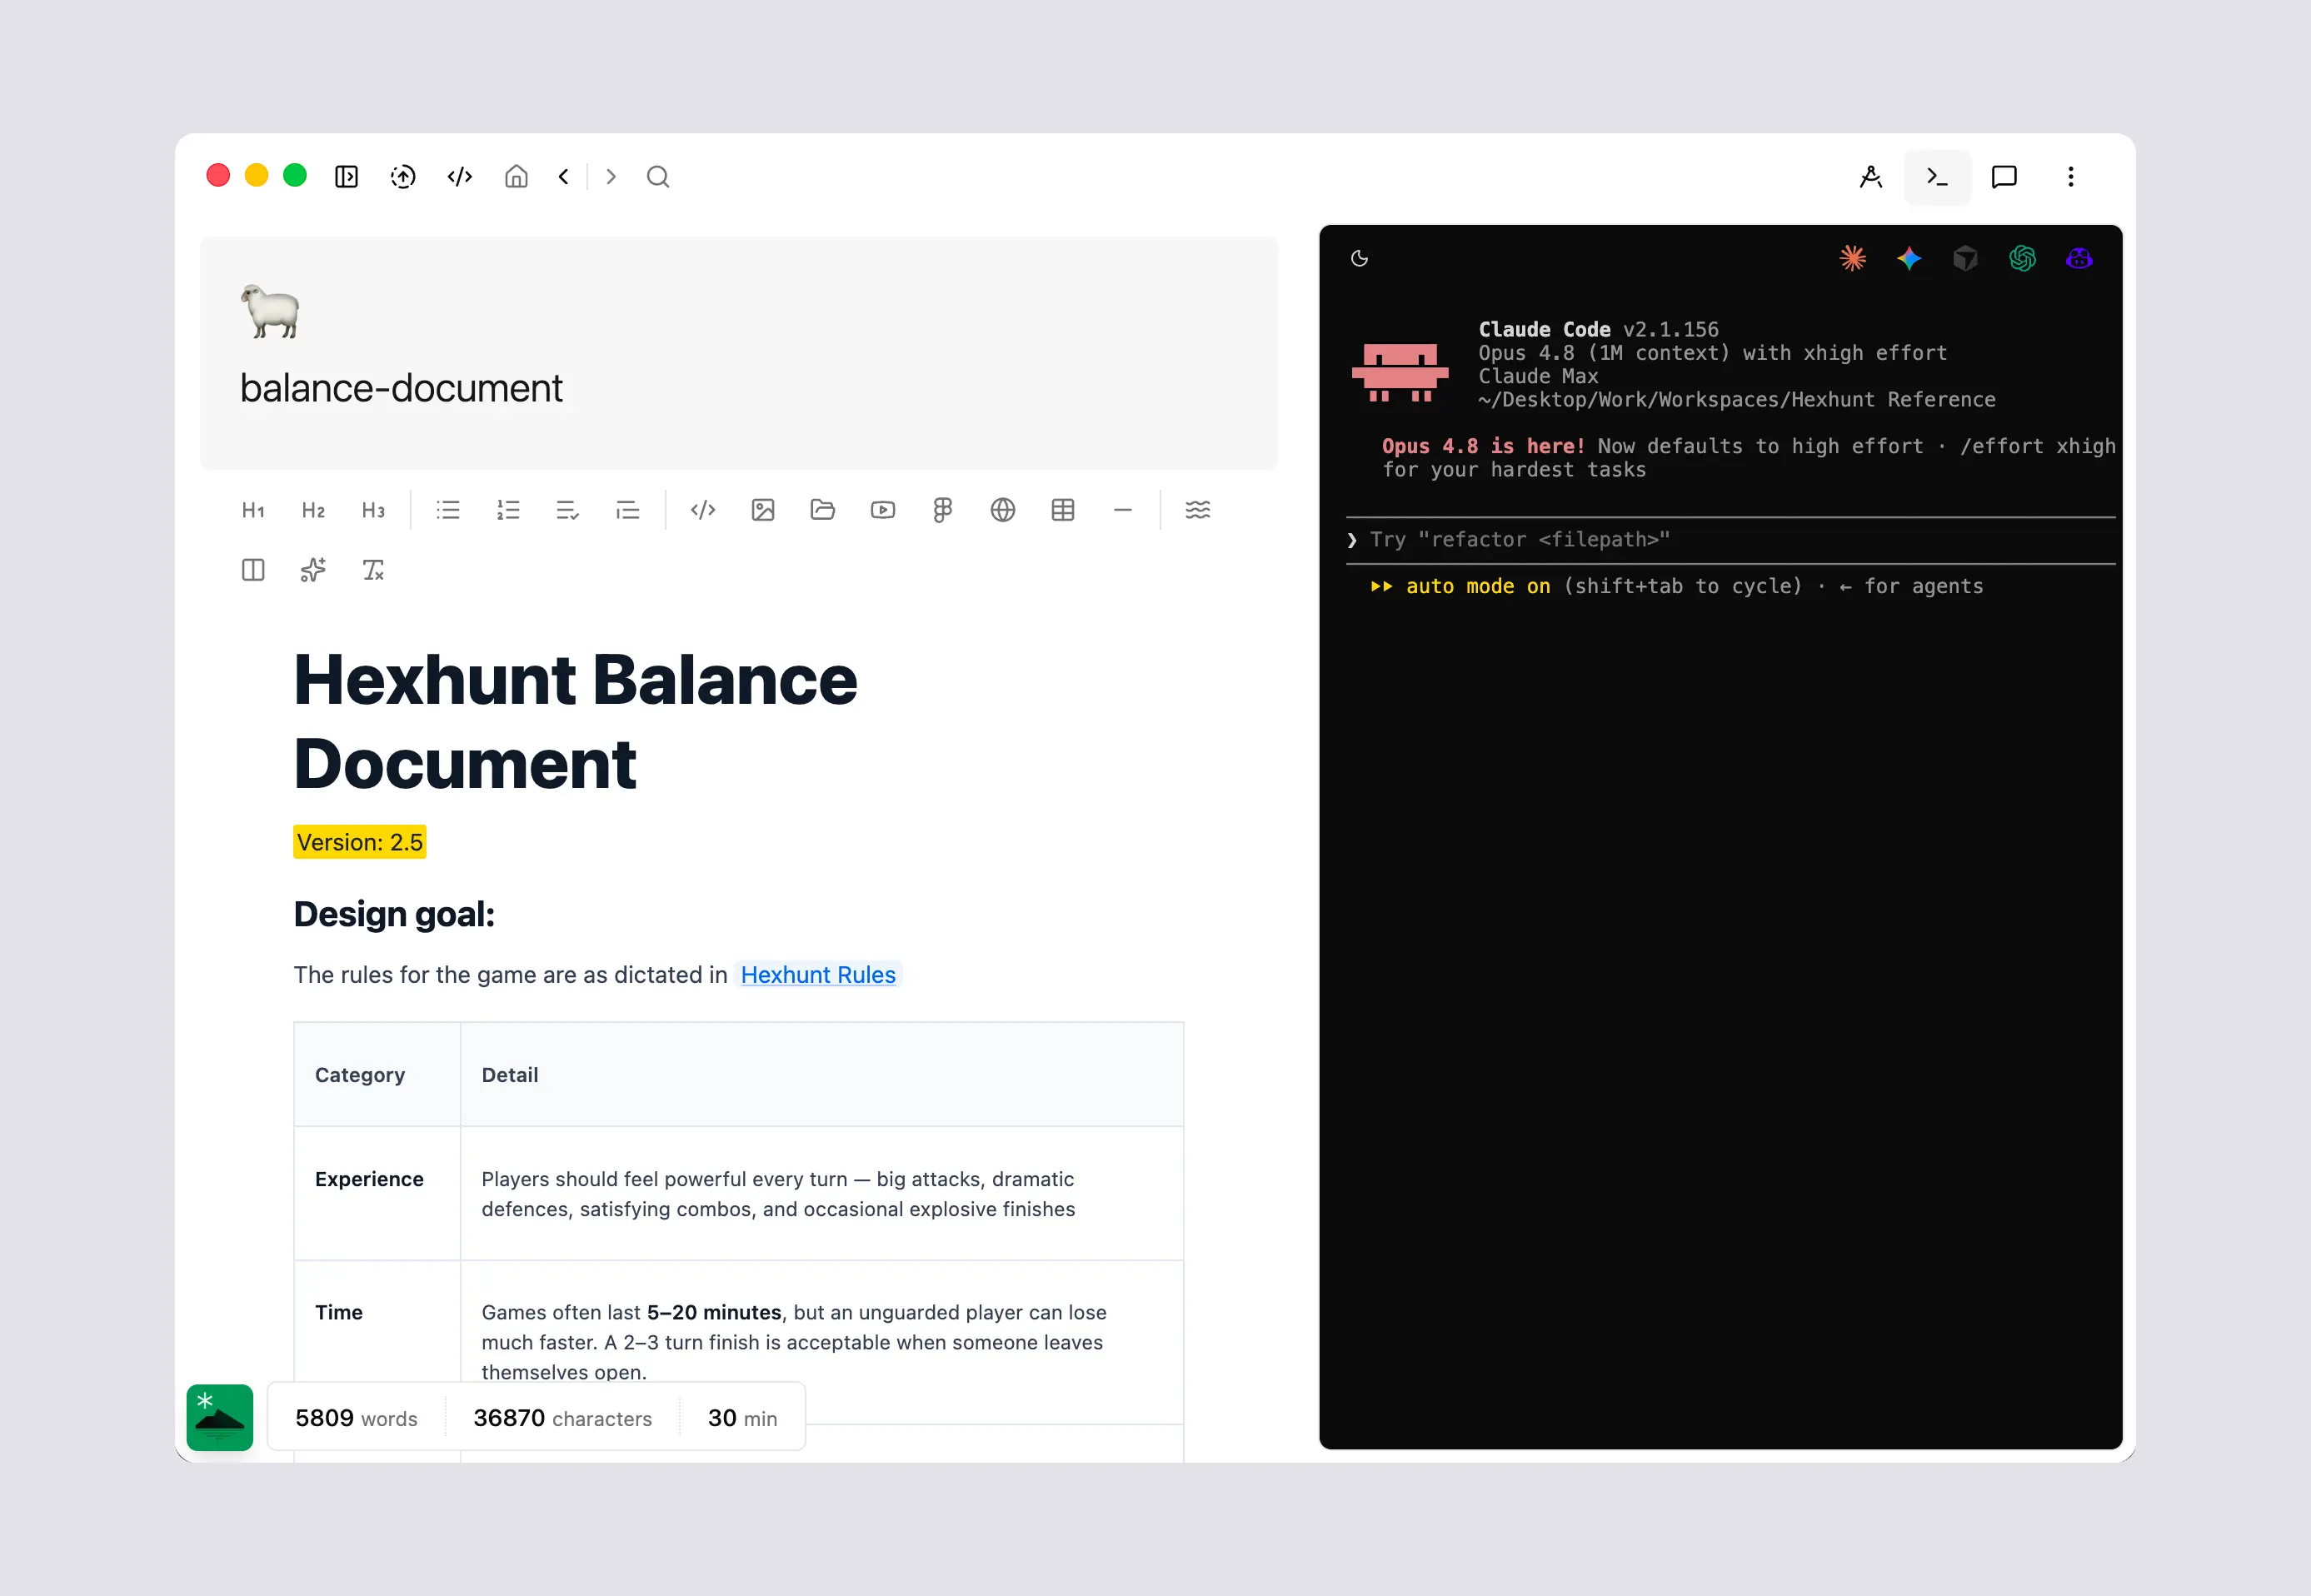 The sidebar has 3 main actions
- Toggle light and dark mode
- Clear all content
- Open once of the CLI options (Claude, Gemini/antigravity, Cursor, Open AI, Github copilot). This however requires the installation to be completed as described in settings of the various CLI tools
The CLI tools will all be primed to point at your workspace and any agents run from your CLI will gain all context via the context files in the workspace.
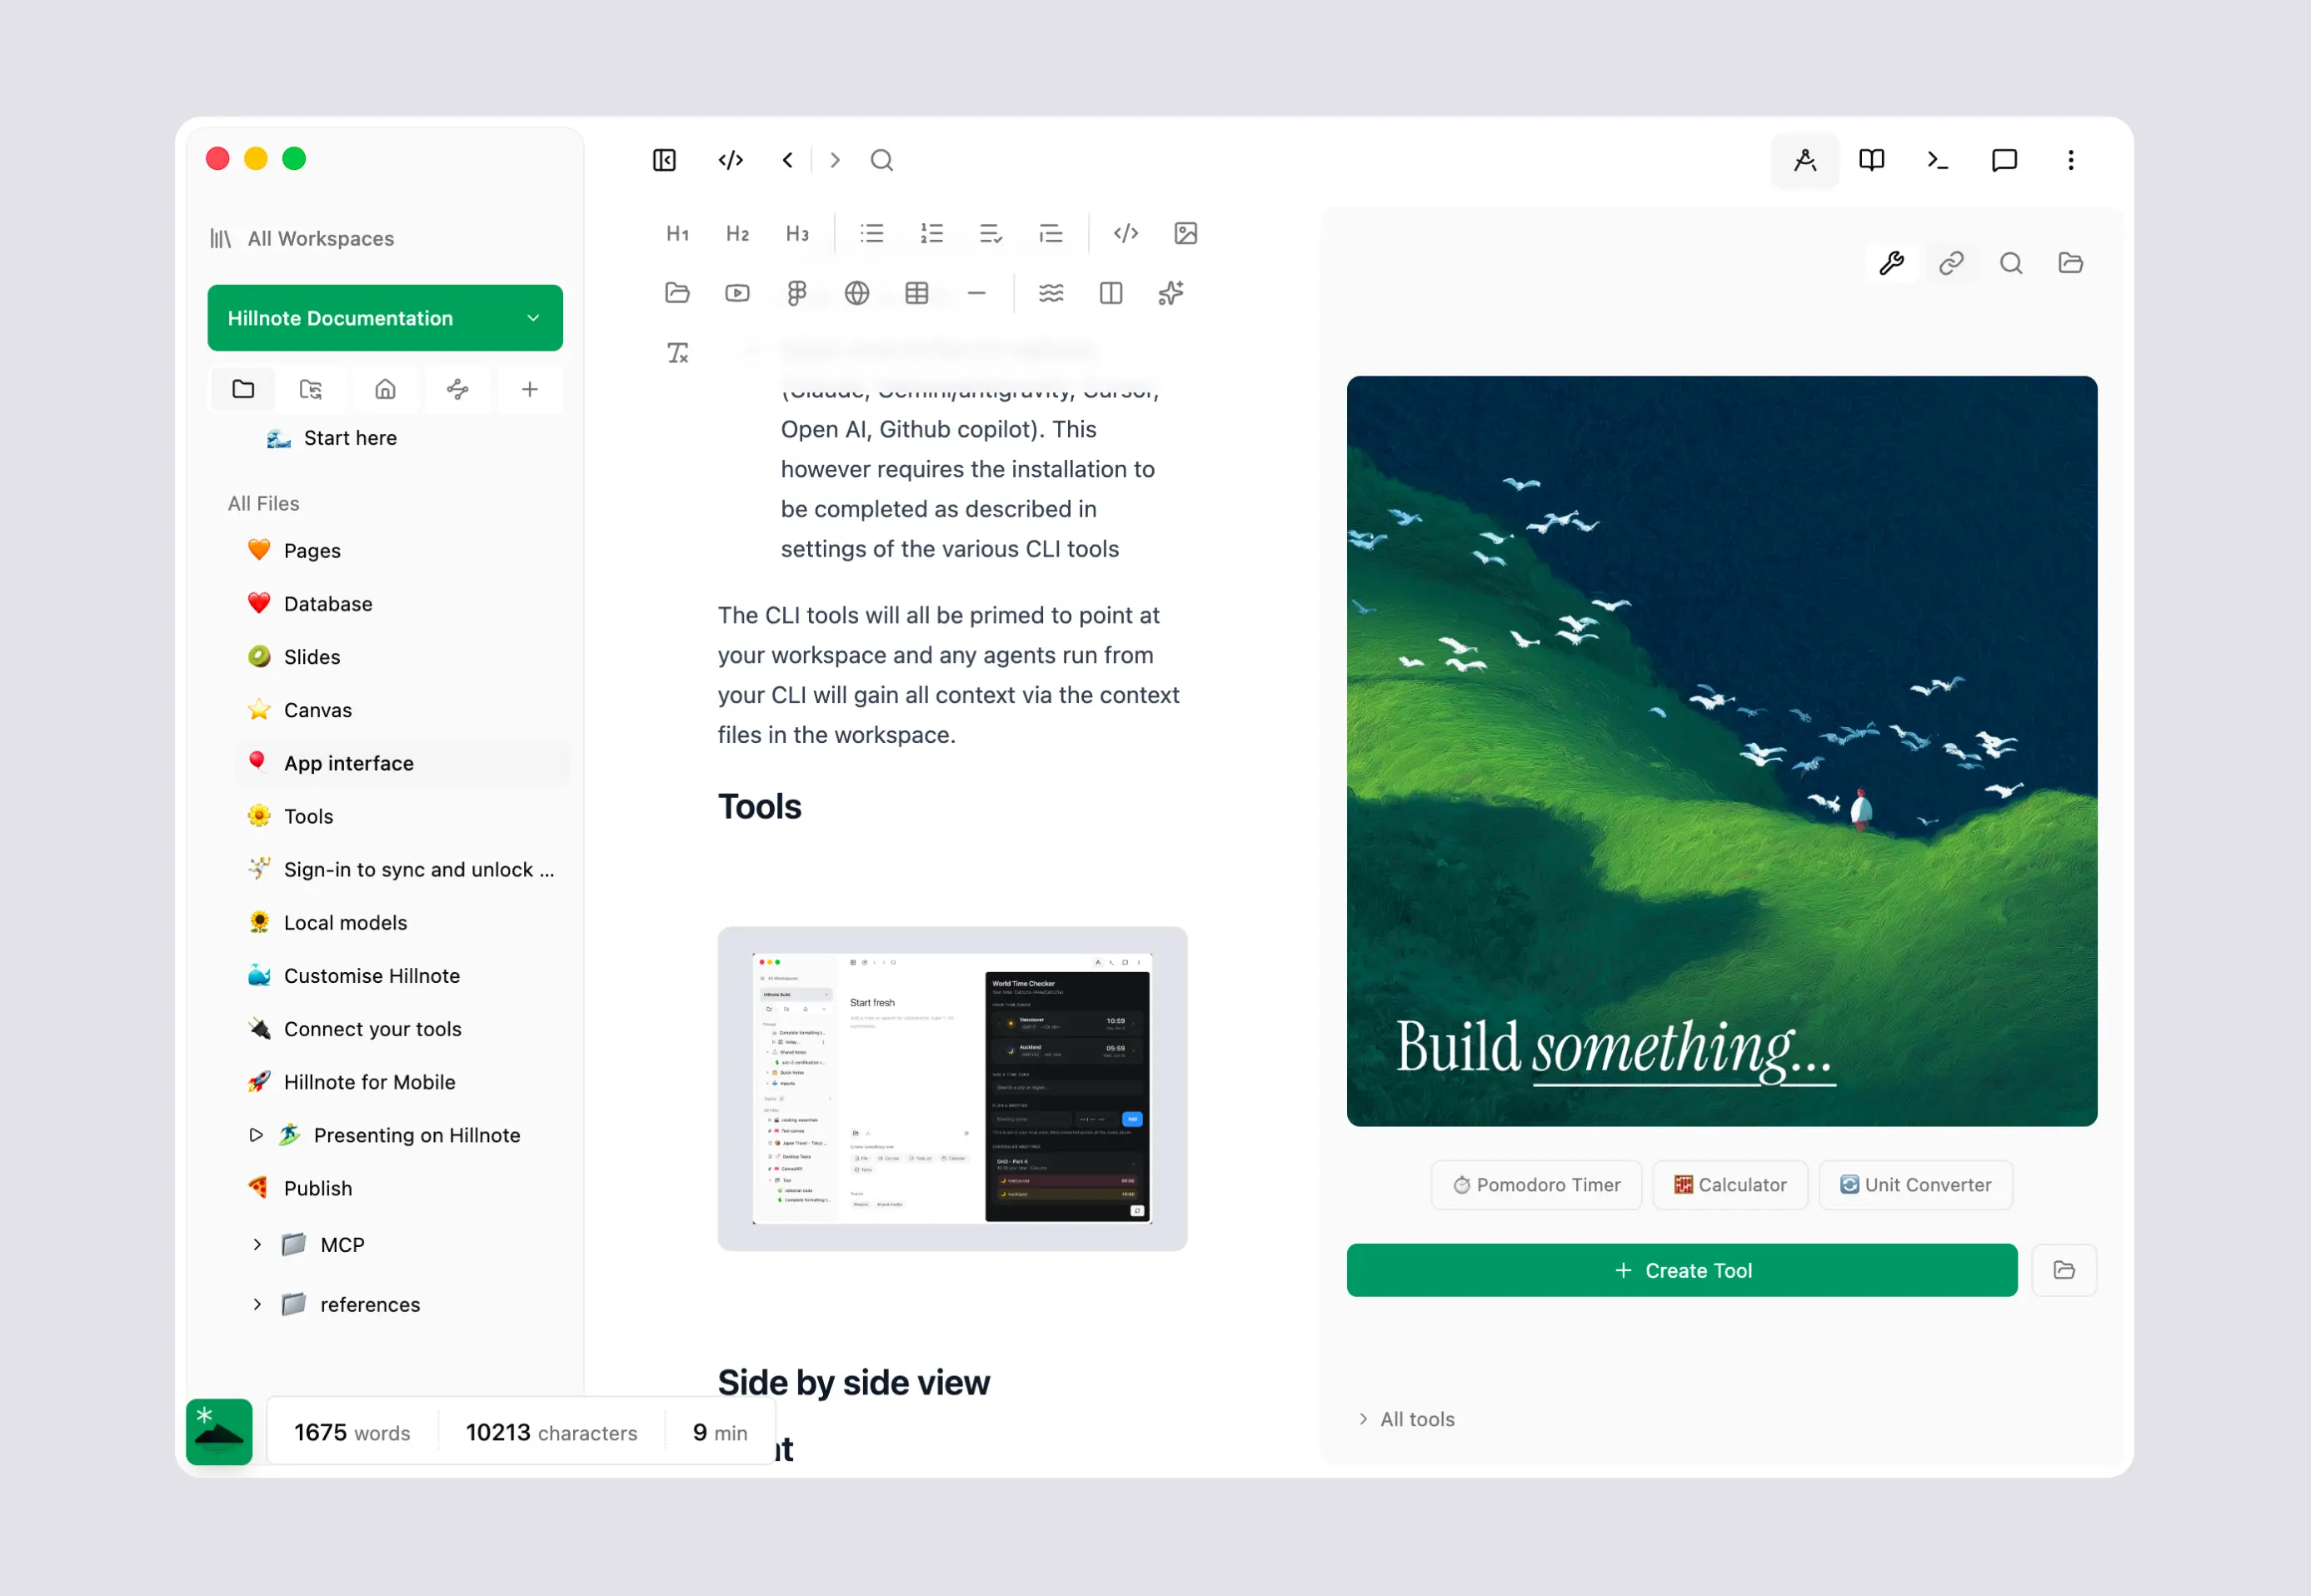
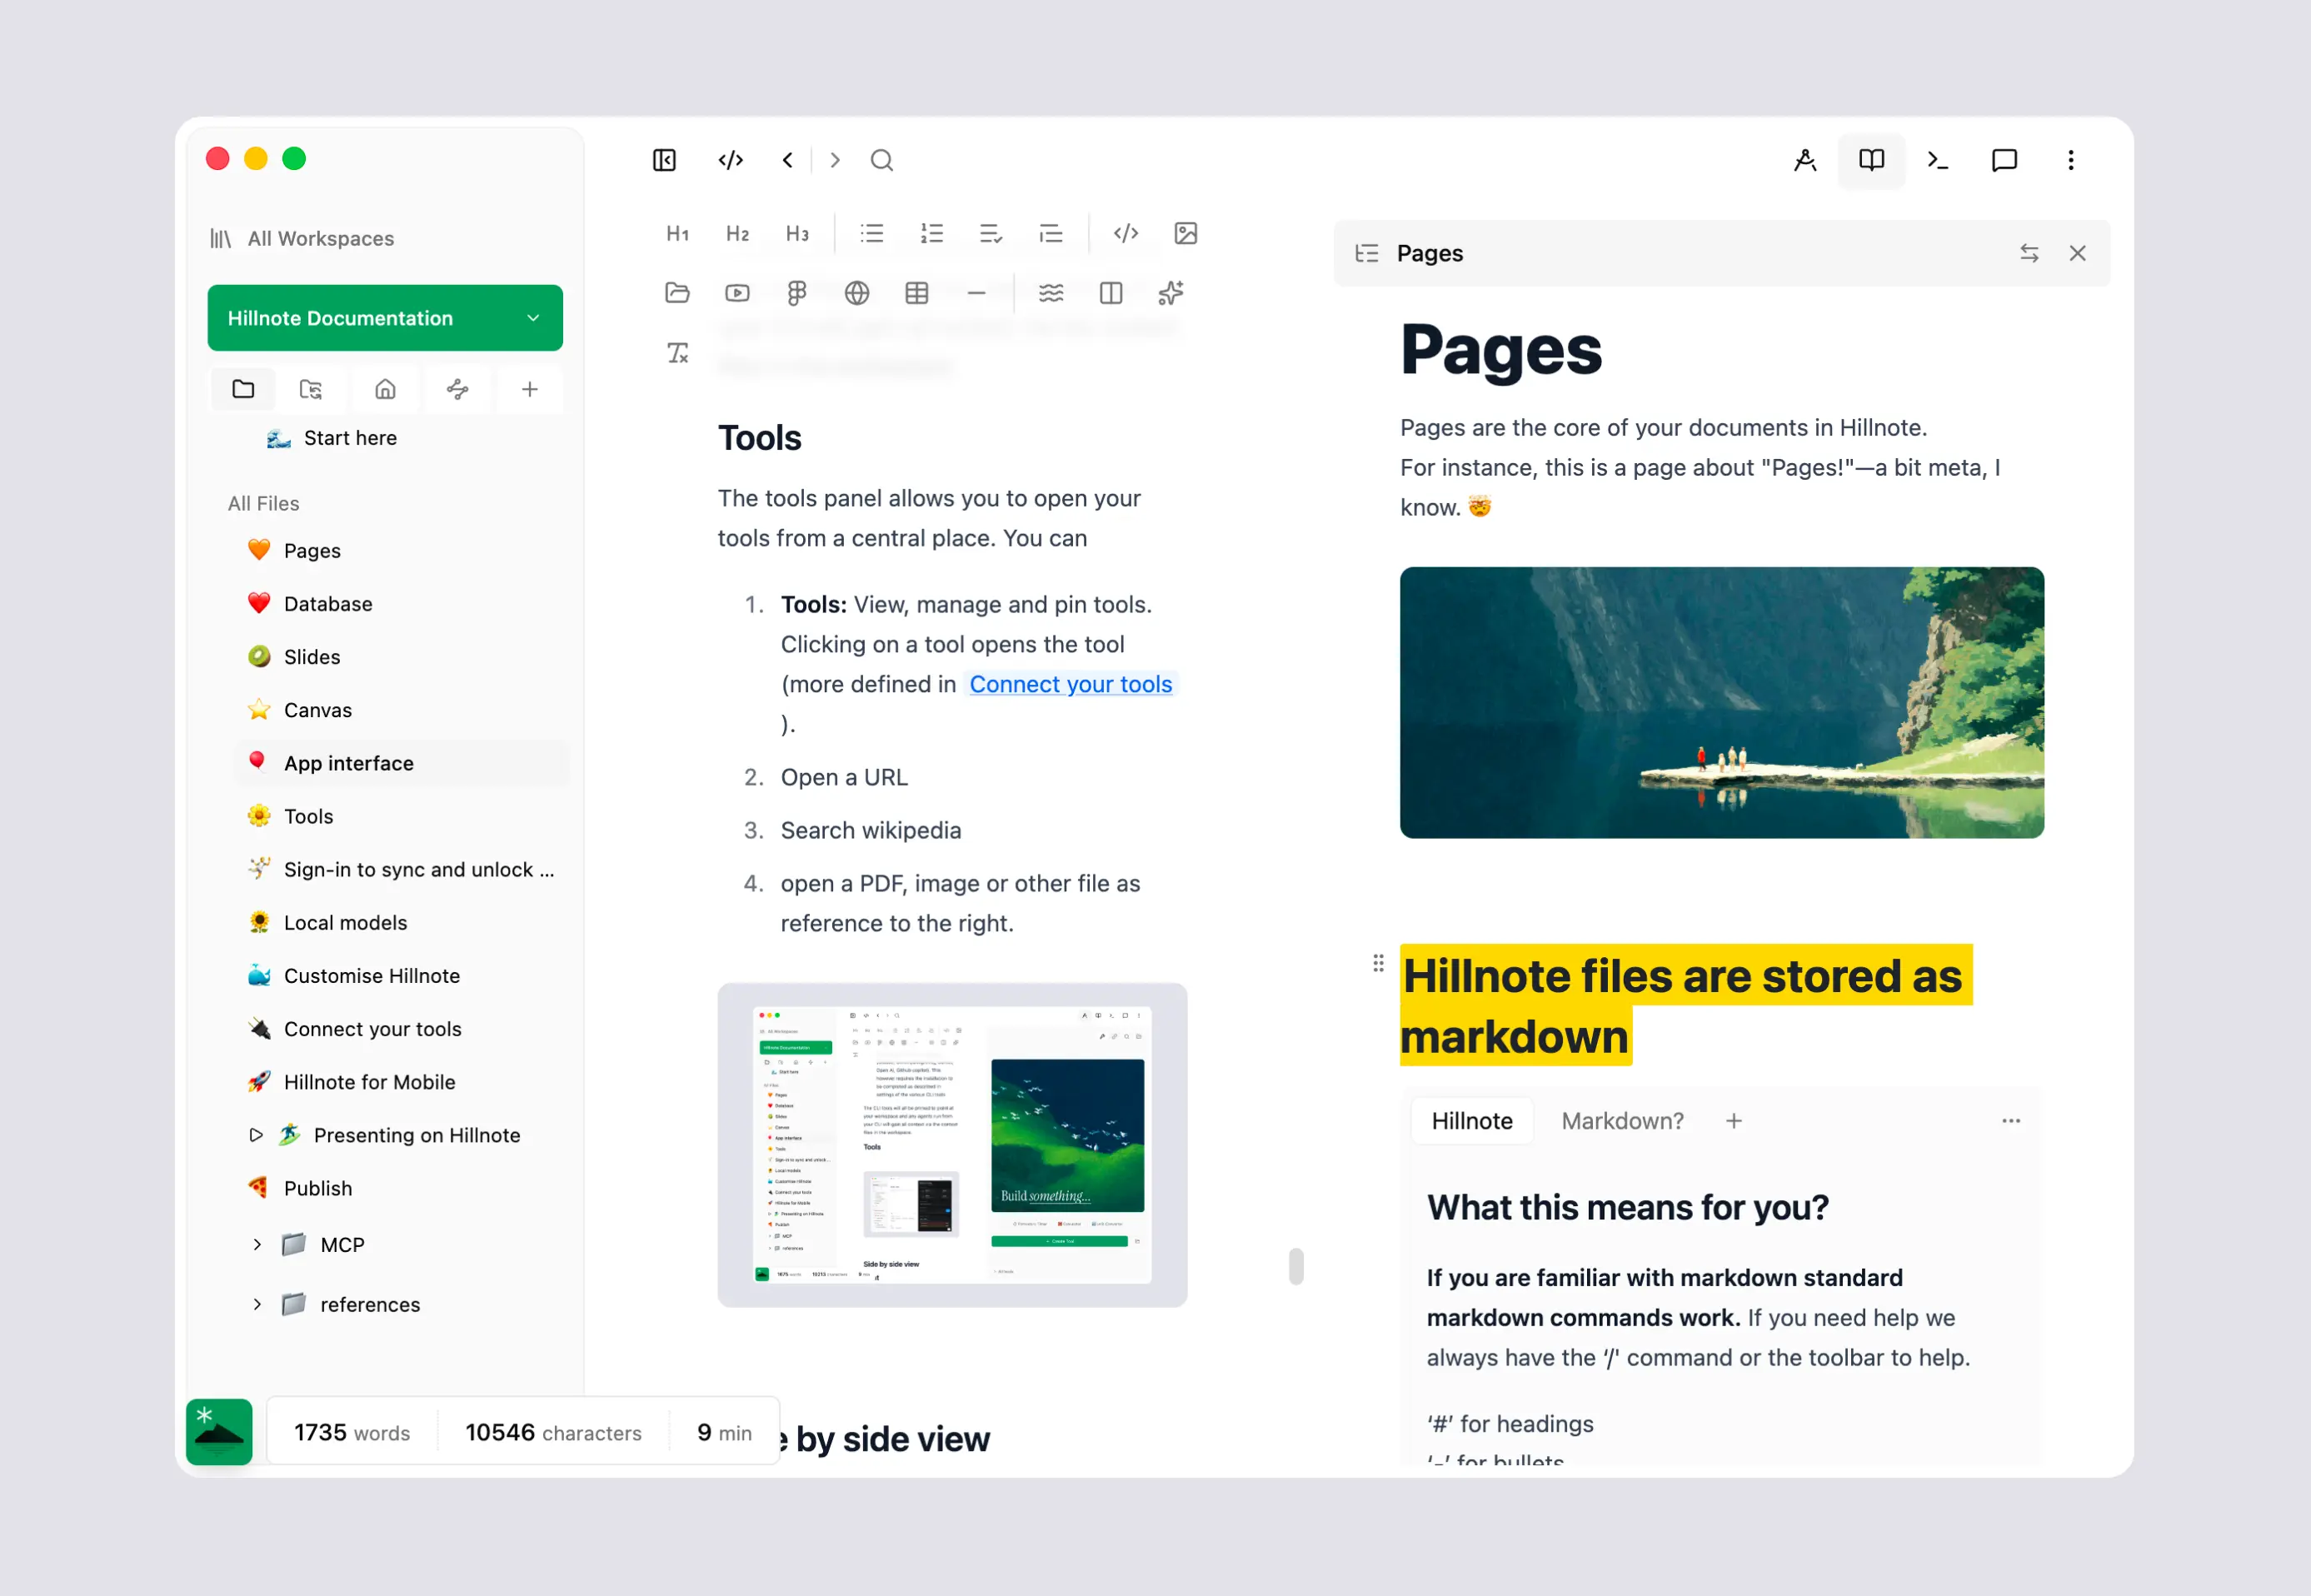
Tools
The tools panel allows you to open your tools from a central place. You can
- Tools: View, manage and pin tools. Clicking on a tool opens the tool (more defined in Connect your tools ).
- Open a URL
- Search wikipedia
- open a PDF, image or other file as reference to the right.
Side by side view
Open another document to the right of your current document to work on both files side by side.
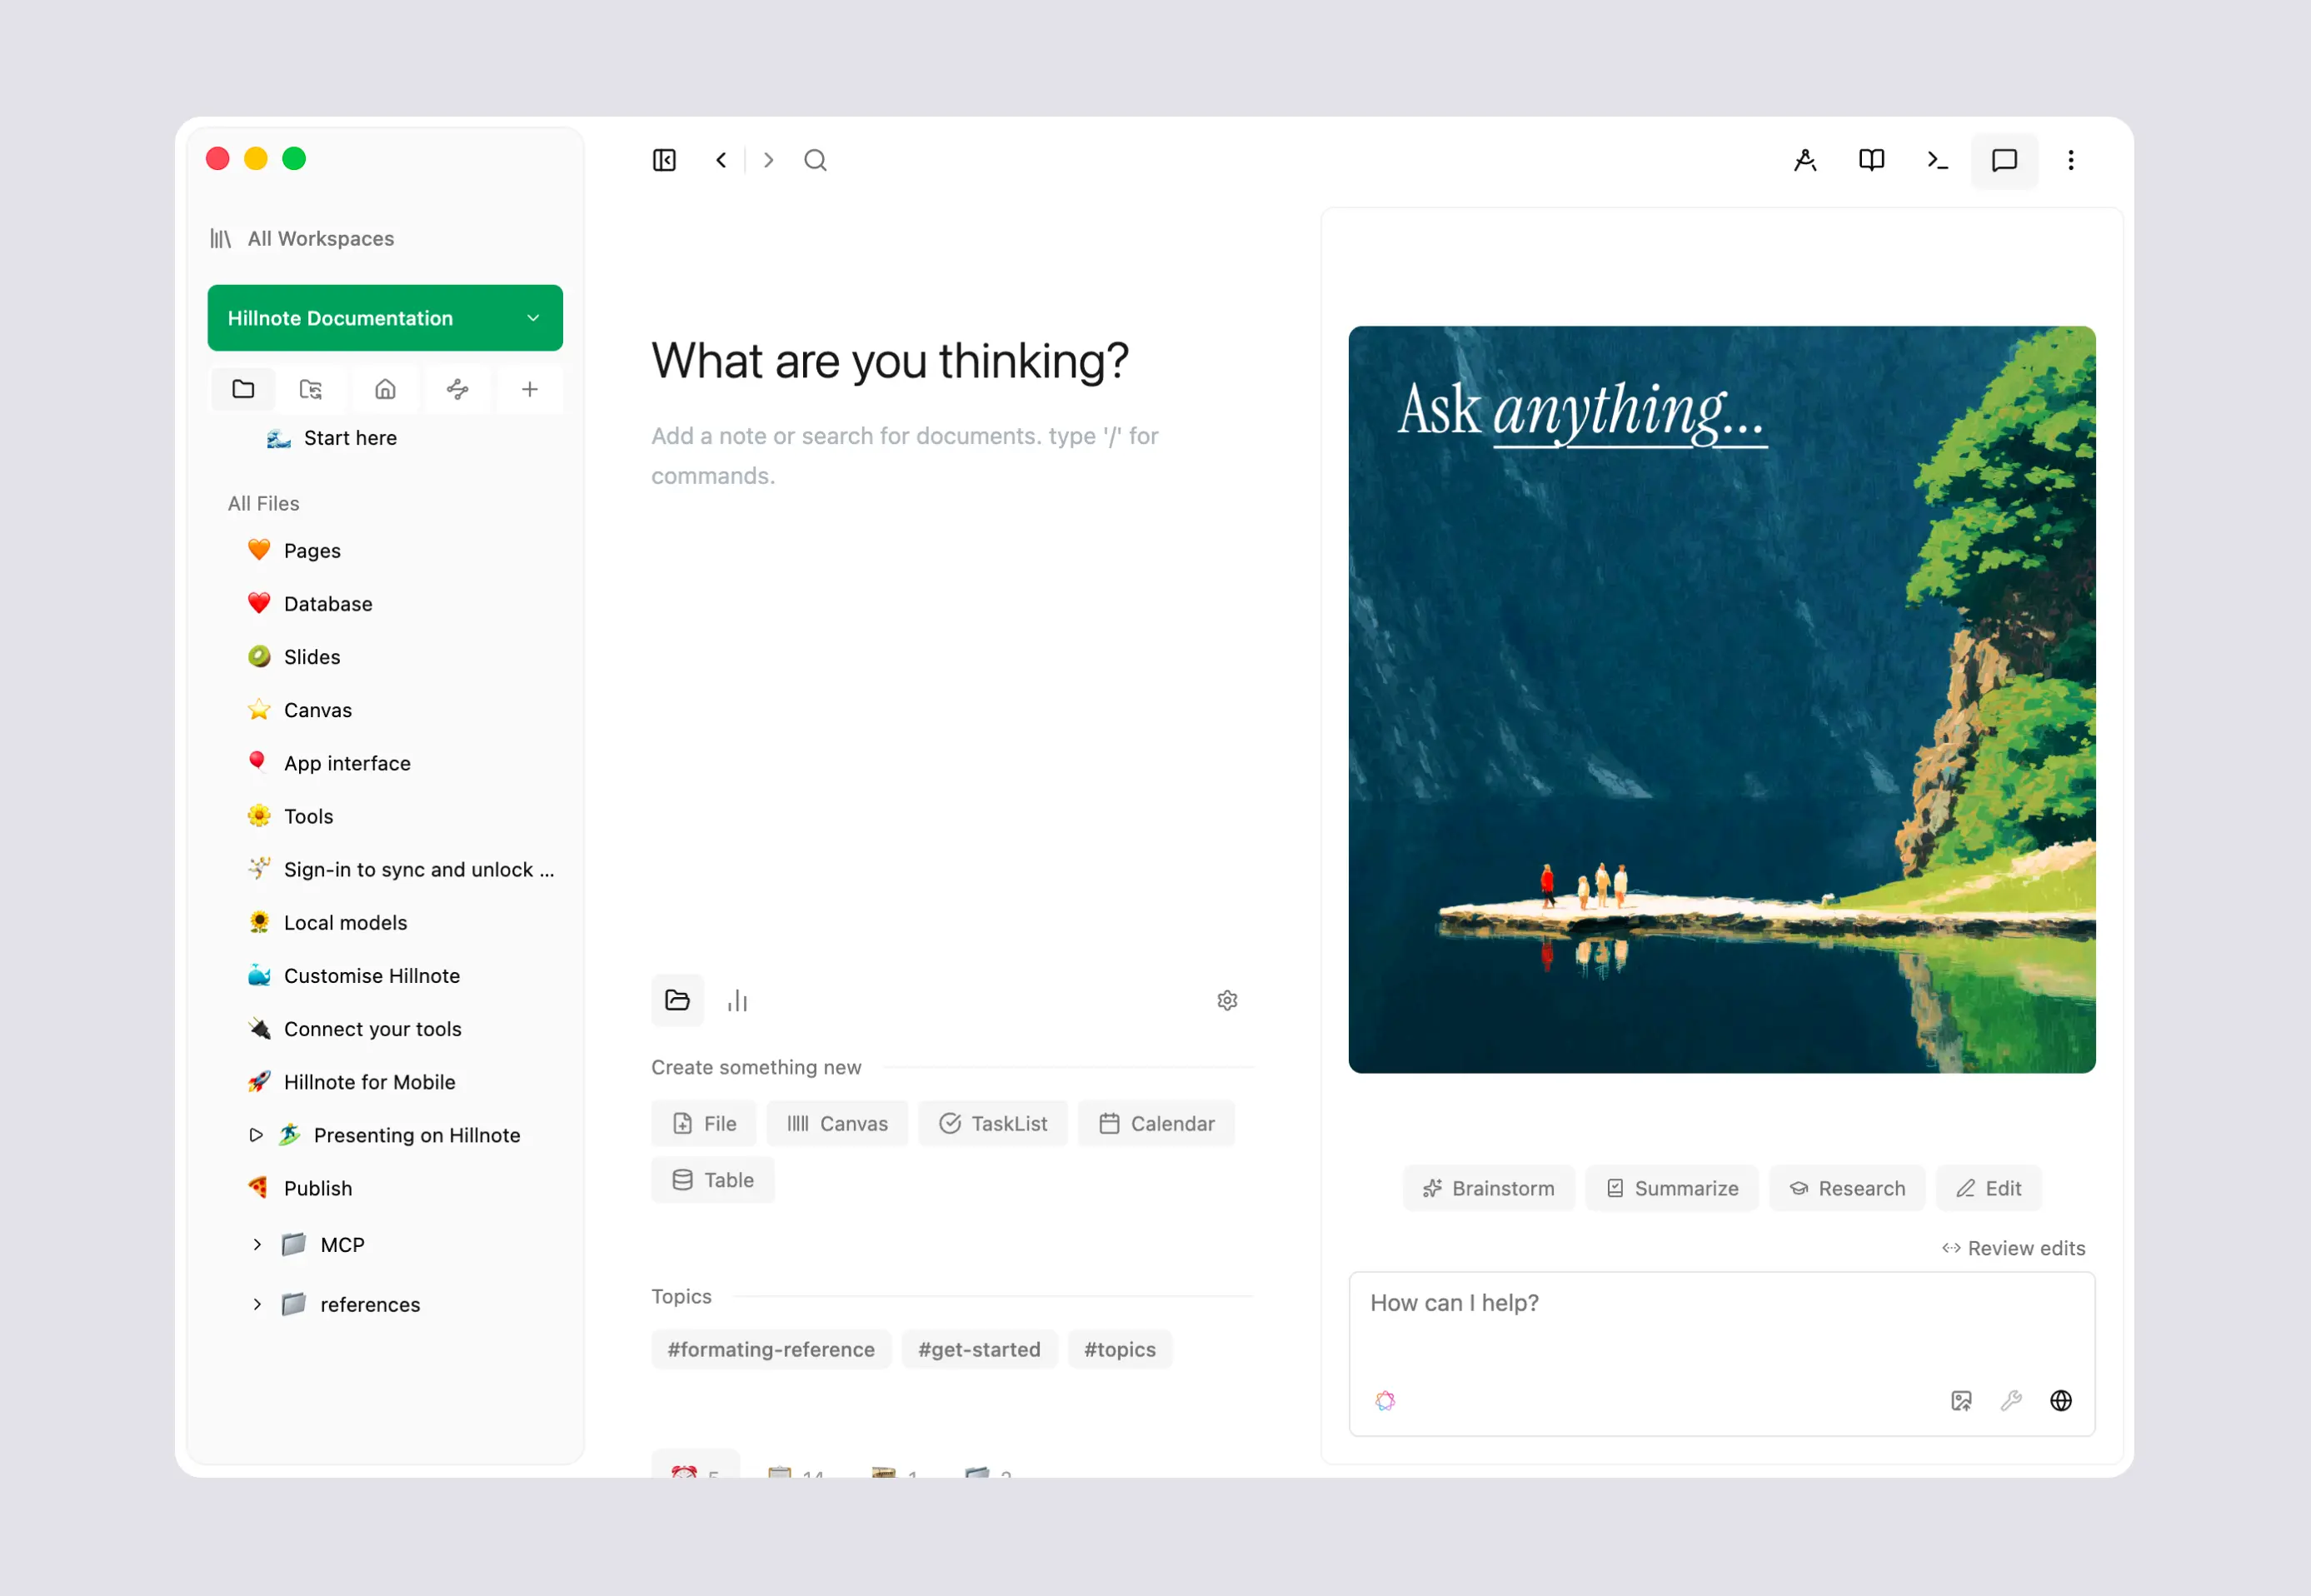
Chat
Chat is the main surface to converse directly with your team of AI agents. You can ask models to edit files, give you answers, create plans and more!
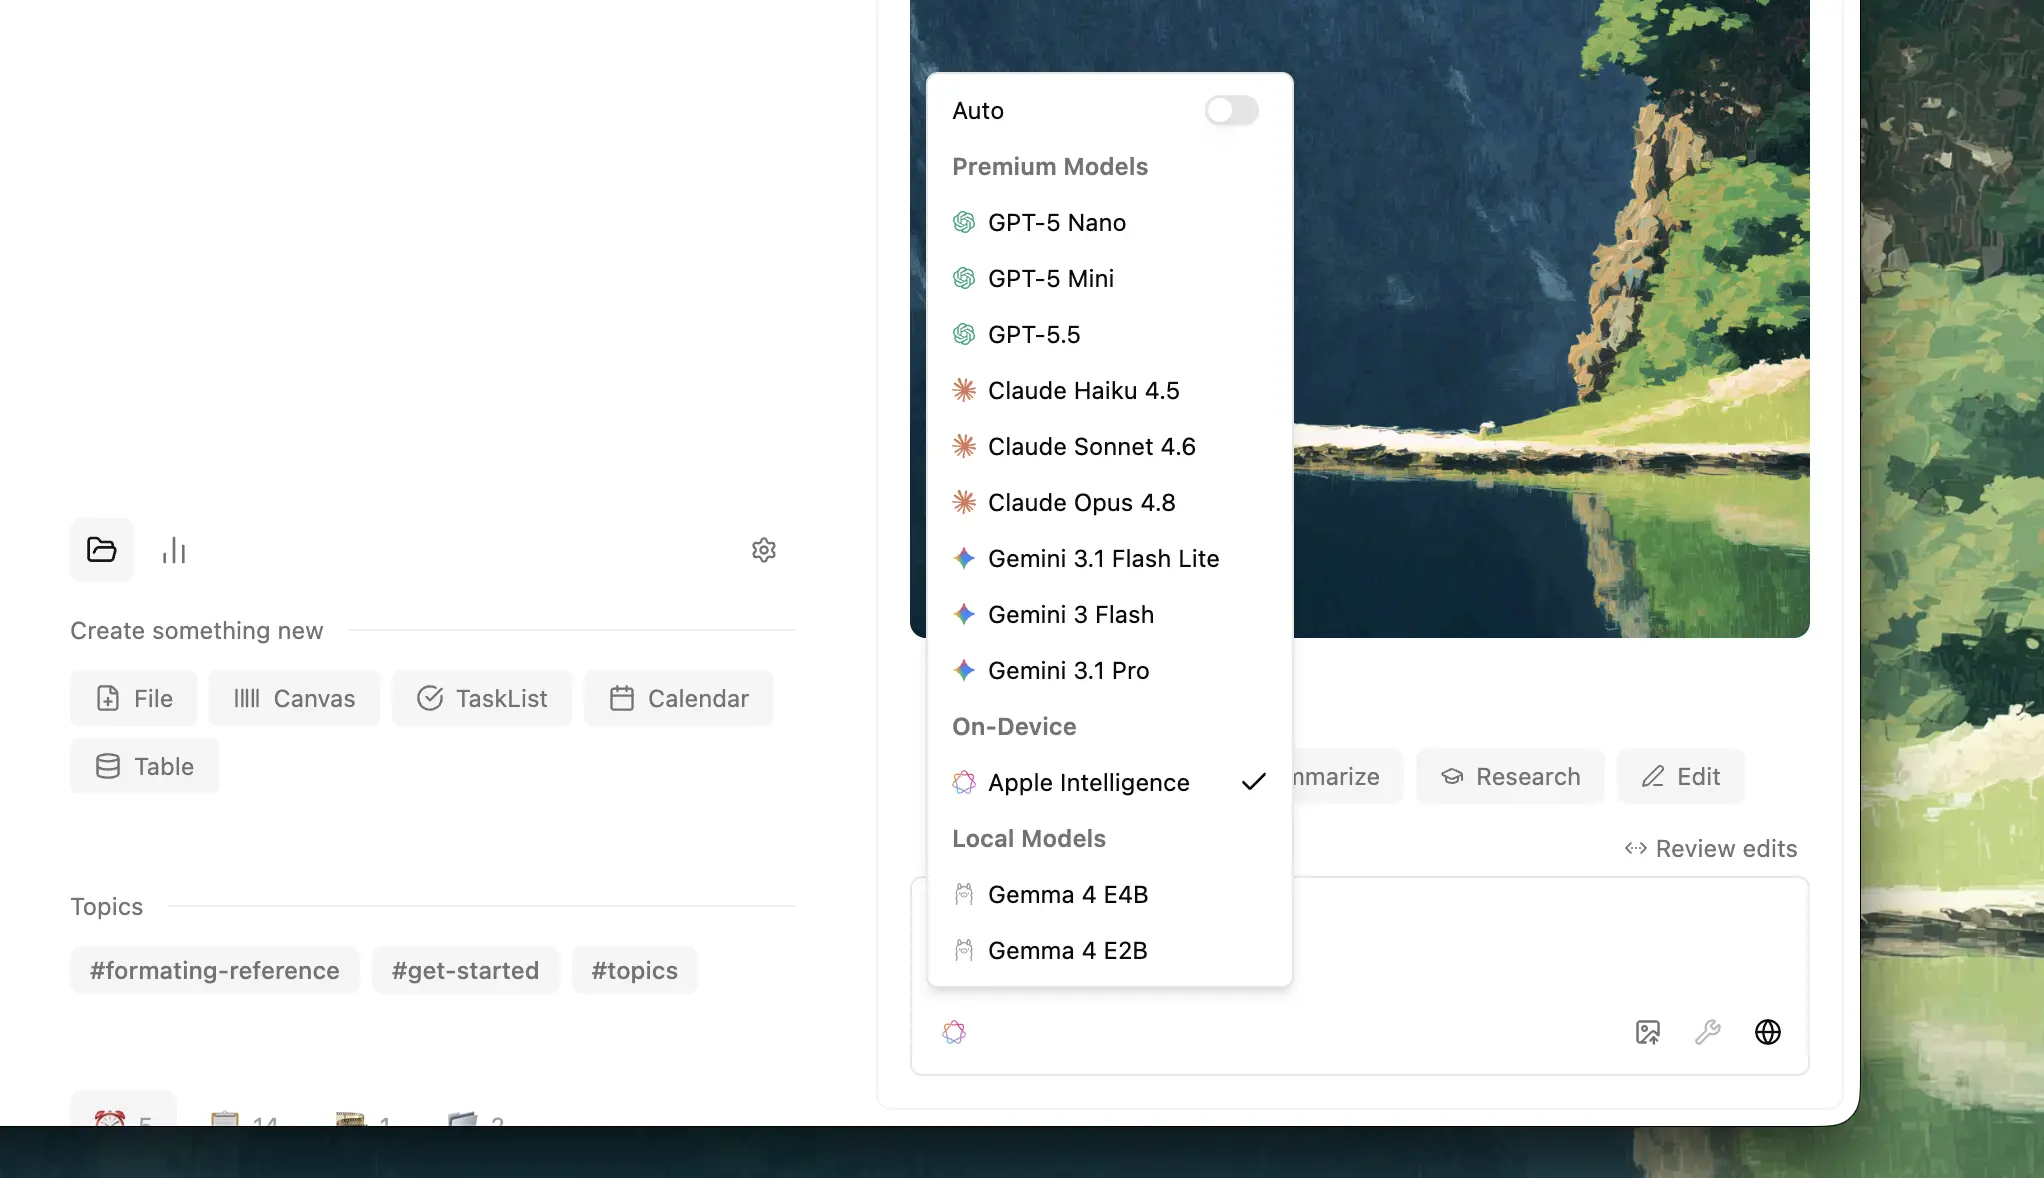
 **To switch models** click on the model icon and choose from the list of available models.
  **The text input** allows for images to be attached, toggling on and off tools (for local models) and web search. You can also switch between review edits and auto accept edits for models to skip asking for permission as they edit files.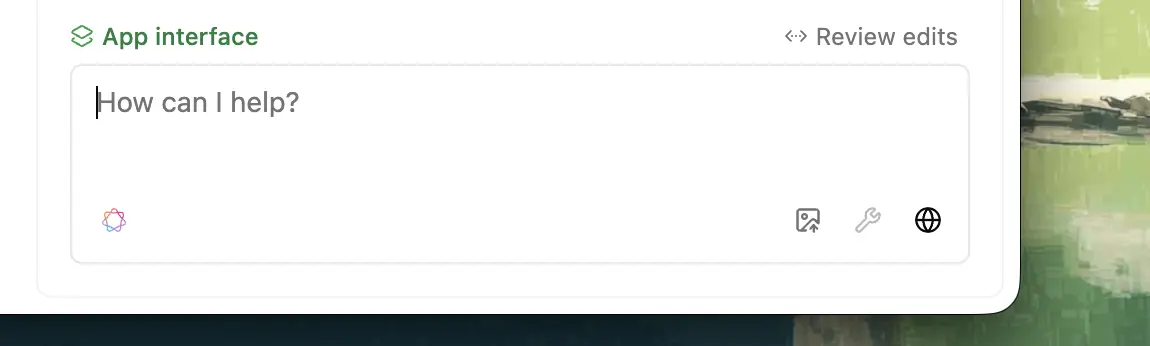
‘/' commands work in the input to clear the conversation, switch models, compact the conversation. Any recipes in the workspace are also available here.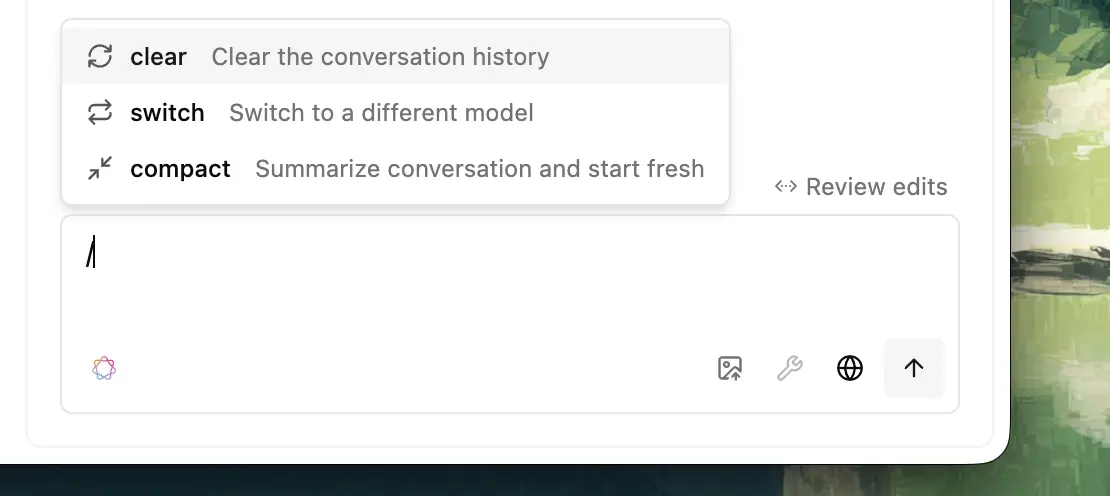
Use the ‘@’ symbol to reference pages across the workspace as context.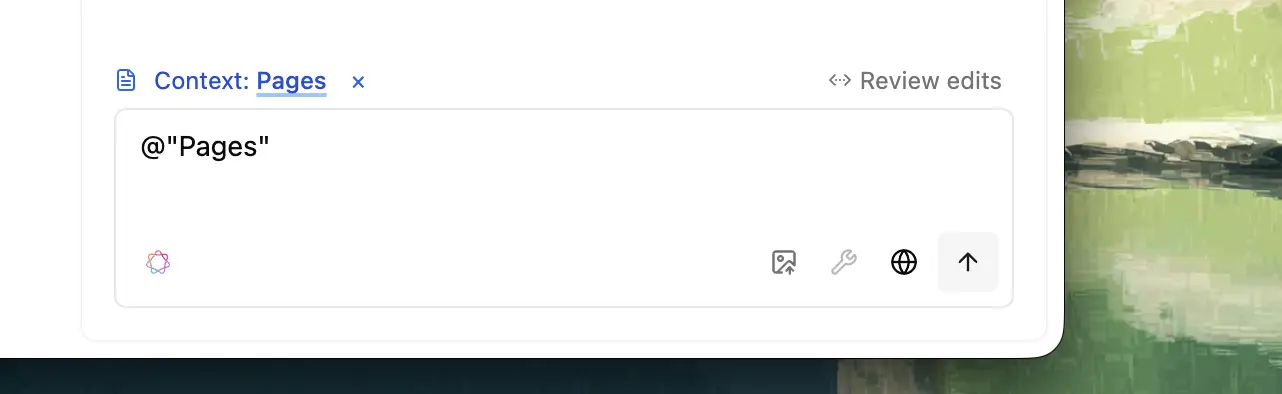
Search and topics
You can search a document for a specific phrase or topic by pressing cmd/ctrl + F or by clicking the panel icon.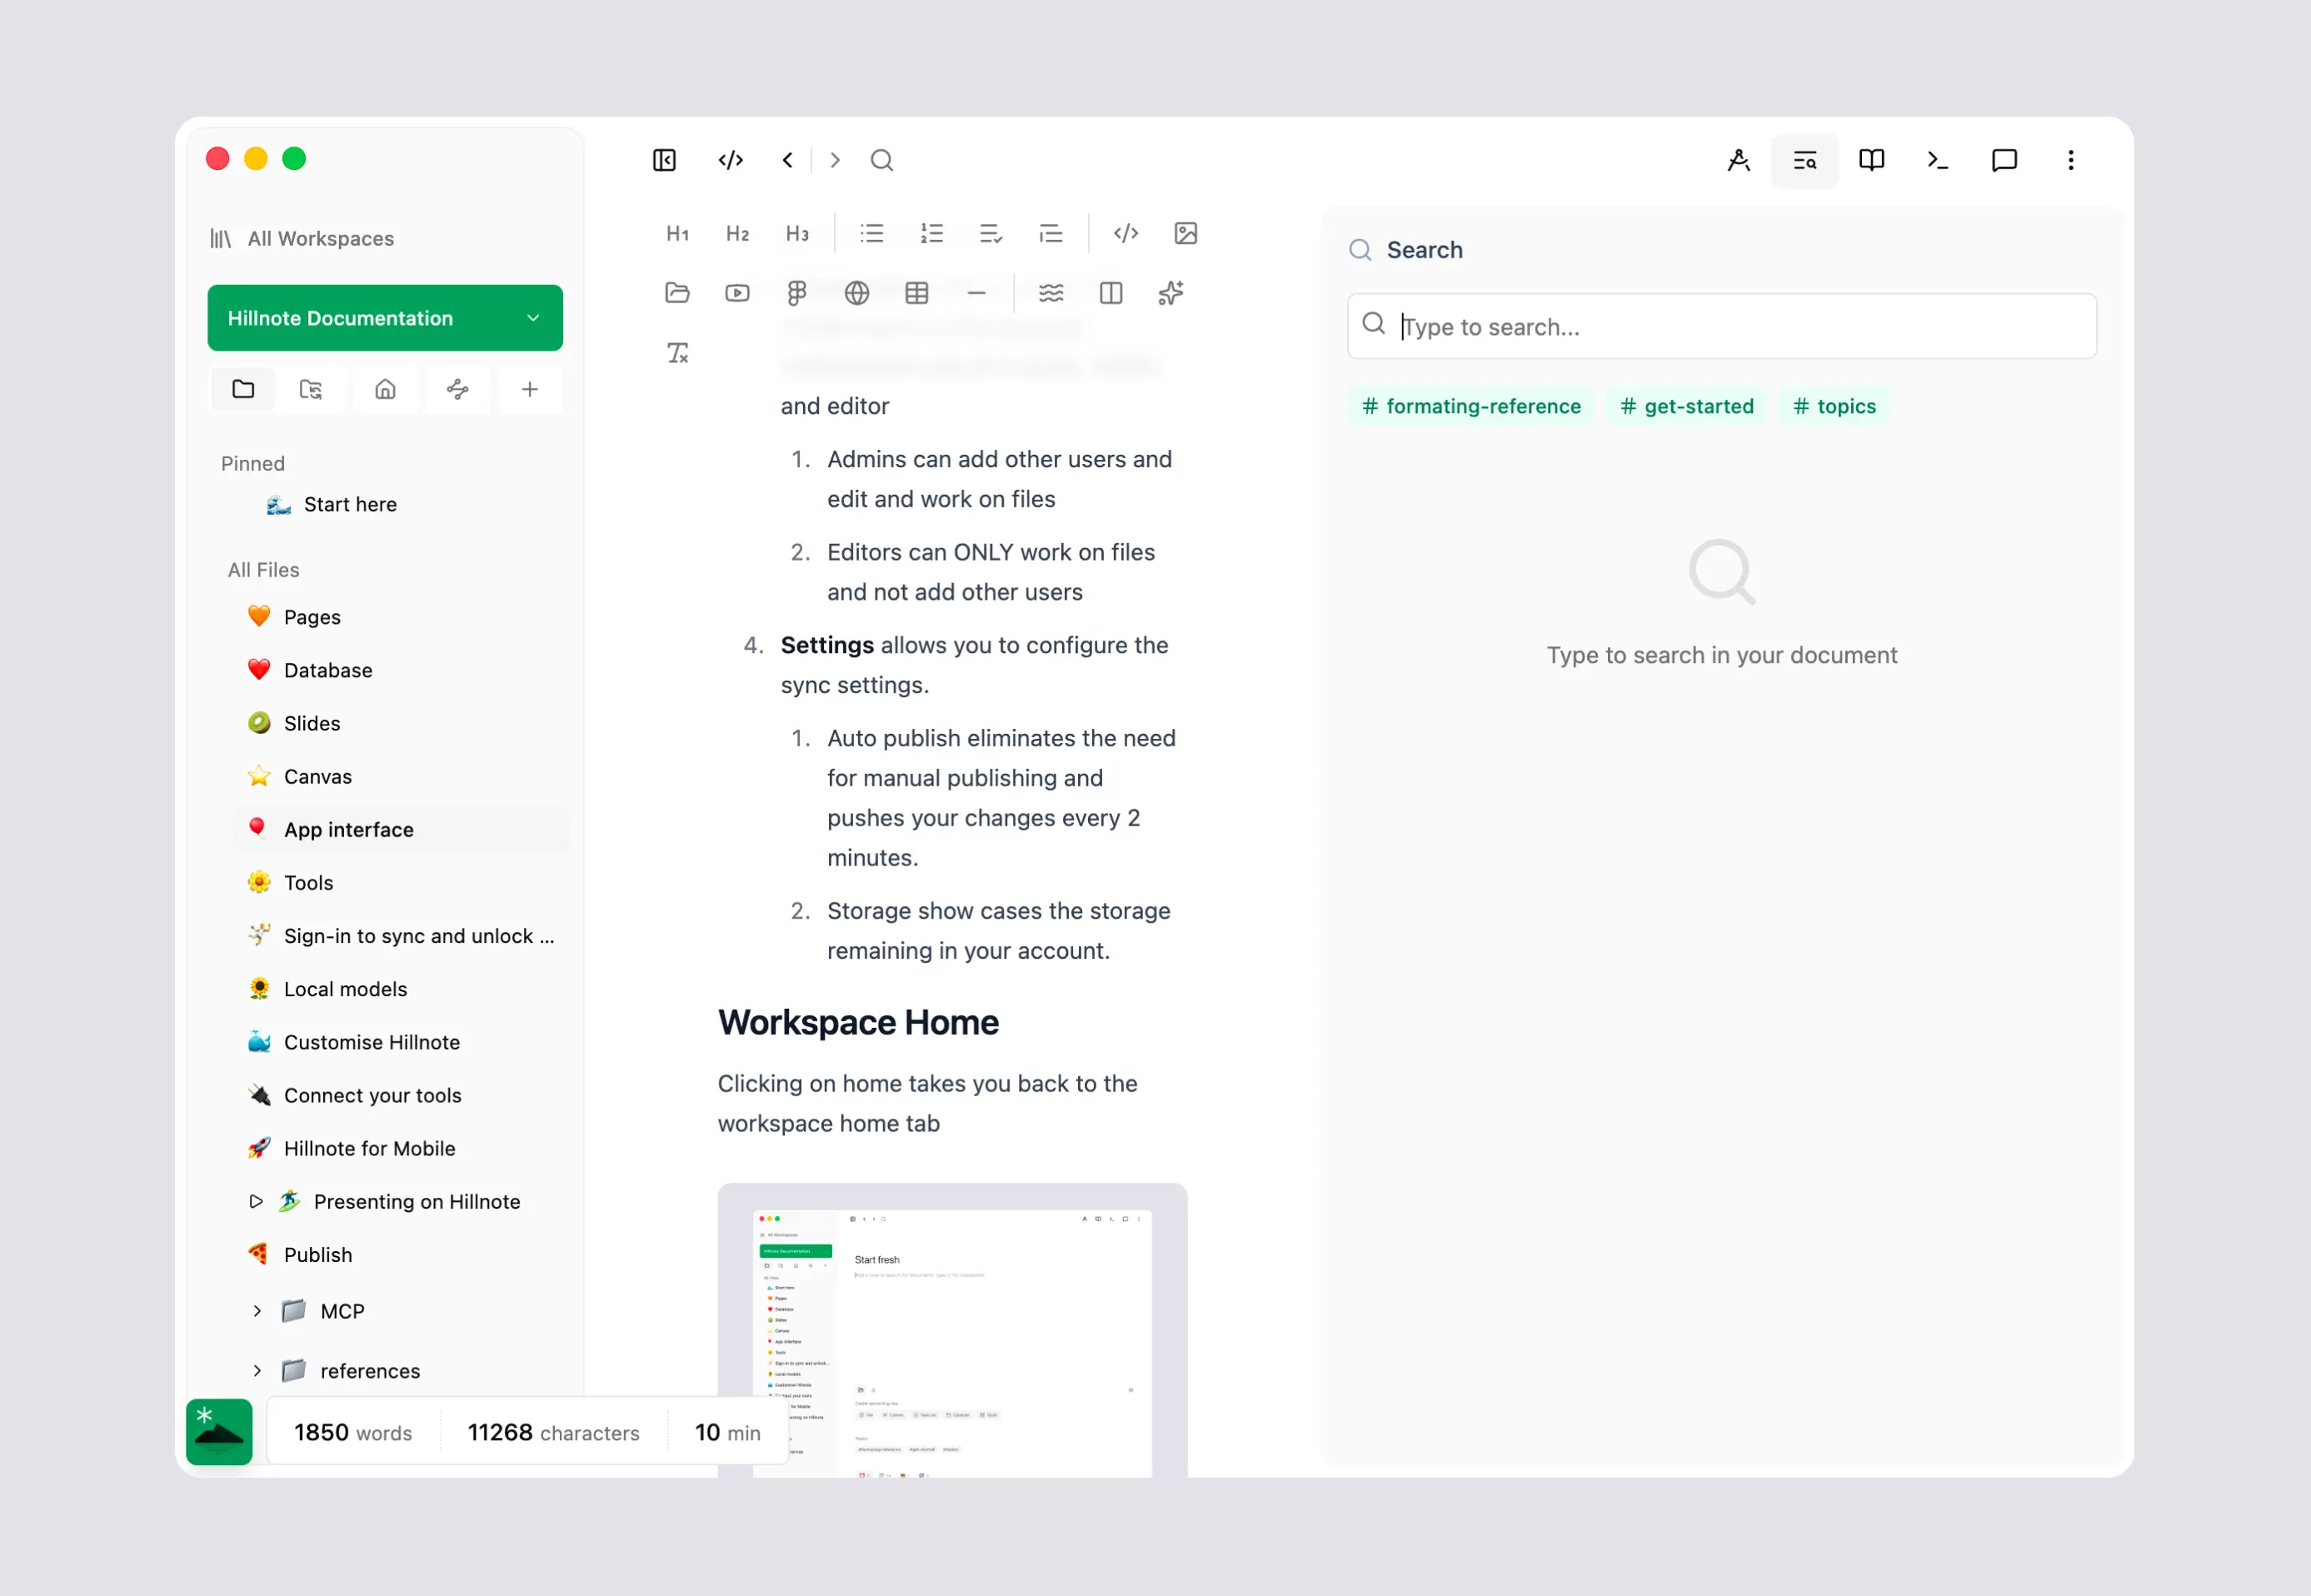 You can also click a topic to open the topics section. The topic section covers both documents that reference the topic and references within the document to traverse across.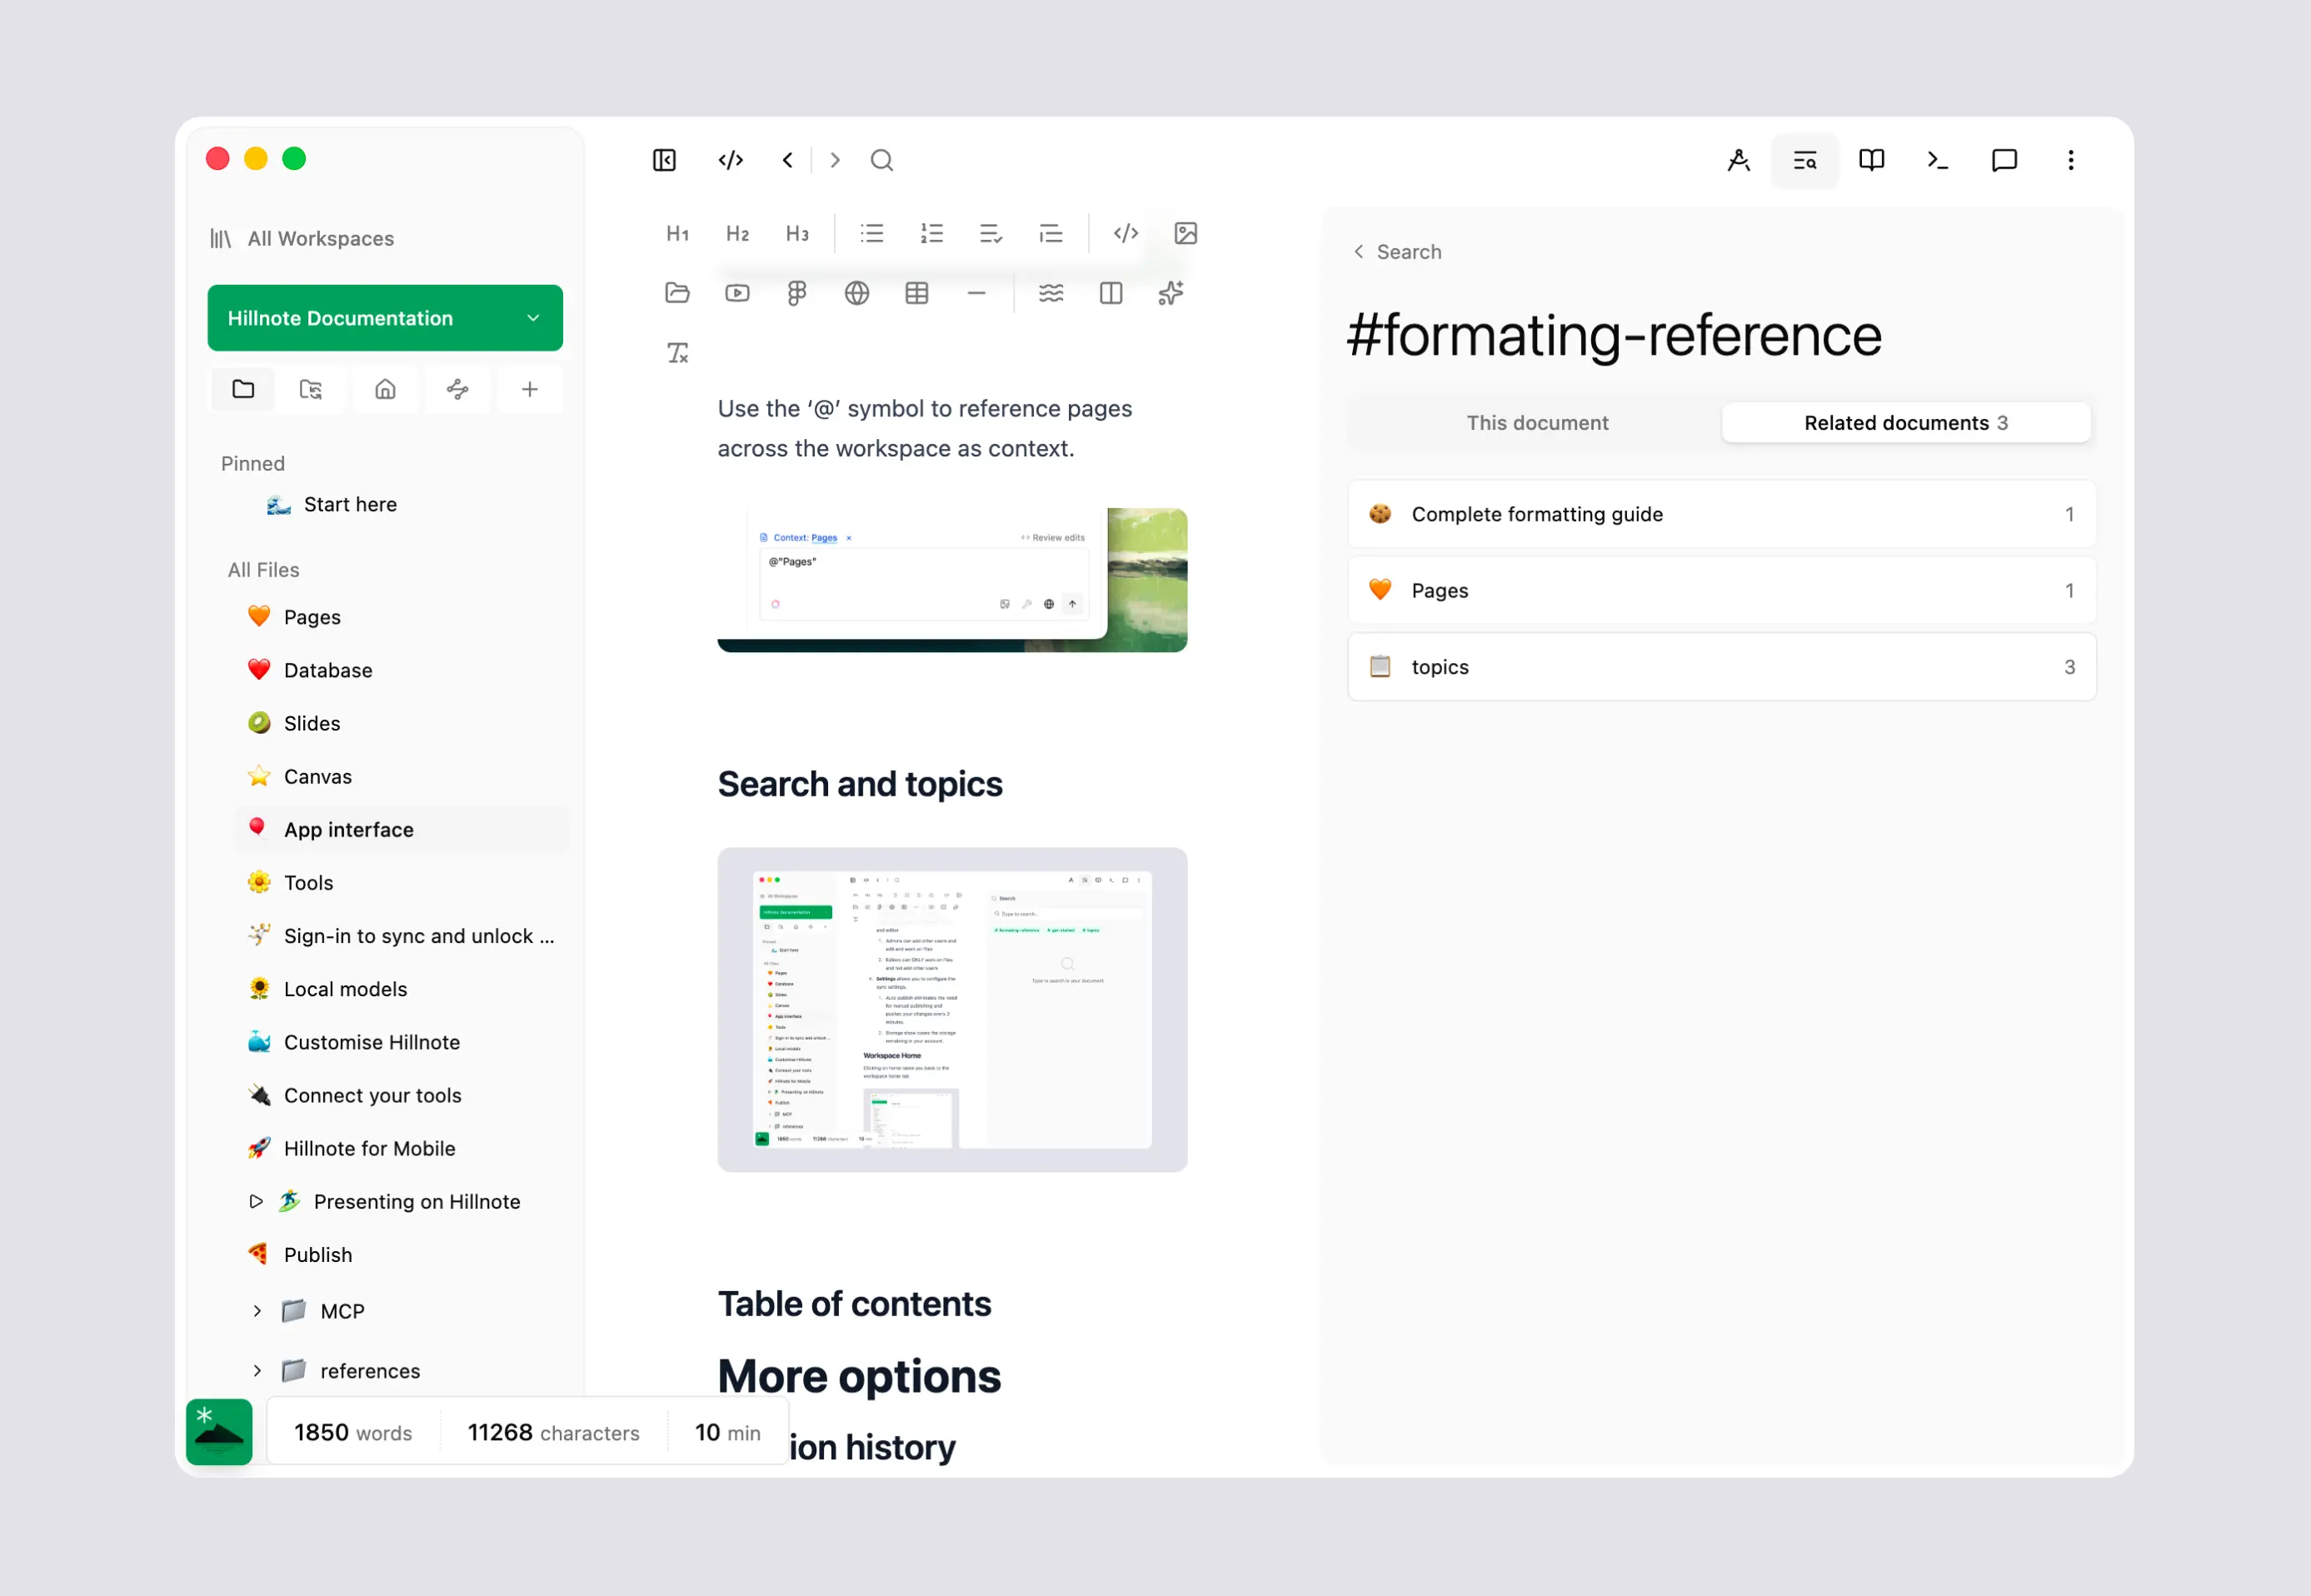
Table of contents
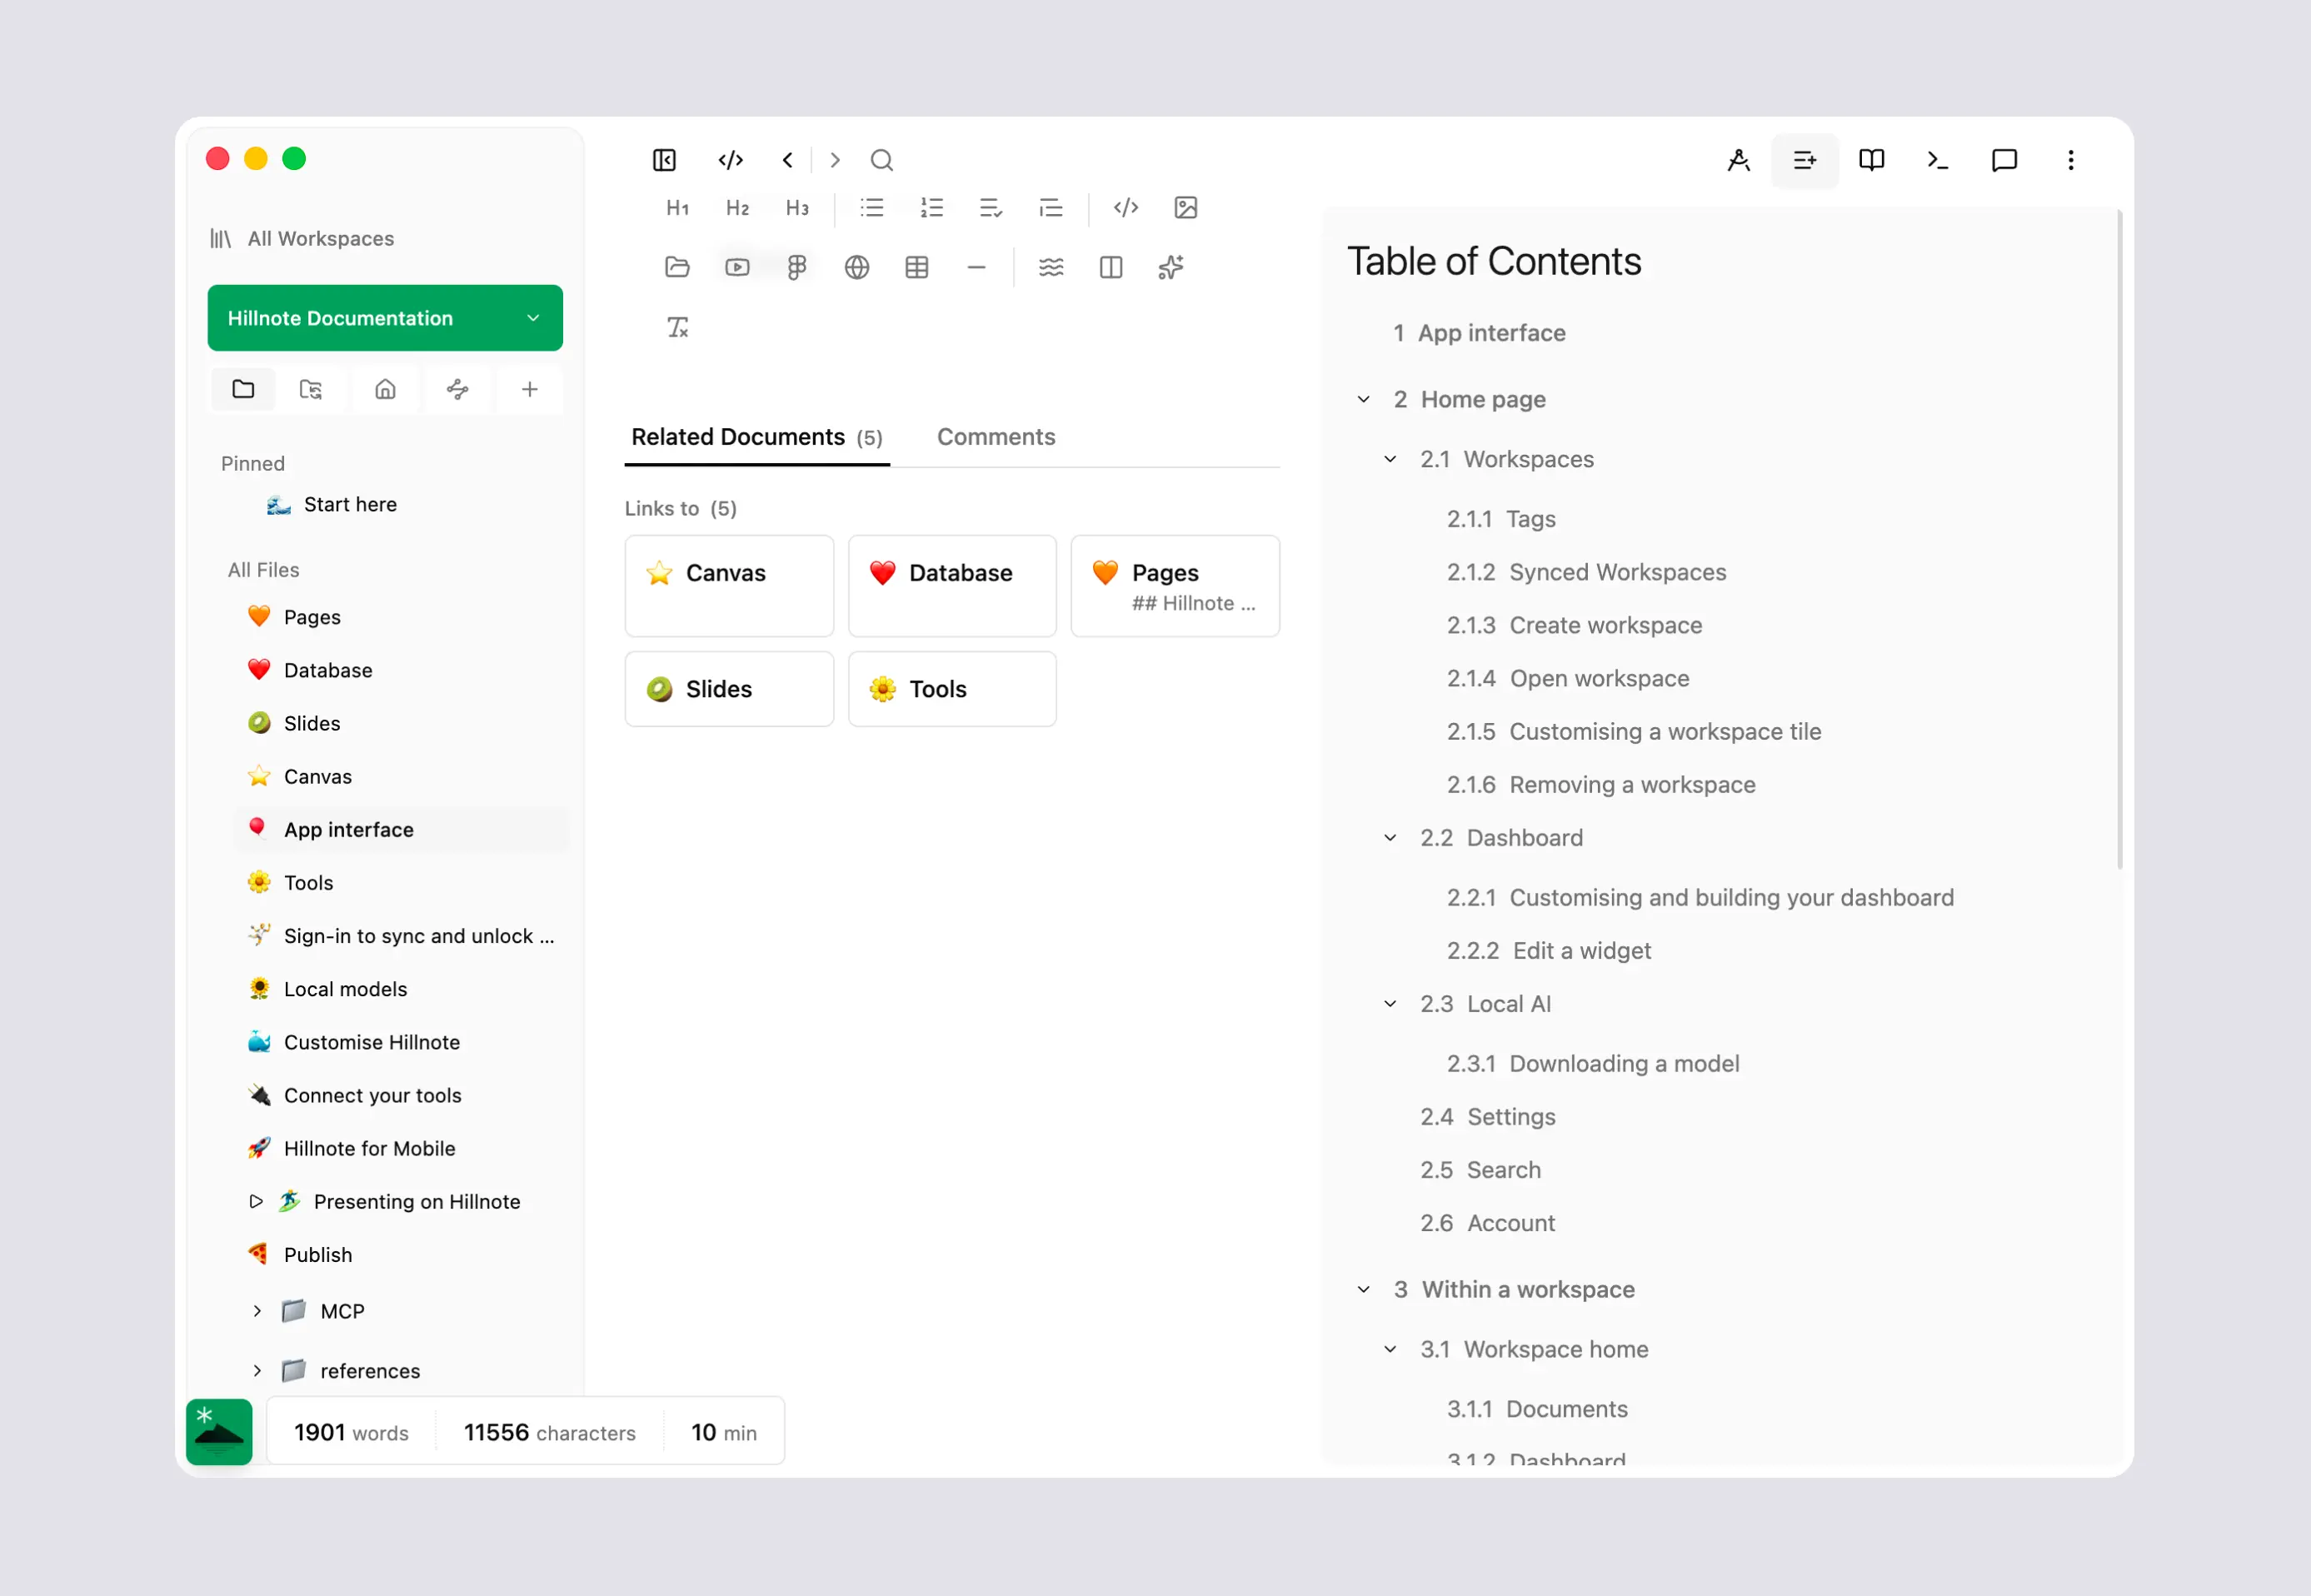
Pressing Shift + Cmd/Ctrl + T opens the table of contents panel which categorises your headings into easy to traverse table of contents. Clicking on a heading in the panel will take you to the section in the page.
More options
The final set of options in the UI are in the 3 dot menu in the top right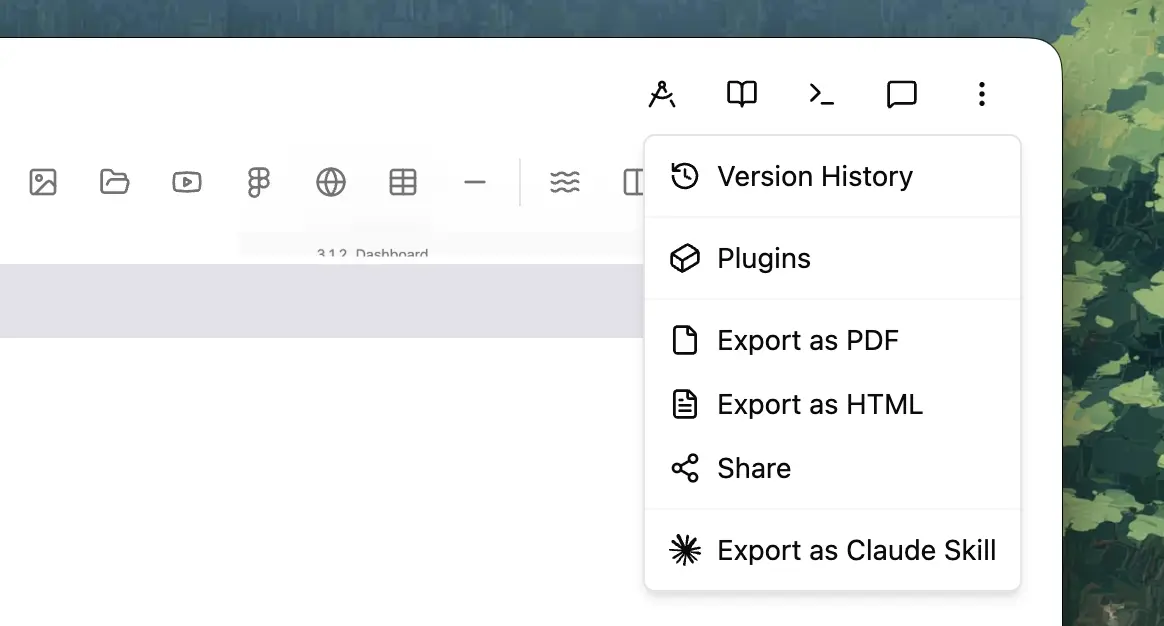 Version history: all files have versions saved locally and periodically. These versions never sync but can be restored at any point using the dialog. Click on a version, preview the same and then proceed to restore it.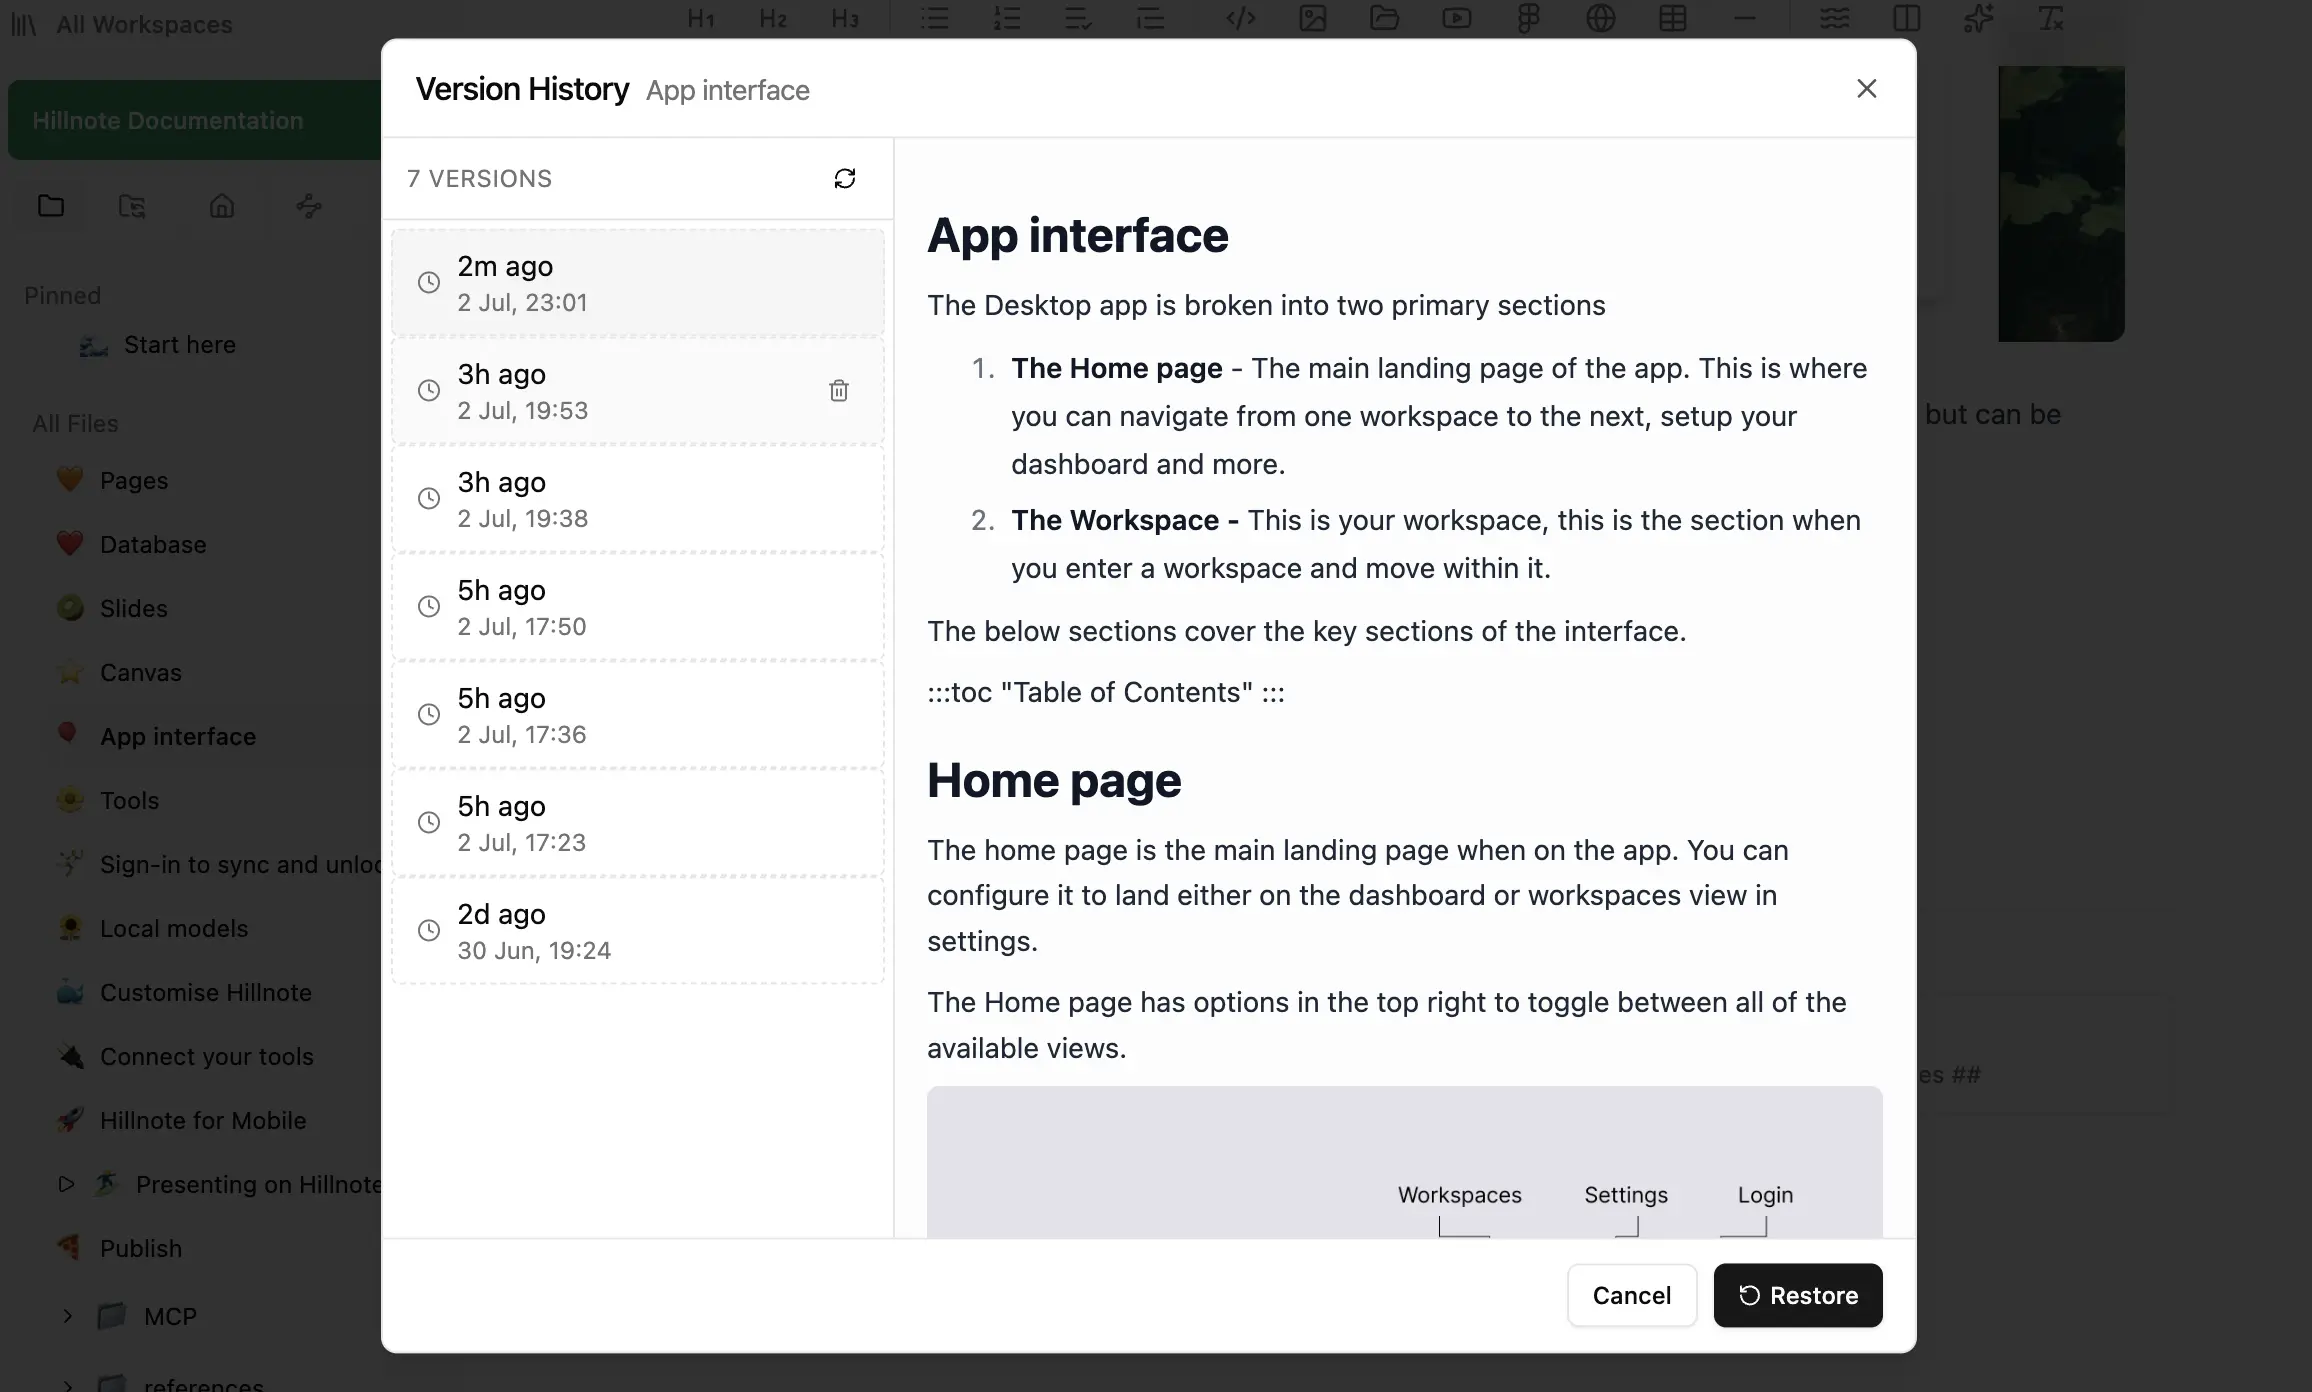
Plugins (Beta): Hillnote has a plugin framework that is currently under development. Please checkout our Github for more info
Export options: Hillnote files can be exported to HTML, PDF and as a claude skill. Induvidual .md files can be shared as well.
 And that is it! That’s everything to do with the interface.